Welcome to my sewing blog! Thanks for joining me. I’m Jo, a sewing enthusiast living in Cornwall, UK. My husband Adam and I set up Country Cow Designs in 2019 and together we create sewing patterns, video tutorials and sell hardware for bag makers across the globe. Every Friday we write a new blog post for bag making tips. Join our mailing list to receive it directly to your inbox along with other exclusive perks. This post relates to the Ojyma sewing pattern which you can purchase here. This post only covers the alternative front panel hack. You’ll need the pattern to complete the entire bag. The post may contain affiliate links.
OJYMA CROSSBODY PATTERN HACK
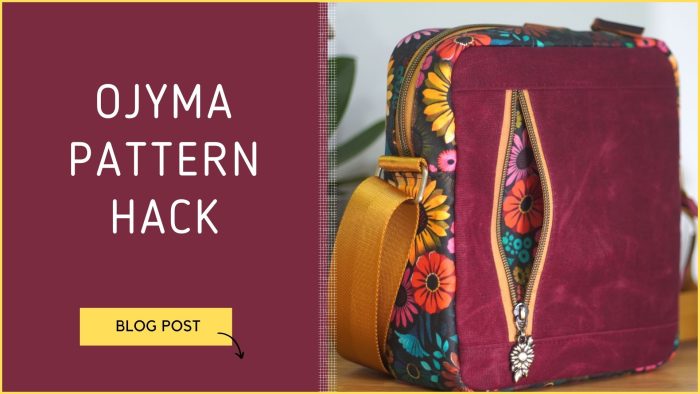
Shortly after releasing the Ojyma sewing pattern, Adam created one with an alternative exterior panel. We’ve had lots of requests for the Ojyma pattern hack so here it is. You can use this panel as an alternative to either the front or back panel on the bag. You’ll need the following supplies to get started:
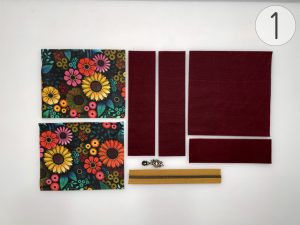
- No.5 size continuous zip tape and one zip pull – 8″ [20.25cm]
- 2 x Lining pocket pieces – 7 1/4″ tall x 6″ wide [18.5cm x 15.25cm]
- 2 x Exterior top and bottom pieces – 2 3/8″ tall x 9 1/4″ wide [6cm x 23.5cm]
- 1 x Exterior left piece – 7 1/4″ tall x 2 1/8″ wide [18.5cm x 5.5cm]
- 1 x Exterior right piece – 7 1/4″ tall x 7 1/2″ wide [18.5cm x 19cm]
Use 3/8″ [1cm] seam allowance (SA) unless stated otherwise.
For basting and topstitching, use 1/8″ SA [0.3cm].
Here’s how to make it:
1. Cut your fabrics according to the measurements above.
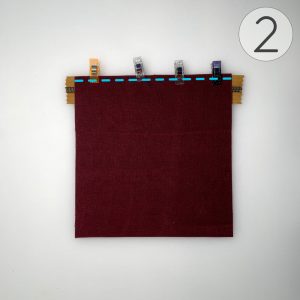
2. Place the exterior right piece RST with the zip. Make sure the zip is centred. Baste together.
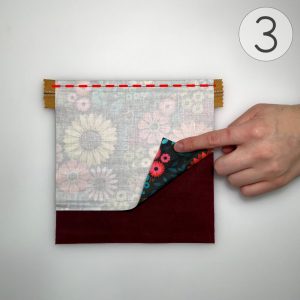
3. Flip this over so the zip is RSD. Place a lining pocket piece RSD so it’s RST with the exterior right piece. Sew with 1/4″ SA [0.7cm].
4. Press both pieces away from the zip tape. Topstitch.
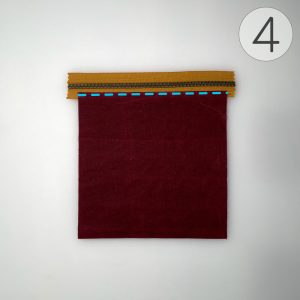
5. With the zip still RSU, place the exterior left piece RST with the zip. Baste together.
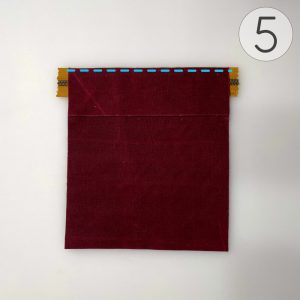
6. Flip this over so the zip is RSD. Place the remaining pocket piece RSD so it’s RST with the first pocket piece. Sew with 1/4″ SA [0.7cm].
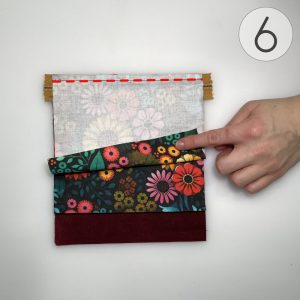
7. Press the exterior left piece away from the zip. Topstitch.
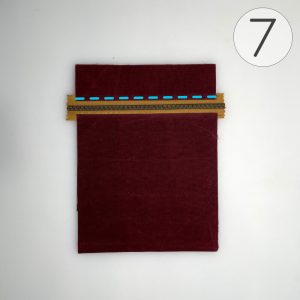
8. Fit the zip pull to the zip tape.
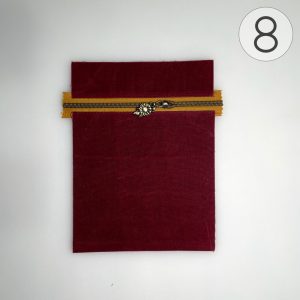
9. Place the panel RSD. One of the pocket pieces is longer than the other, this is fine. Make sure the pocket pieces are lying flat. Clip them together, then pull away from the main panel and sew the pocket pieces together. DO NOT sew through the exterior piece.
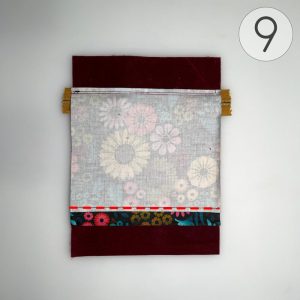
10. Place the panel RSU. Place the exterior top and bottom pieces RST with the edges. Line them up to the edge of the smaller exterior piece. They will be smaller than the main panel, unless you’ve used a larger SA on the zip. We’ve purposefully allowed for some change in the seam allowance around the zip for those who prefer to have less tape showing. Sew the two pieces.
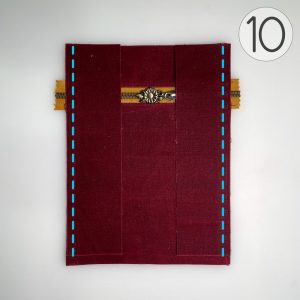
11. Press the top and bottom pieces away from the main panel. Topstitch.
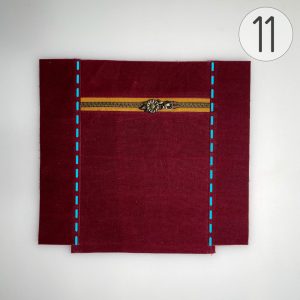
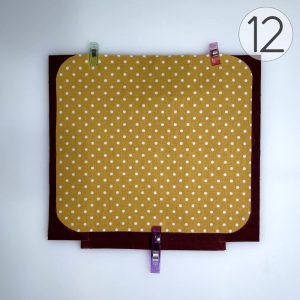
12. Place one of the lining panels on top of this exterior panel. Line it up with the smaller exterior piece and centred from the top and bottom, as shown in the photo. Clip together.
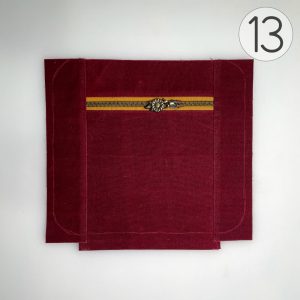
13. Mark the main panel around the lining panel shape.
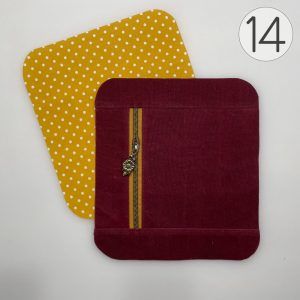
14. Cut the main panel out where marked. That’s the panel finished. Now you can make the rest of the bag, skipping either the front or back exterior panel, depending which you’re replacing it with.
Grab the full Ojyma sewing pattern here
That’s so awesome!!
Sneaky wee hack but i like it!!
Good to have a versatile pattern😁