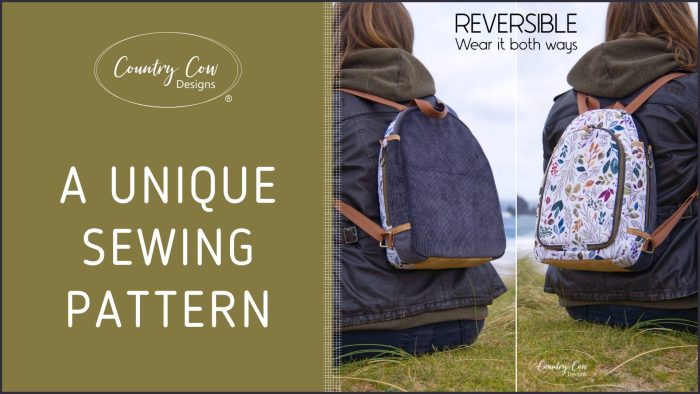
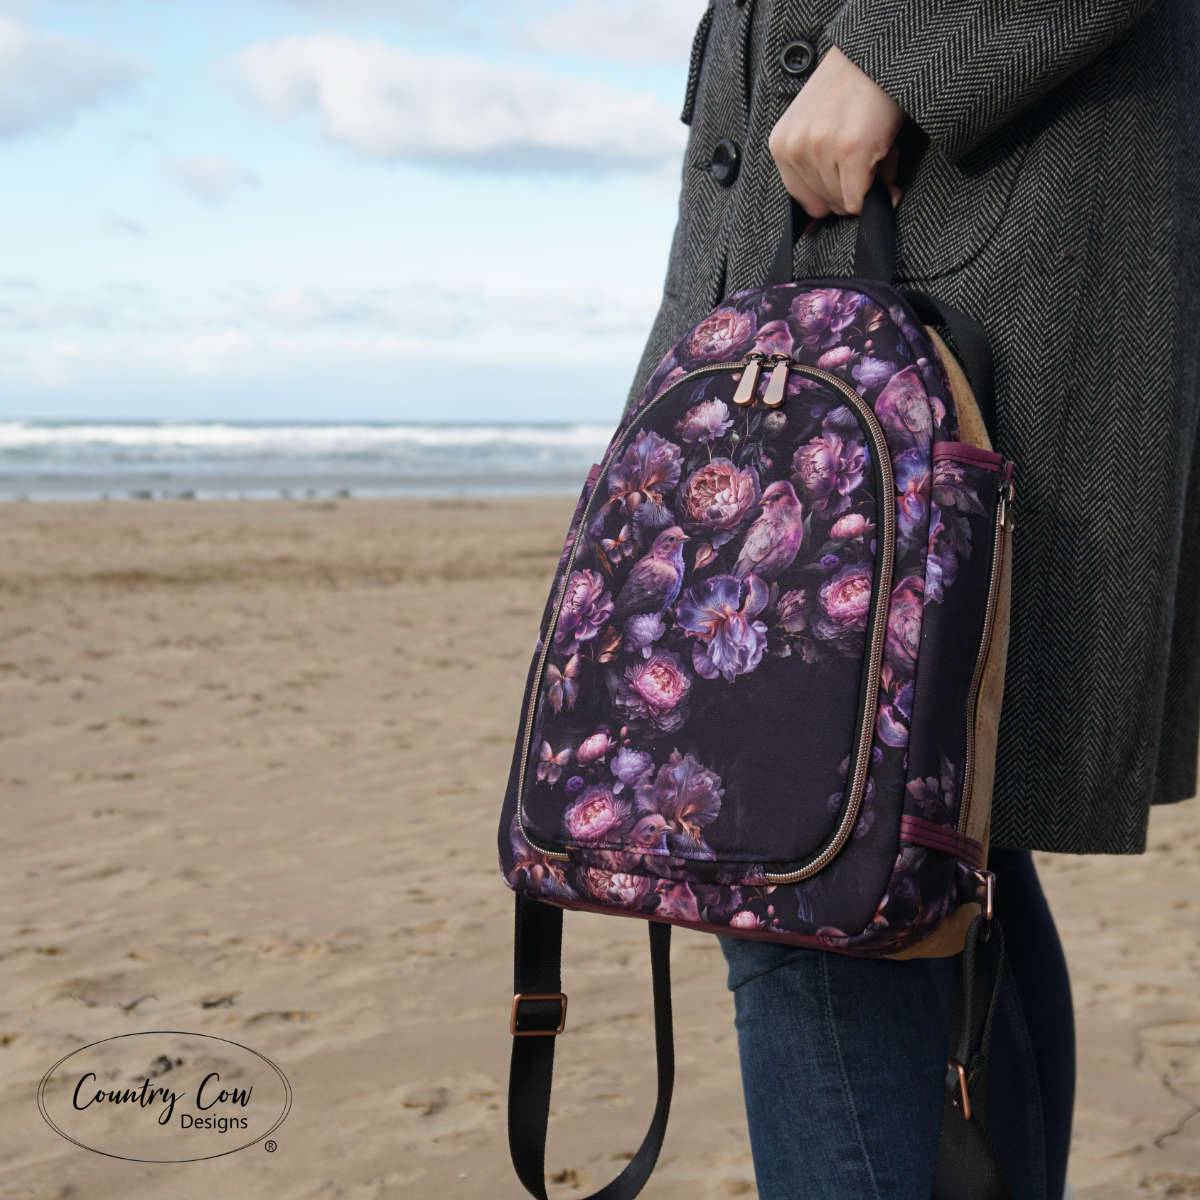
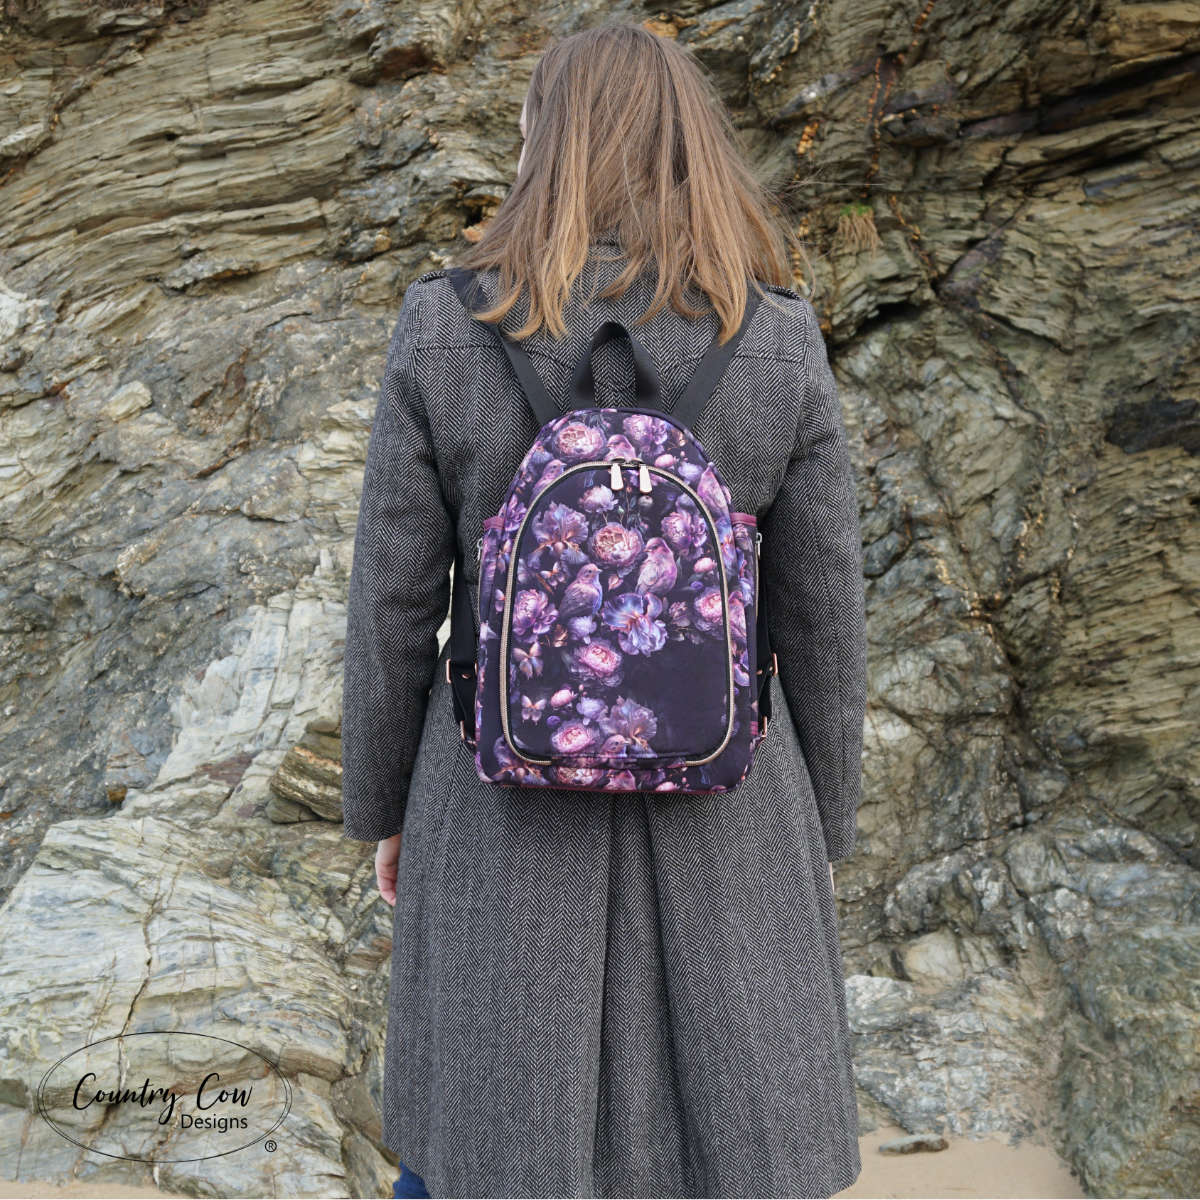
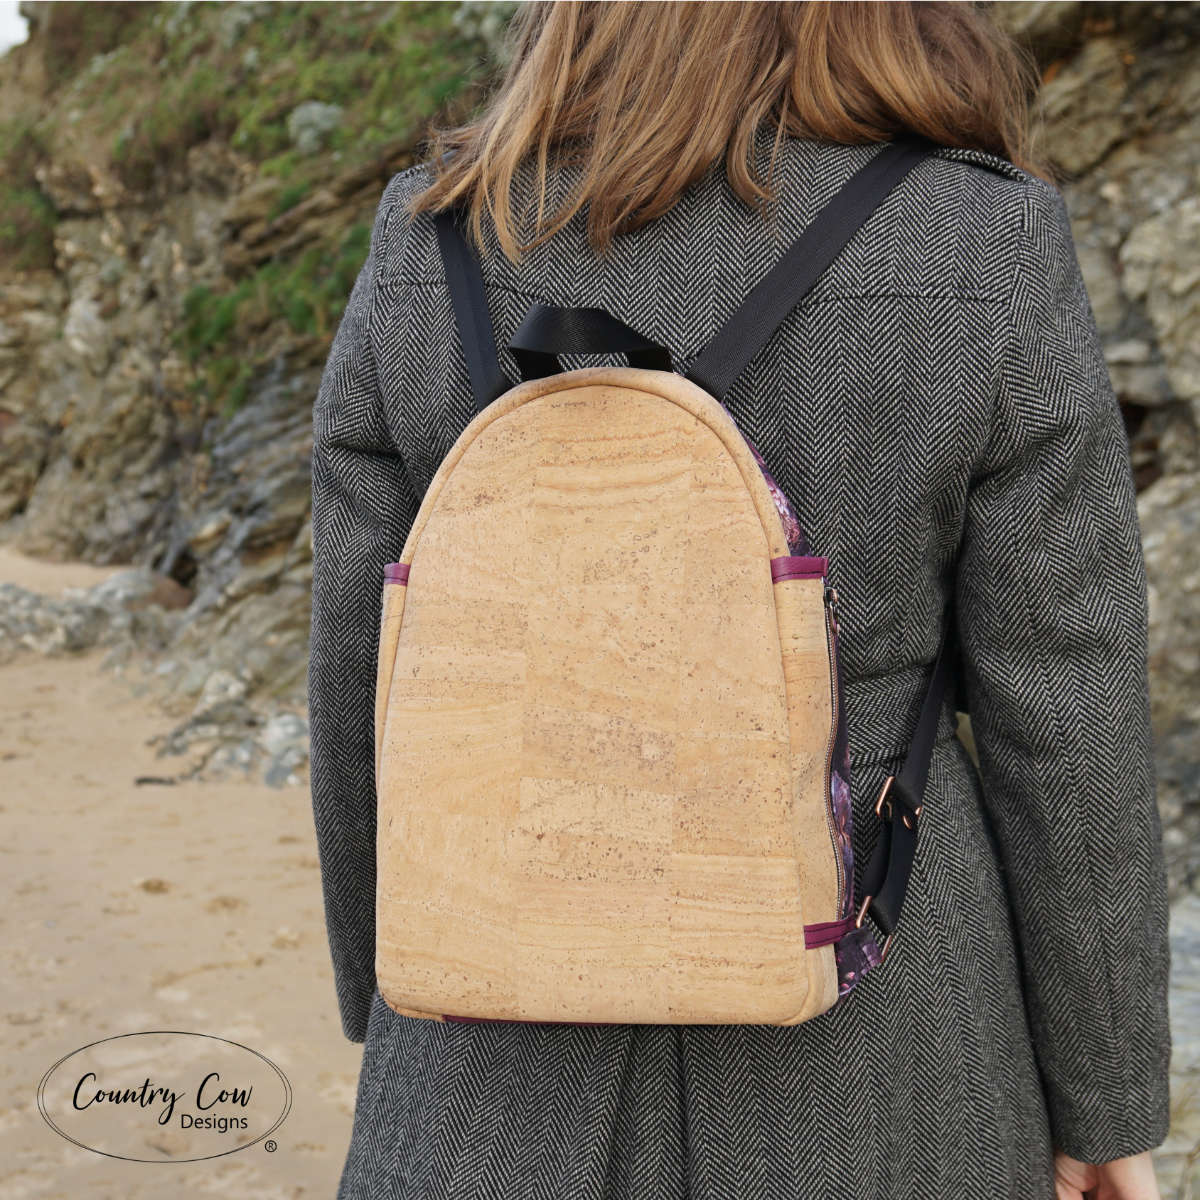
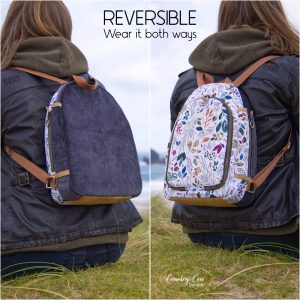
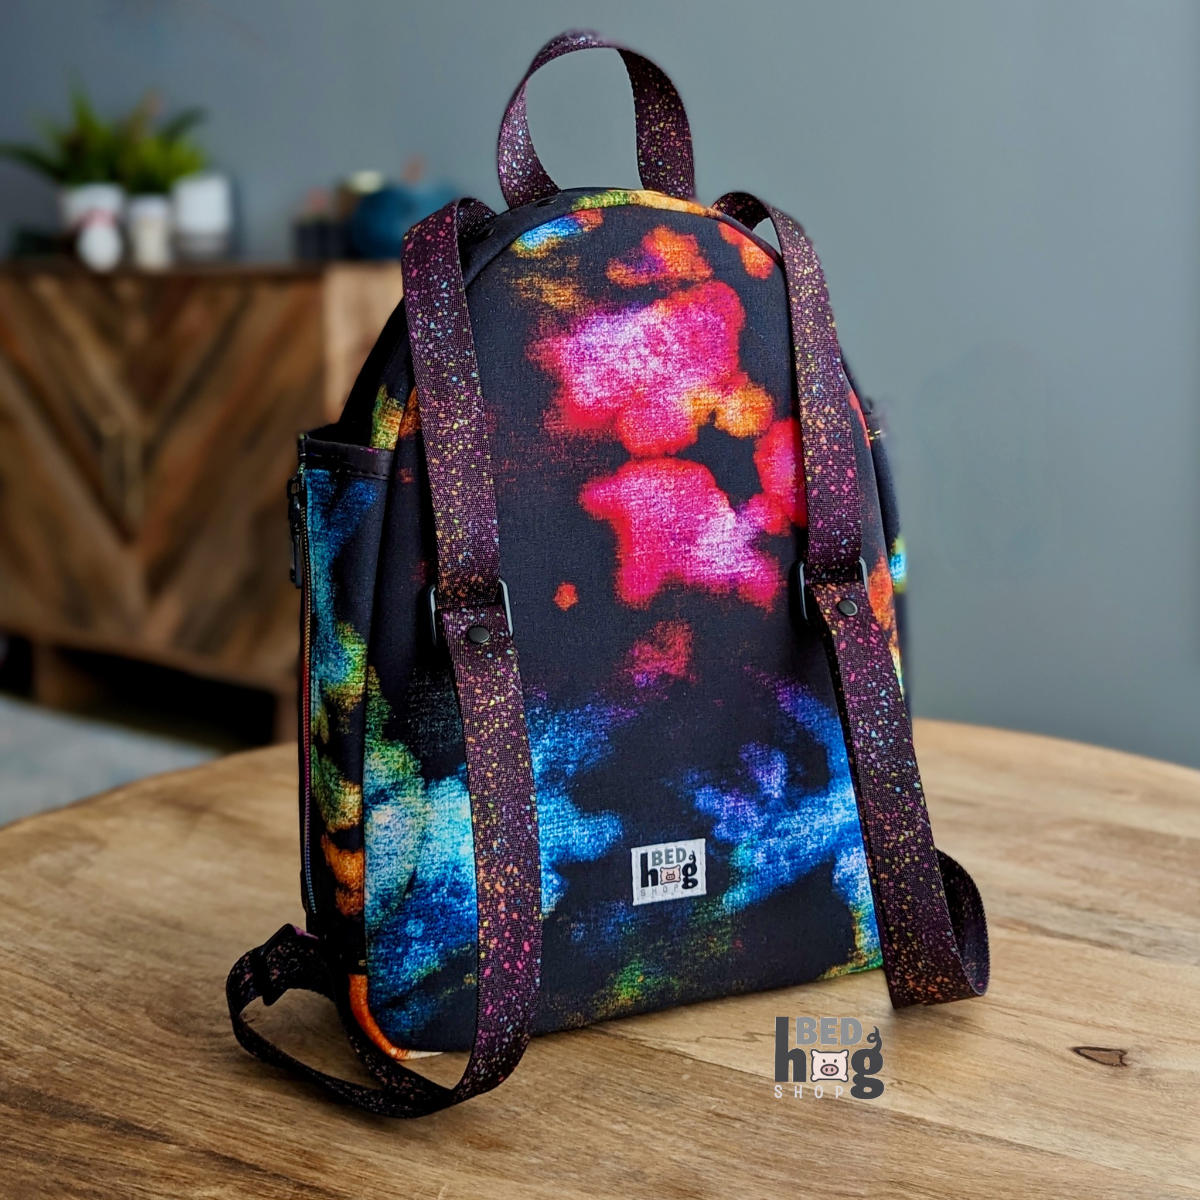
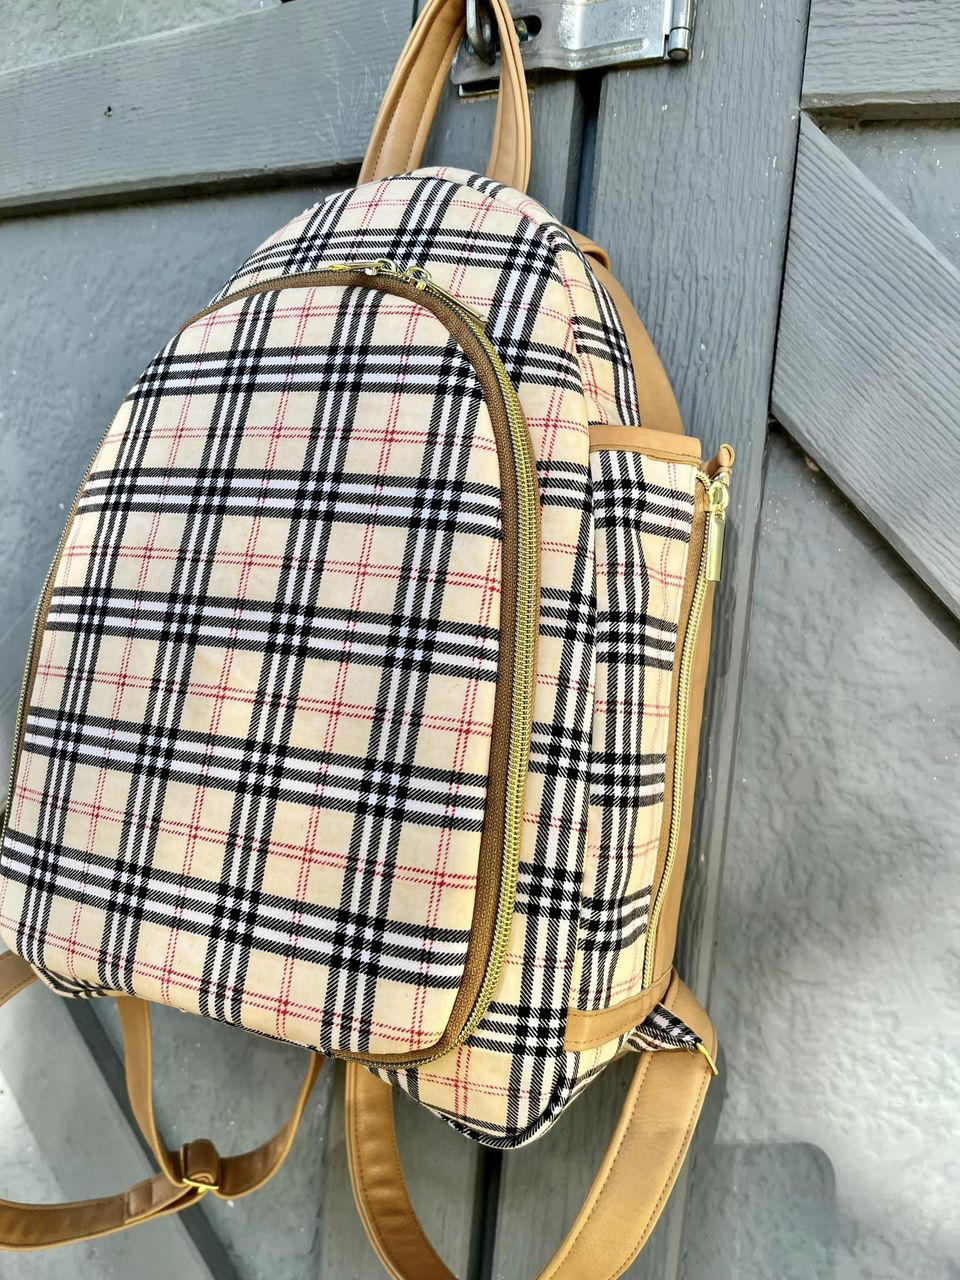
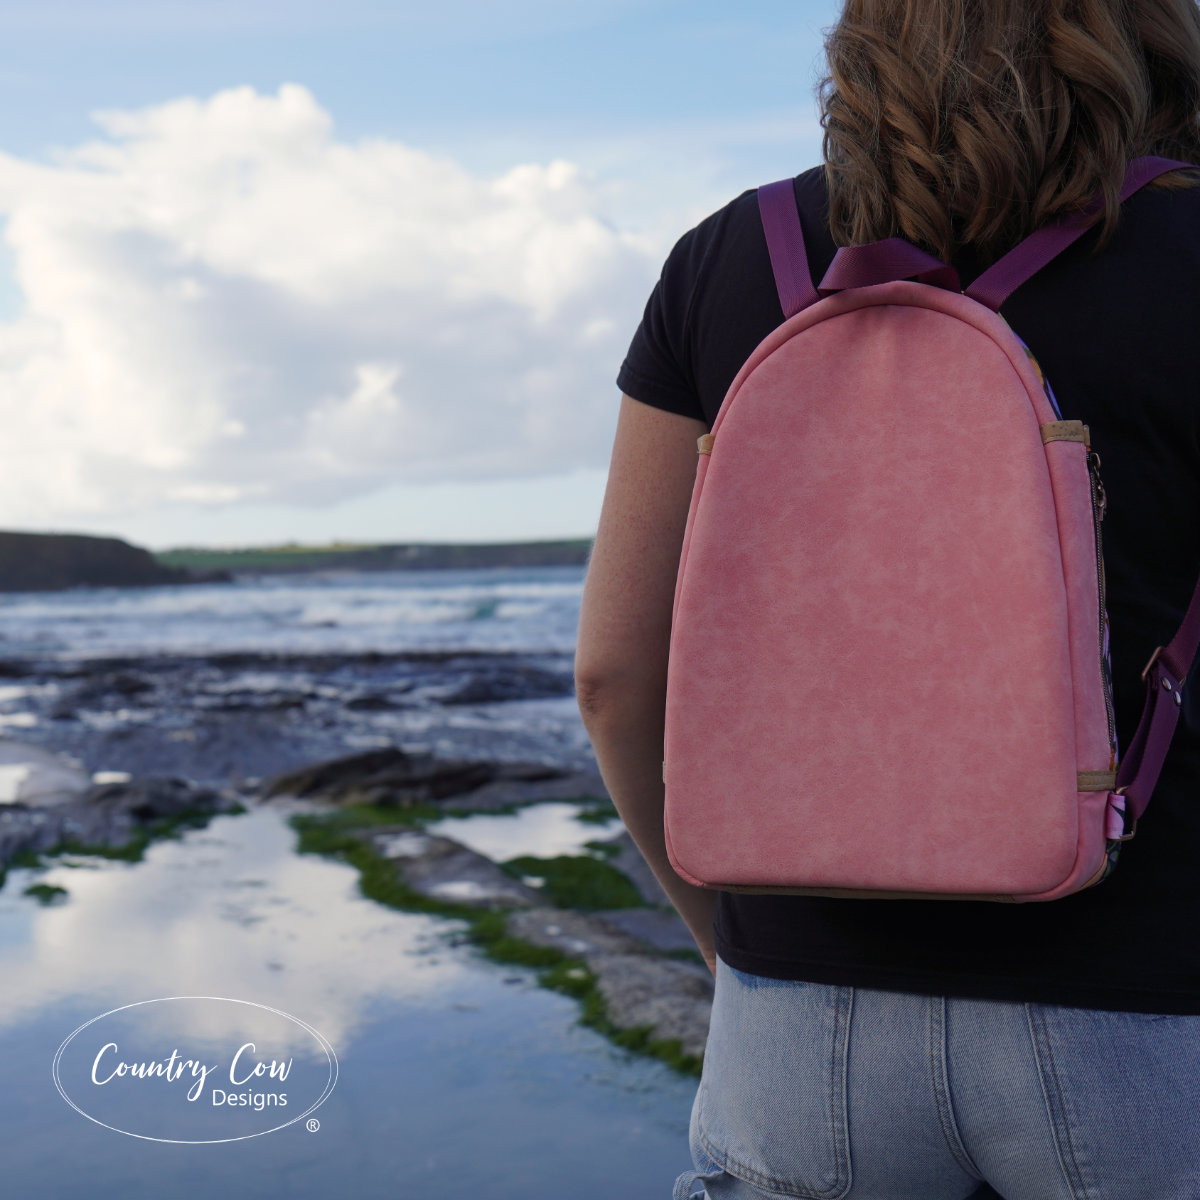
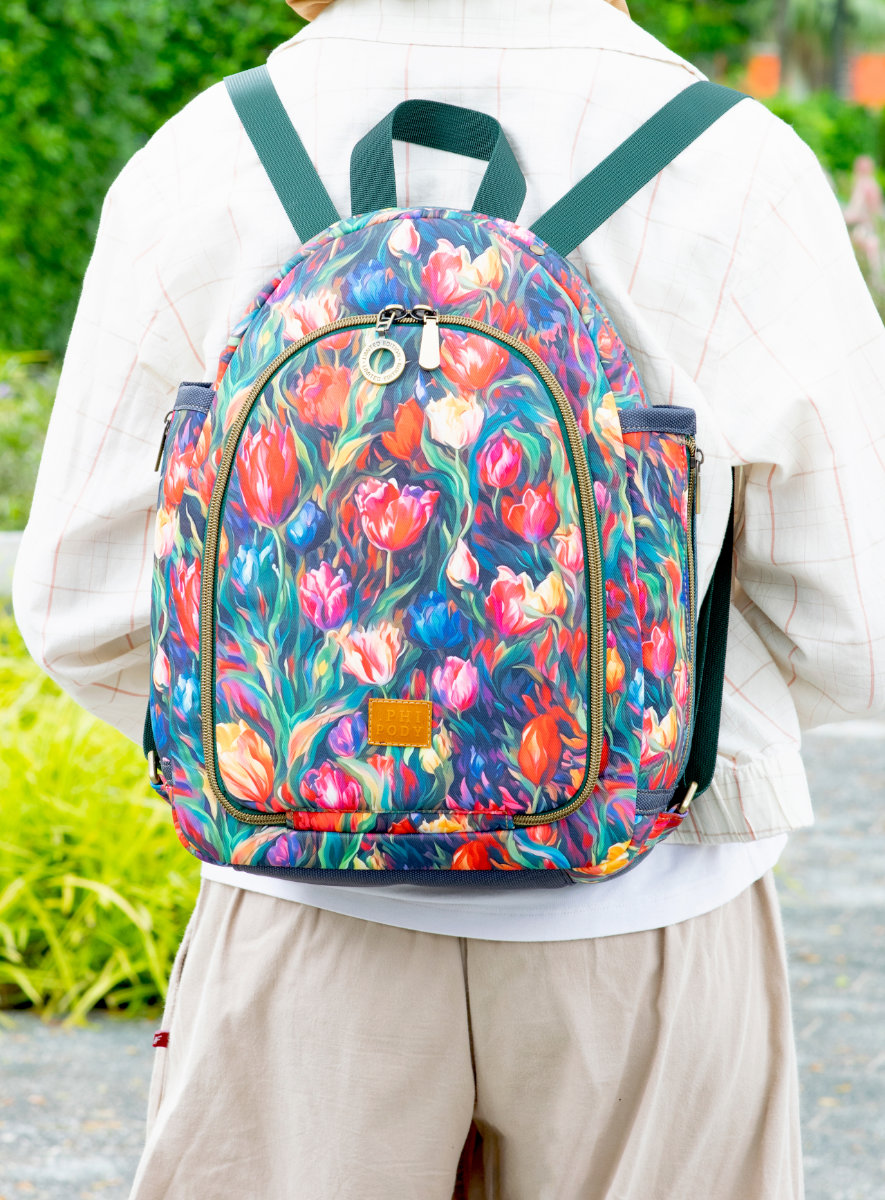
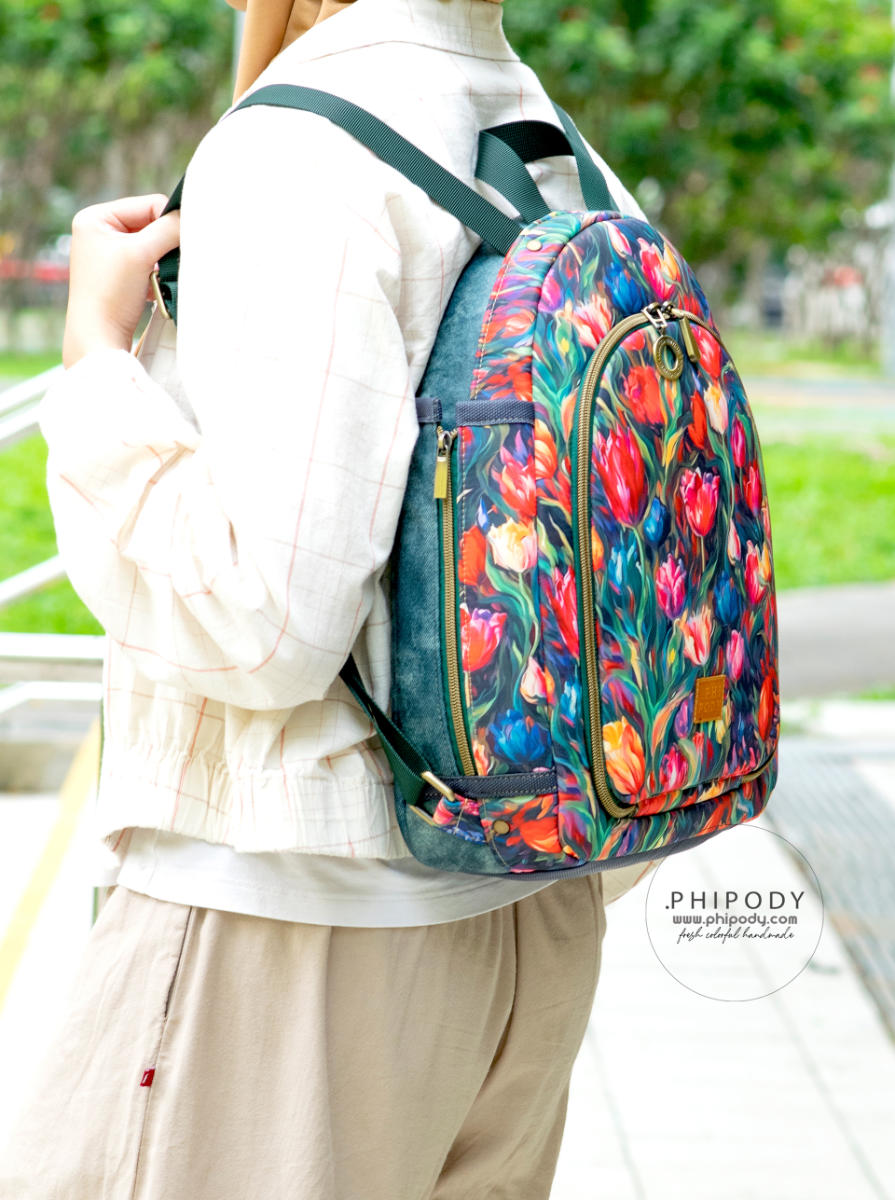
We’re excited to introduce our latest bag sewing pattern, the Two Faced Backpack. As the name suggests, this bag is reversible so it can be worn either way. This makes it ideal as an anti-theft backpack.
Rather than having a front and a back, it has two faces, hence the name. We’ve been working on this pattern for many months, trying different prototypes and sewing methods, and we’re finally happy with all the changes we’ve made along the way. We hope you love it as much as we do! Scroll down to see the tester photos for this bag and get some inspiration before you sew.
Grab your copy of the pattern here


What’s special about this bag pattern?
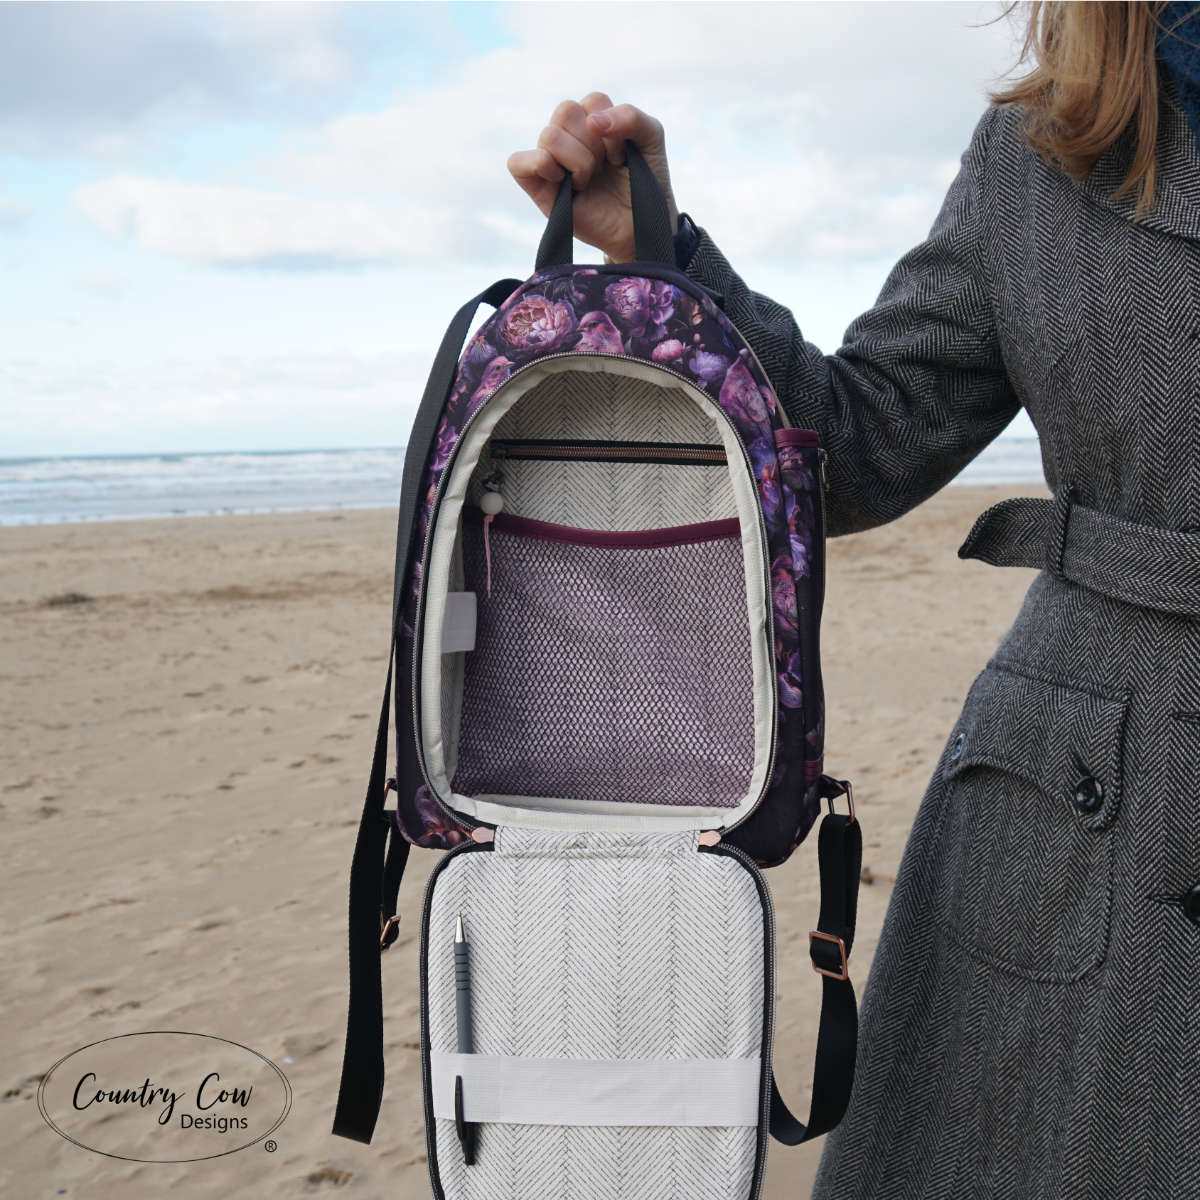
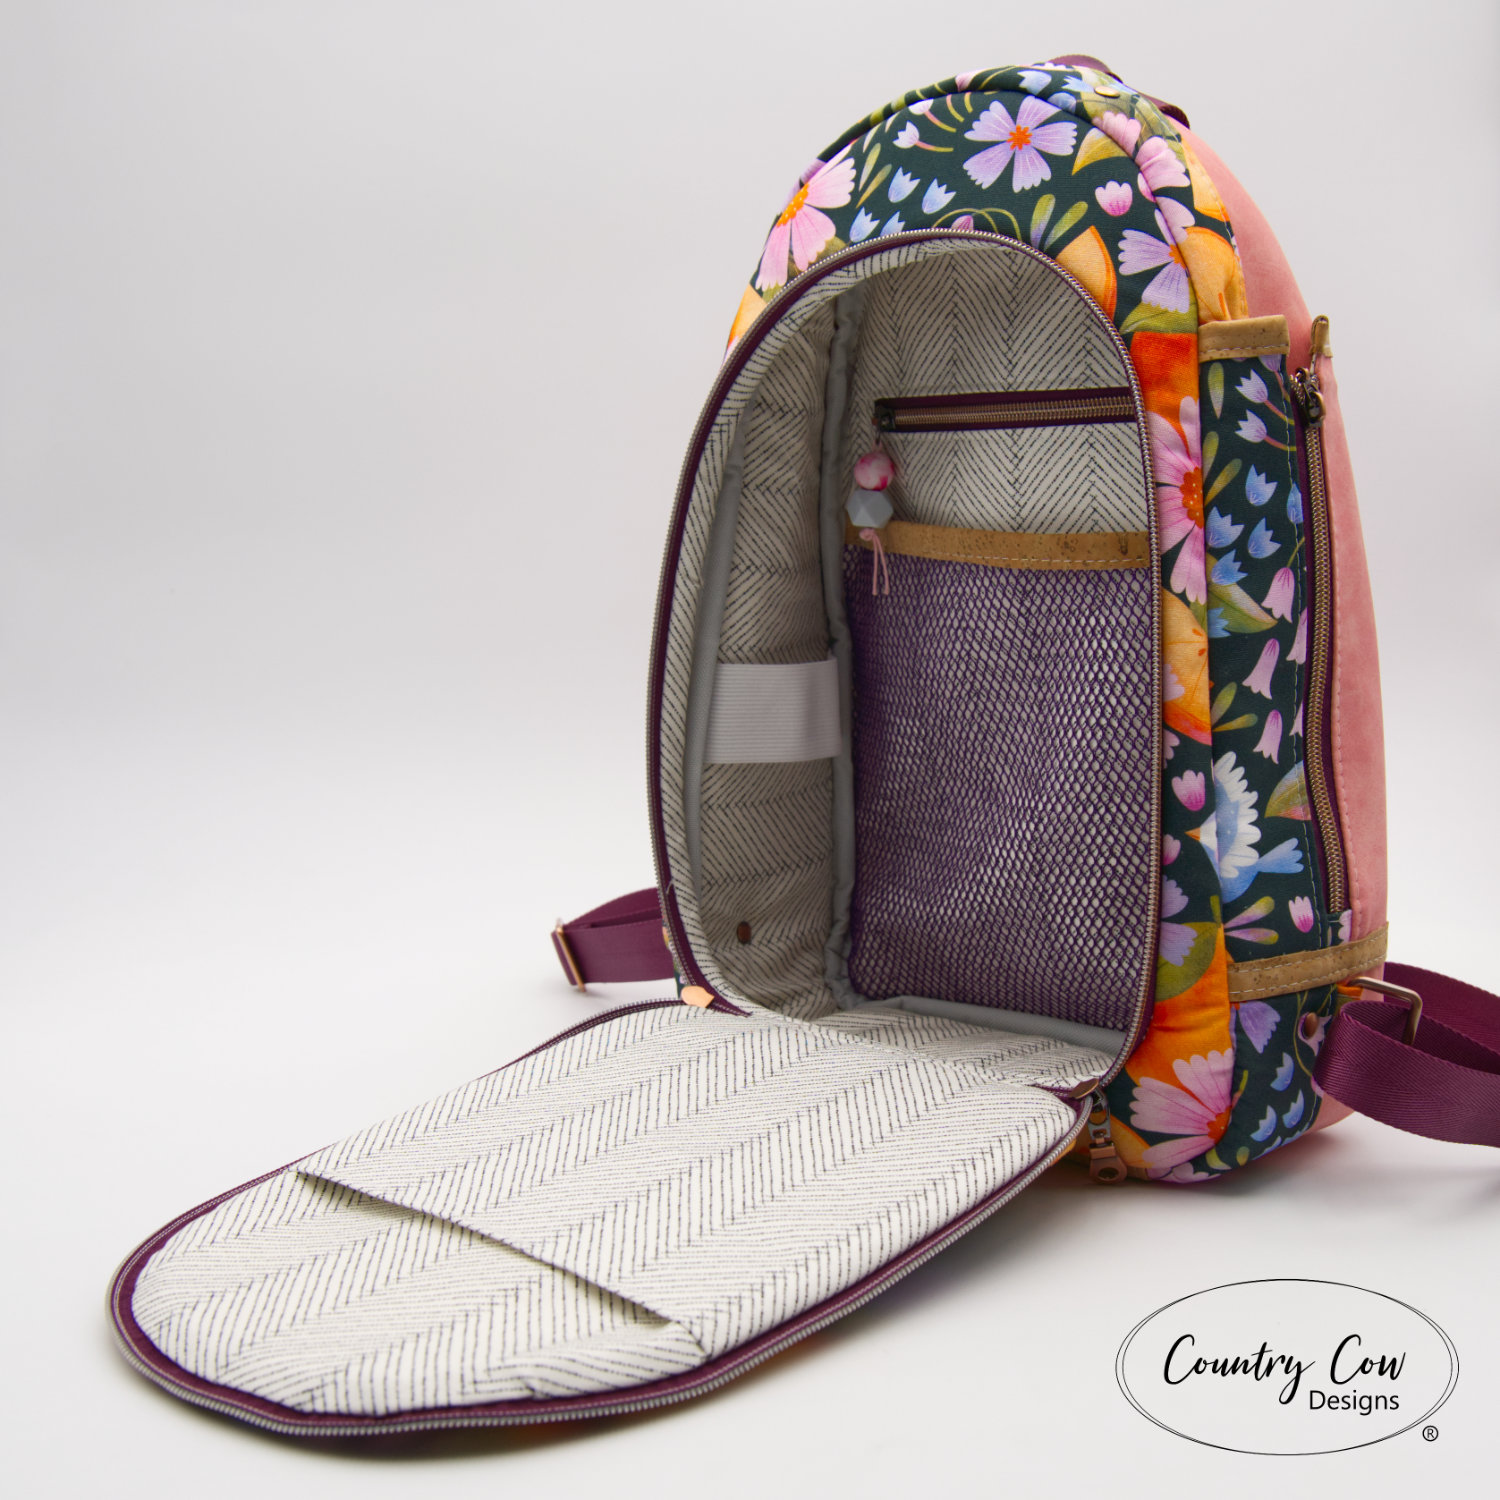
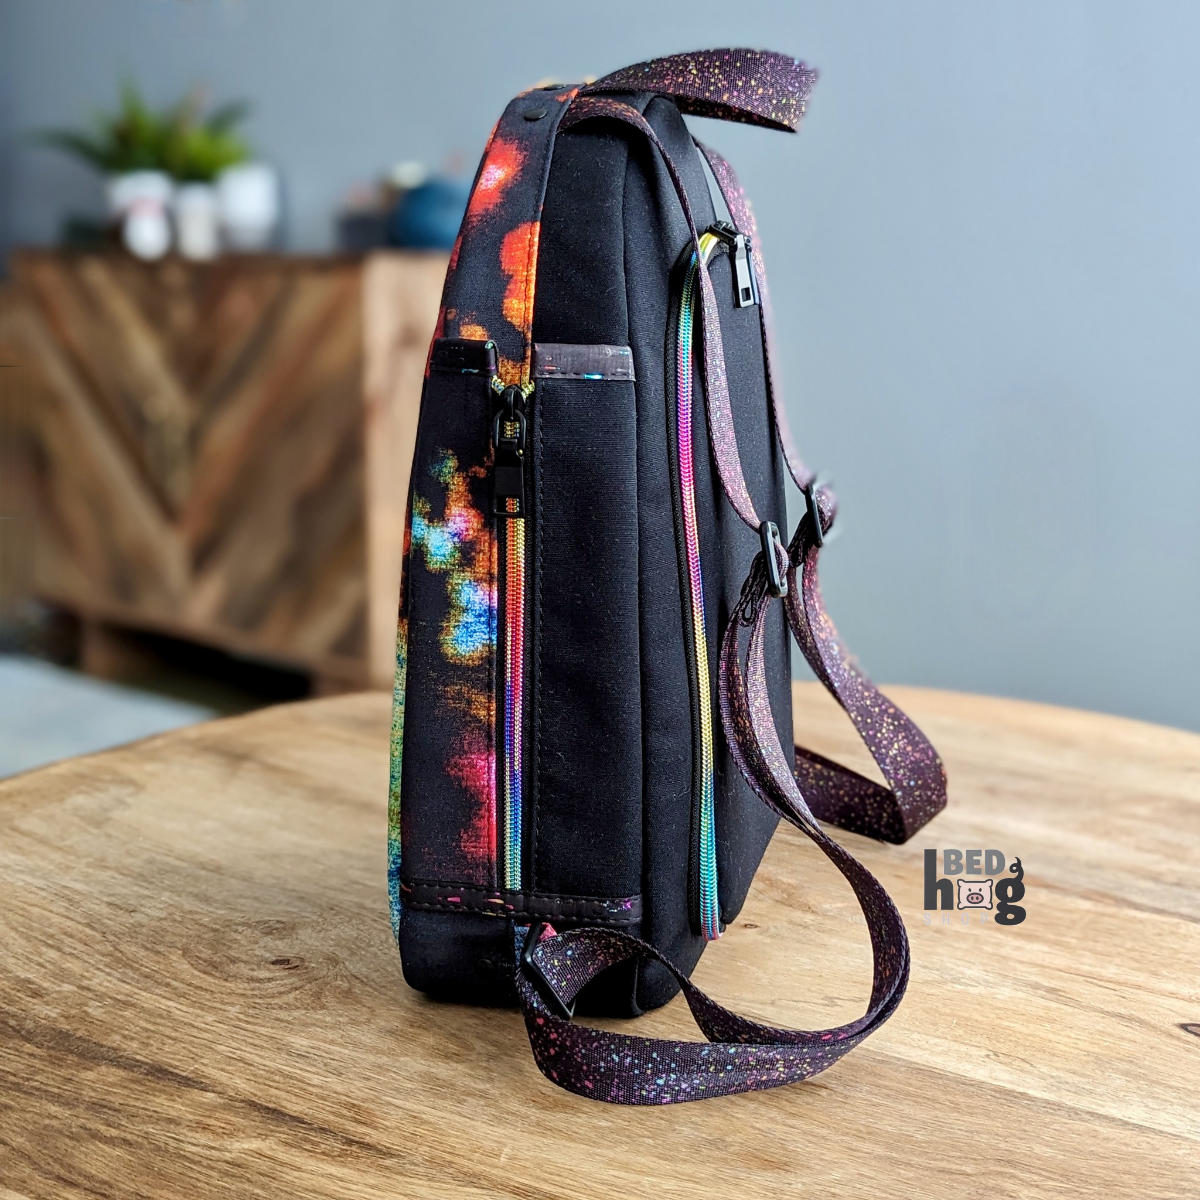
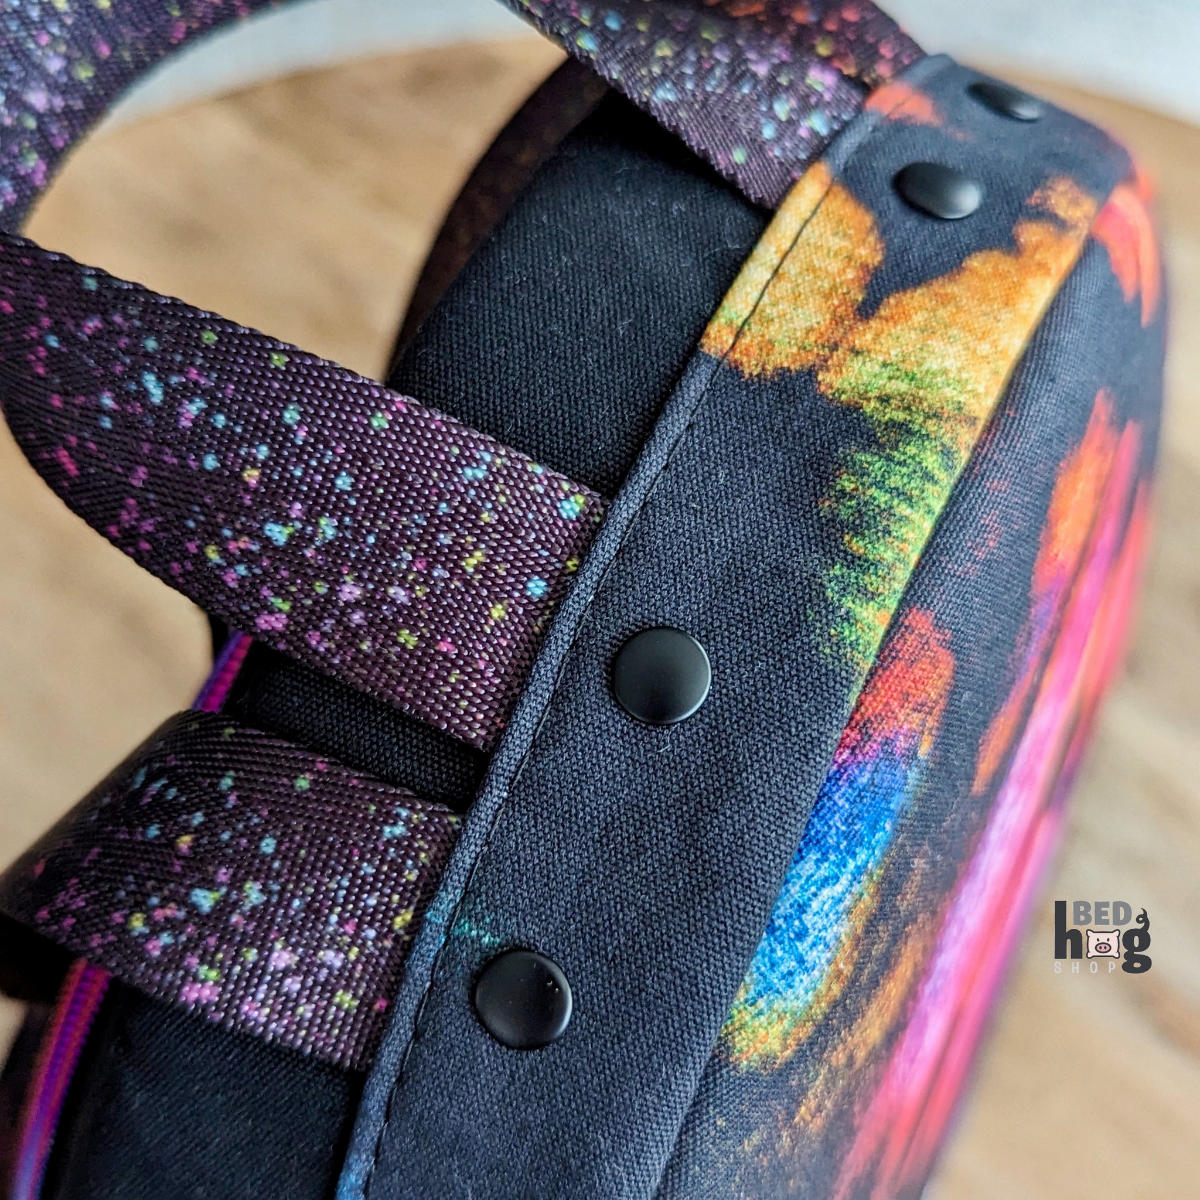
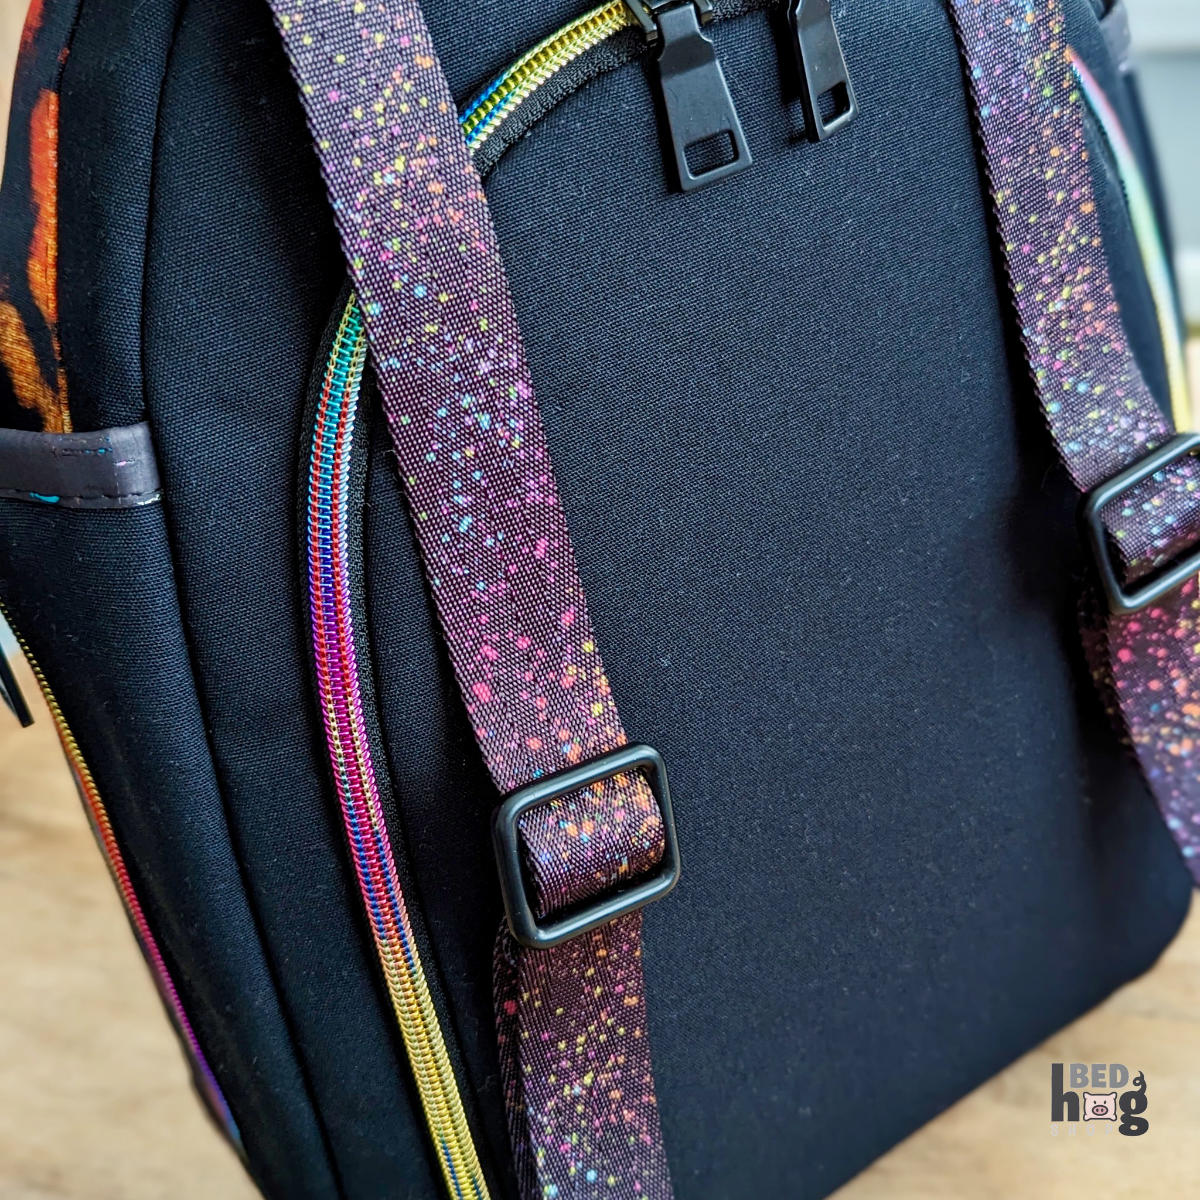
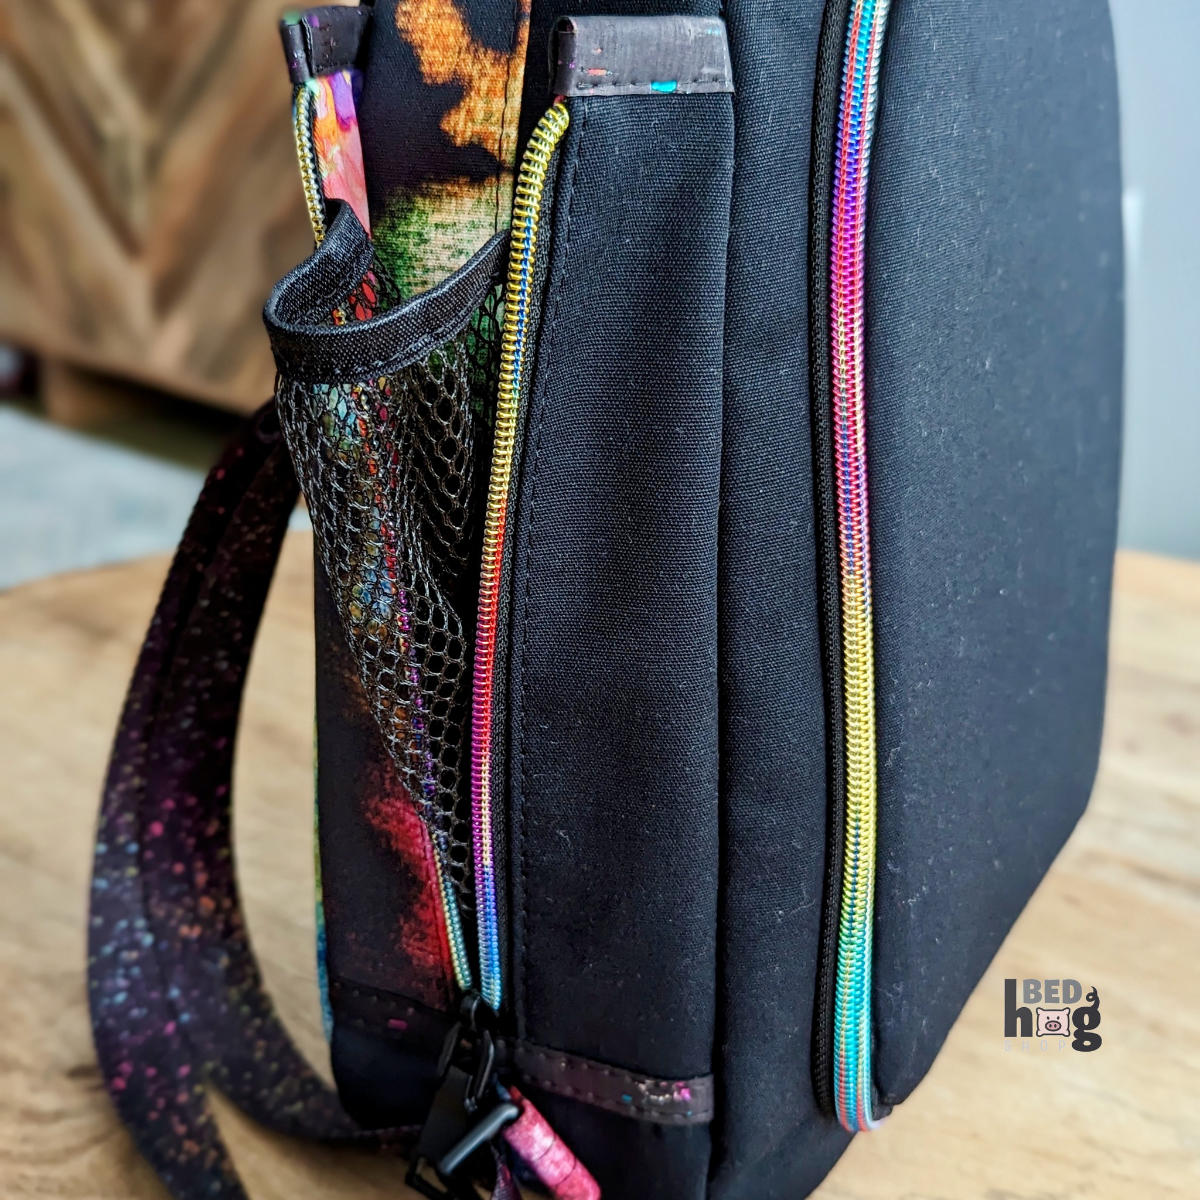
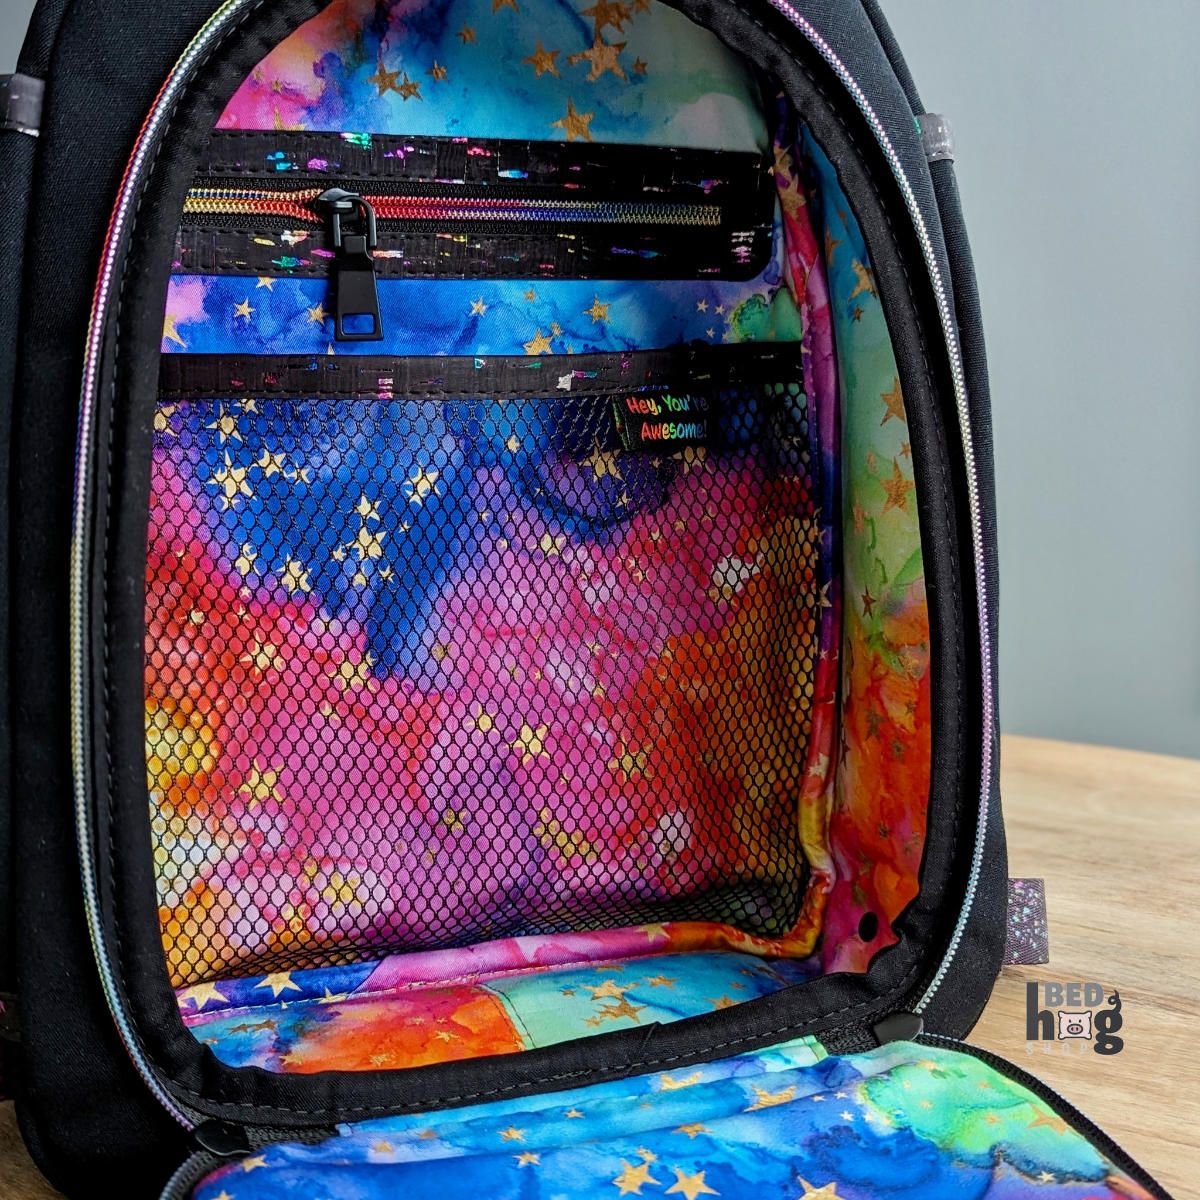
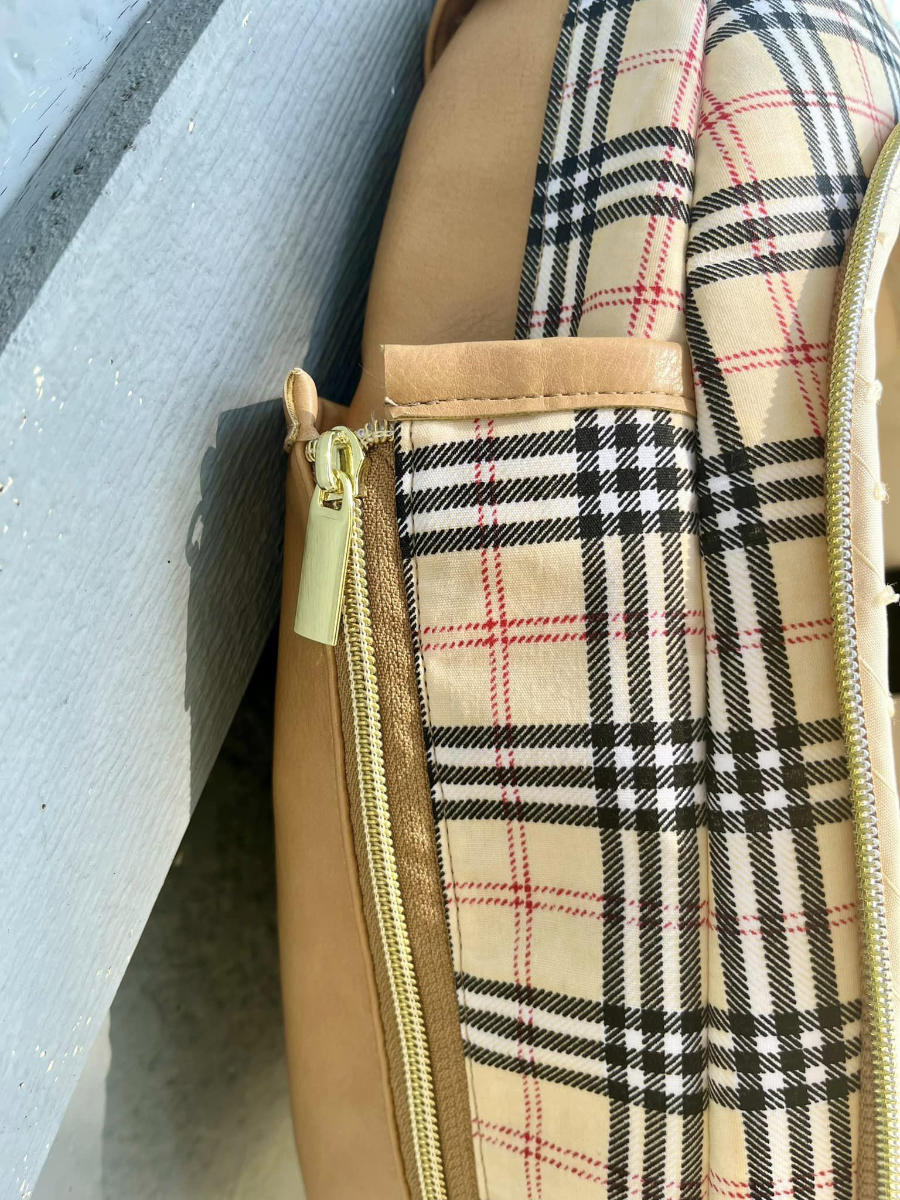
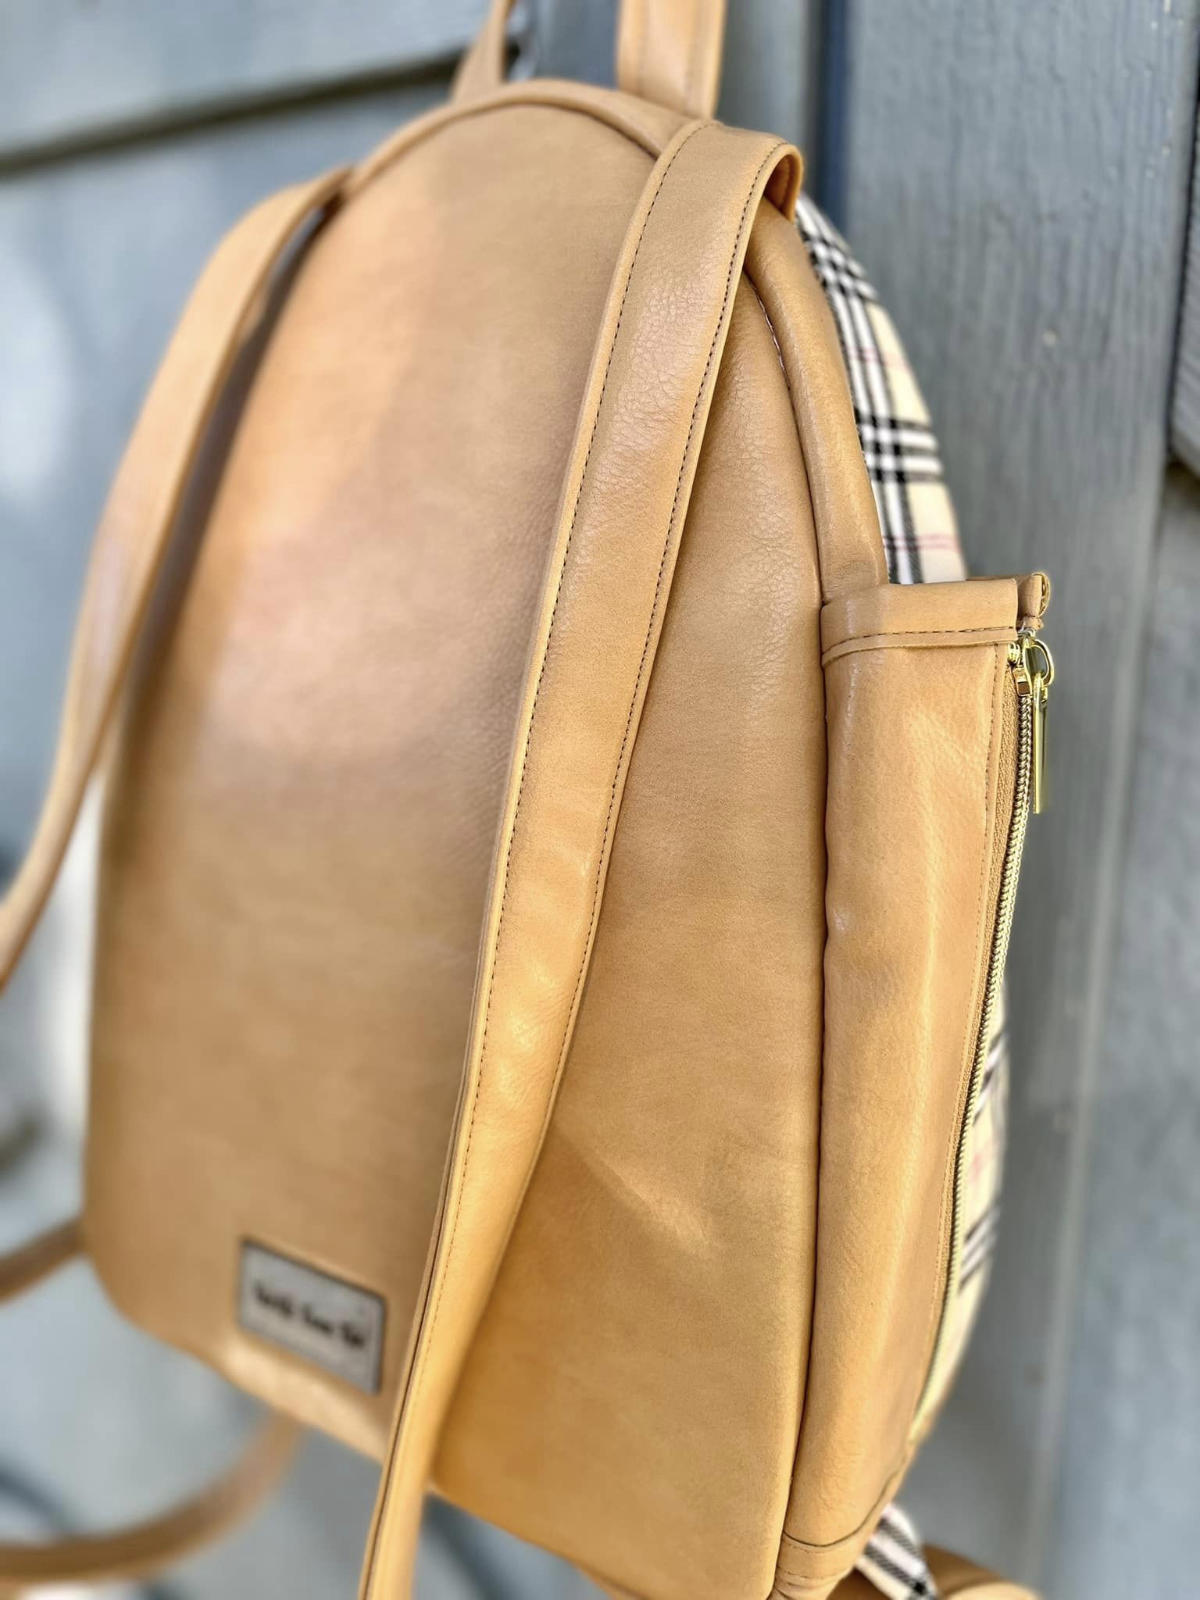
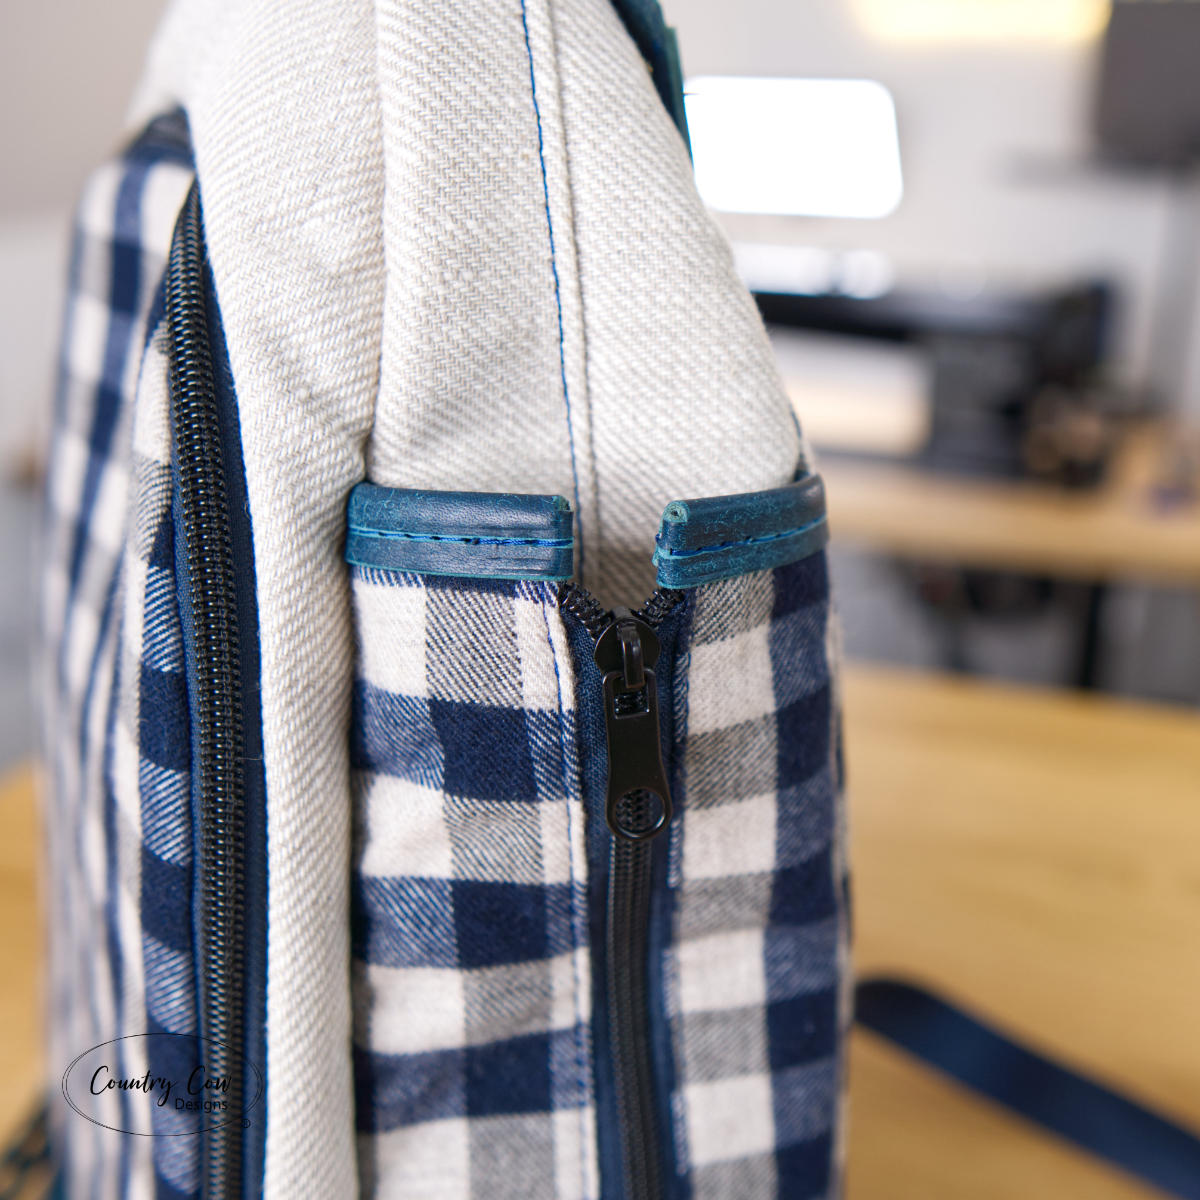
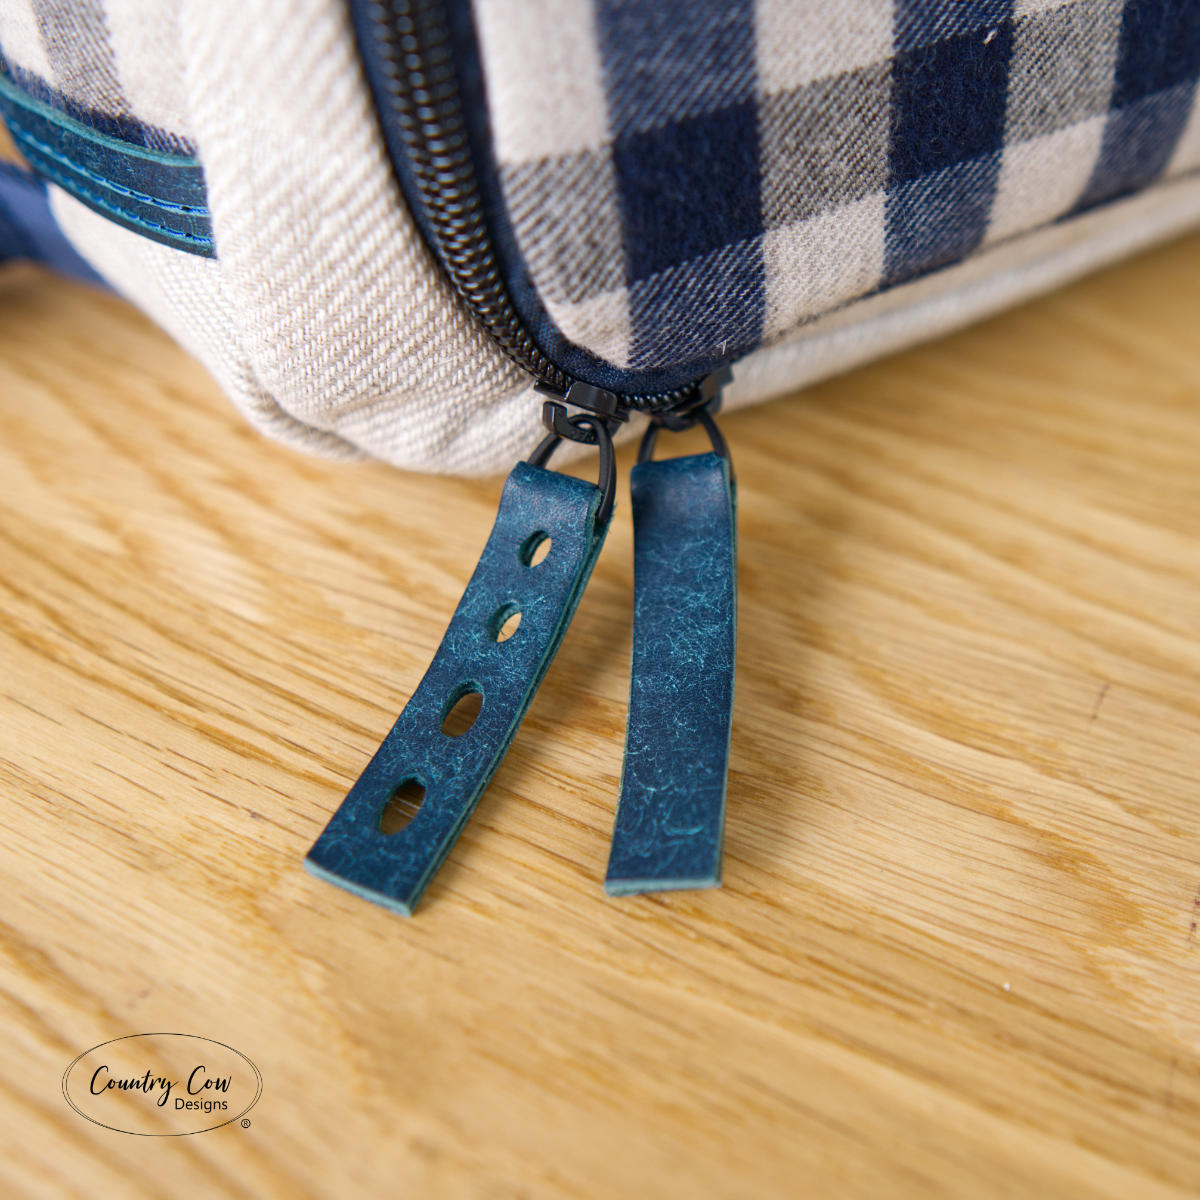
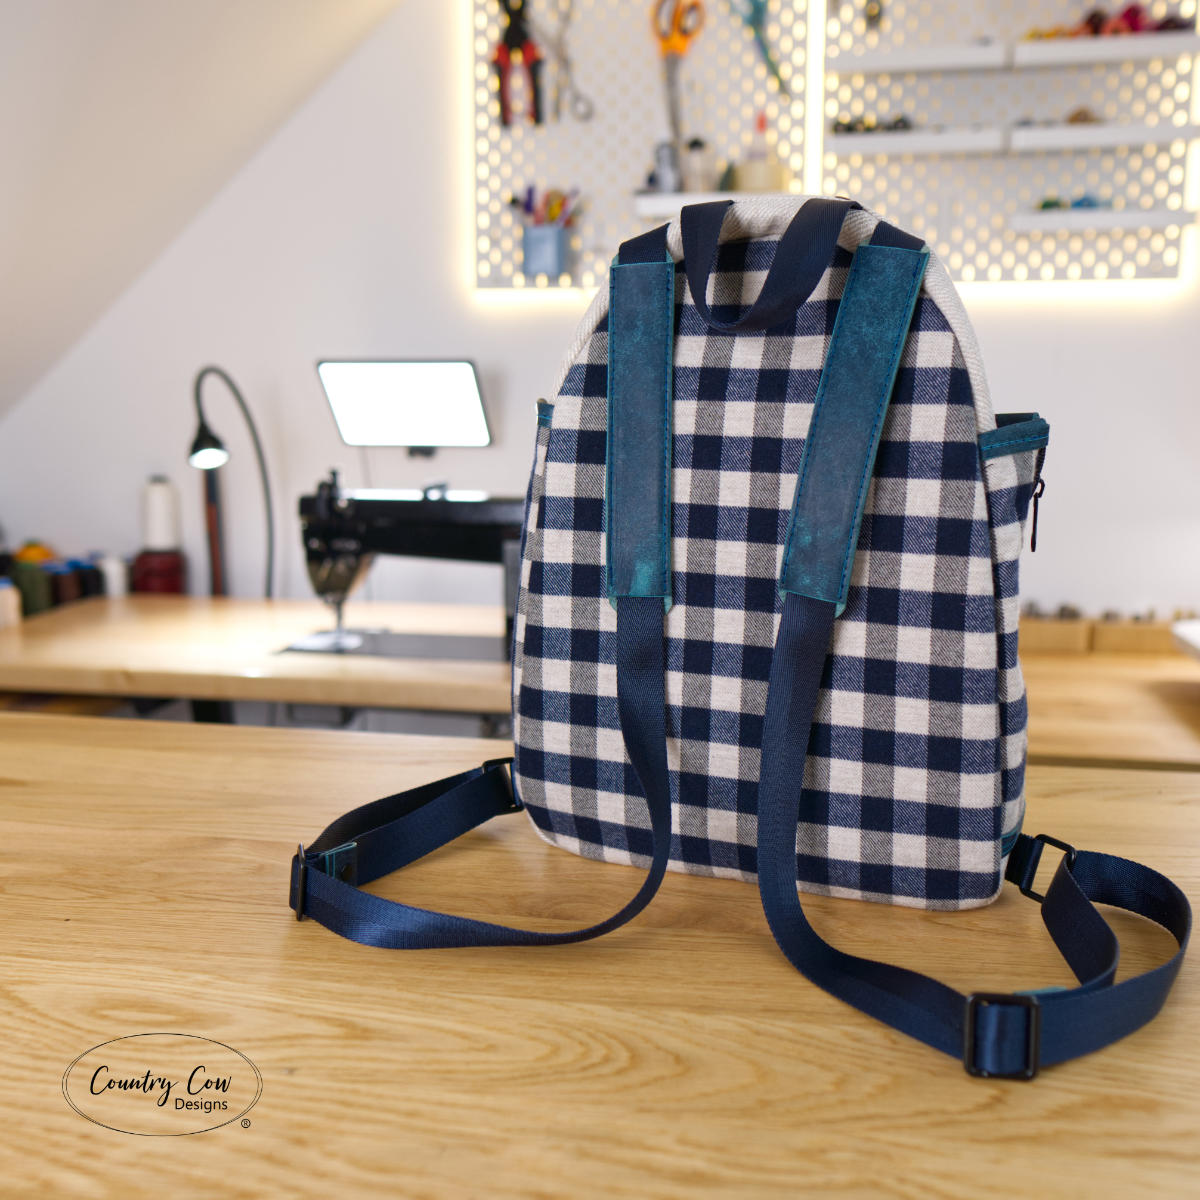
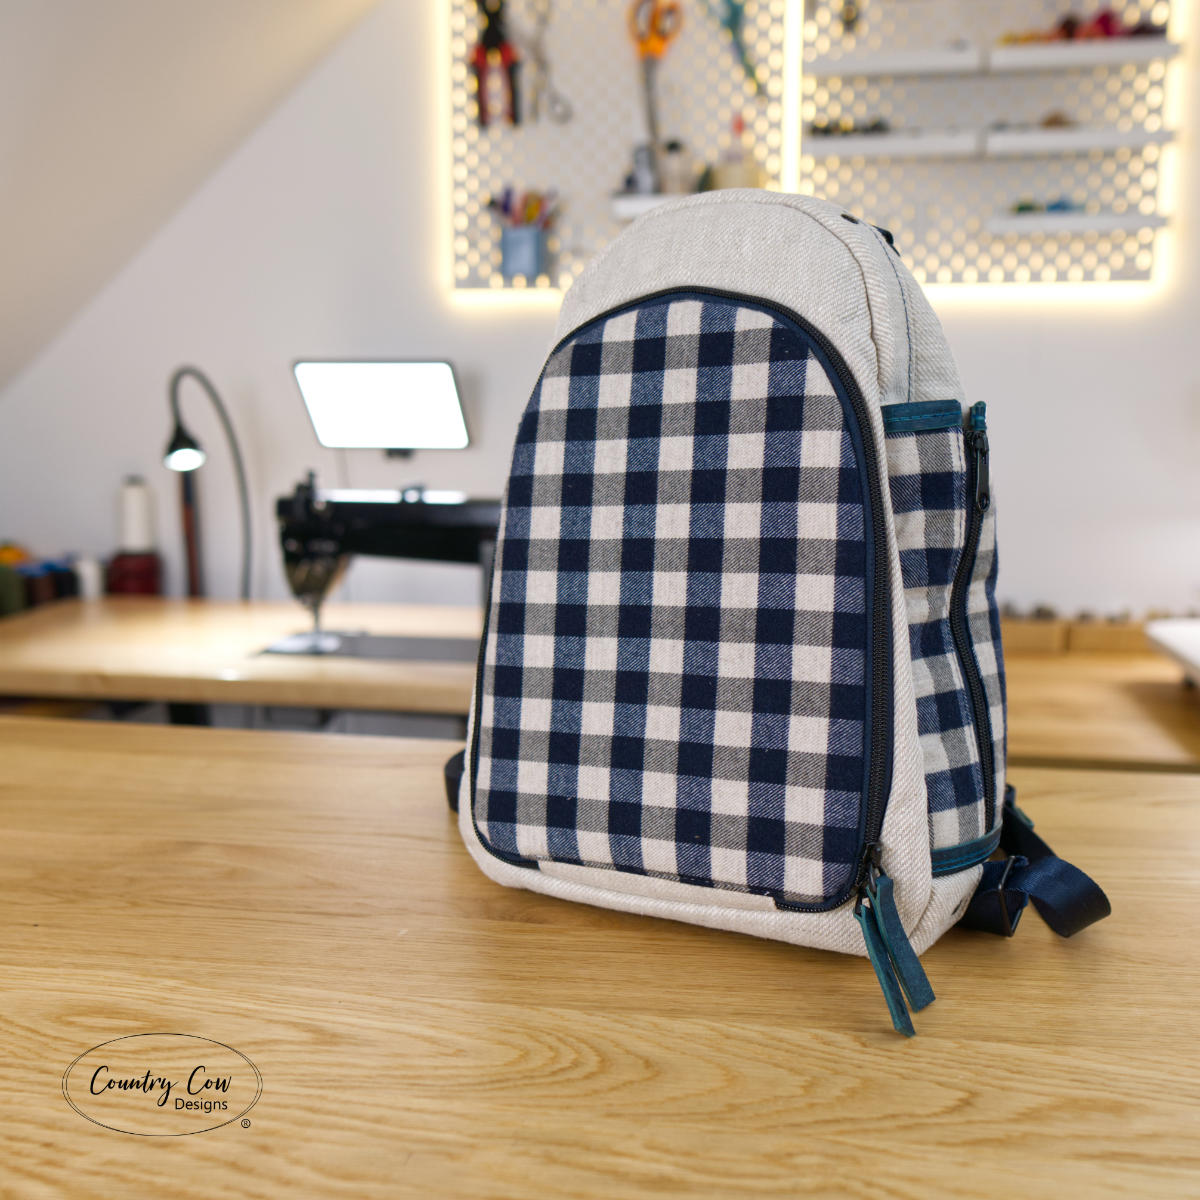
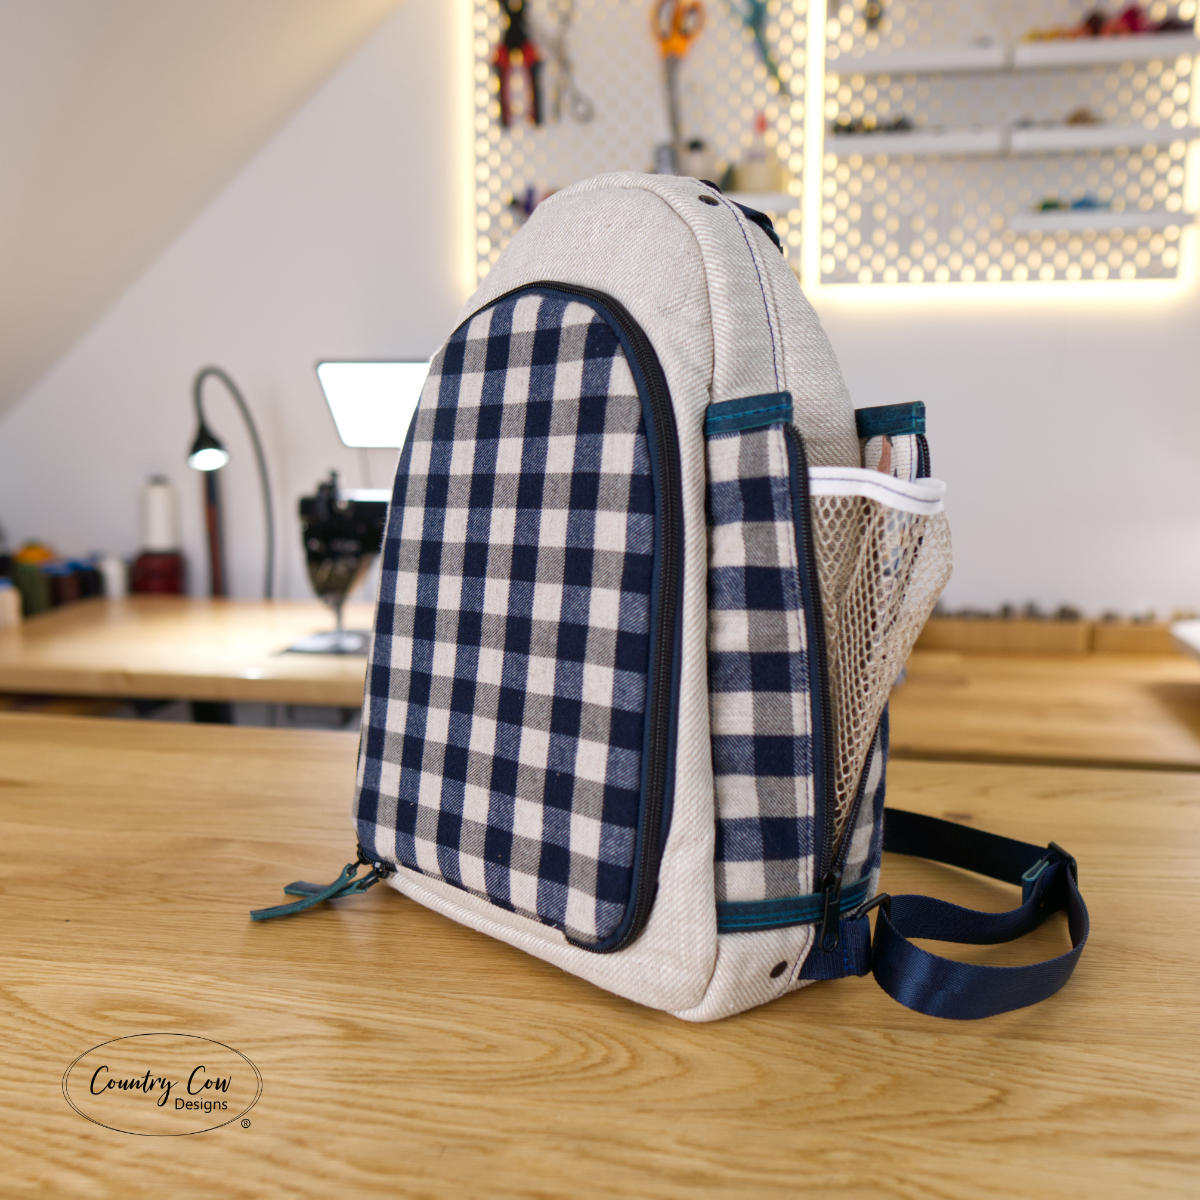
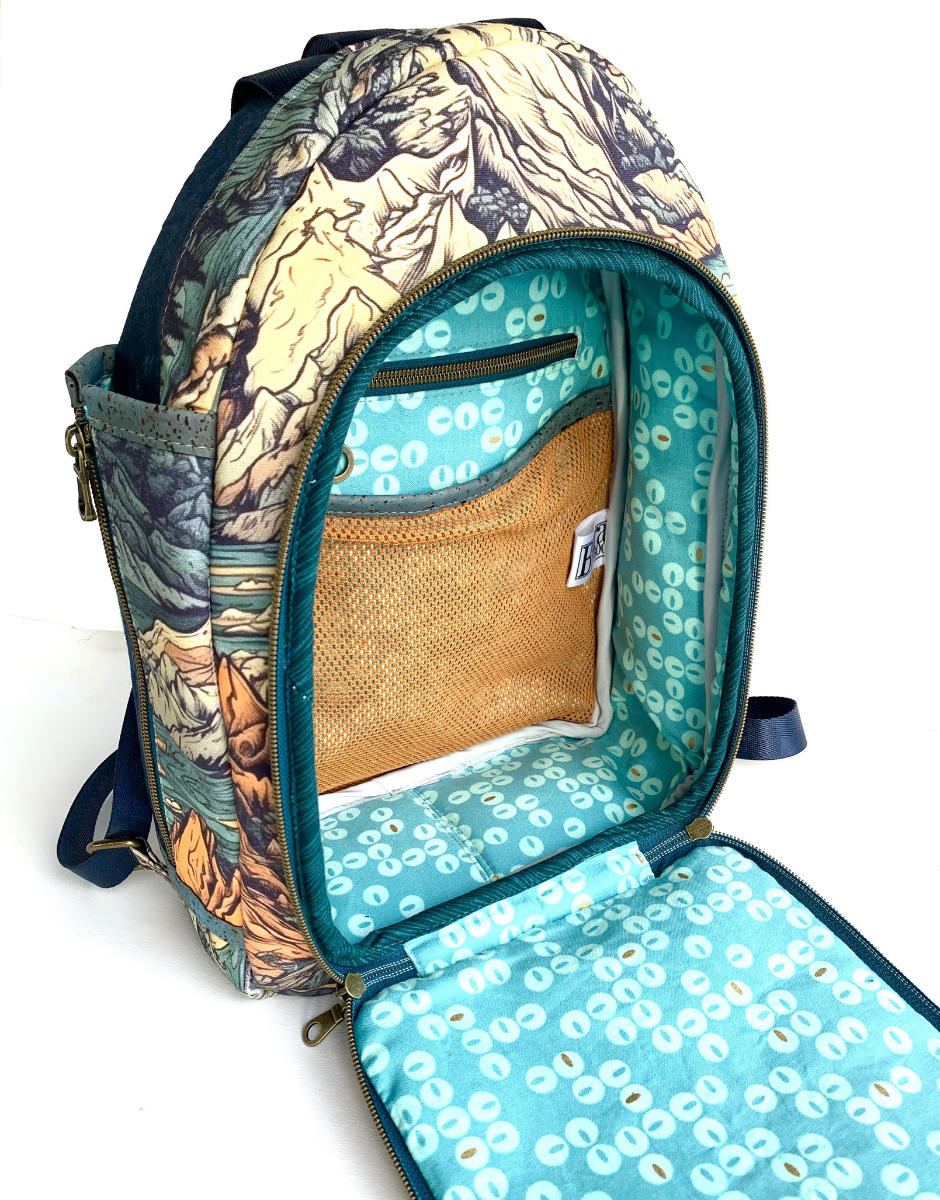
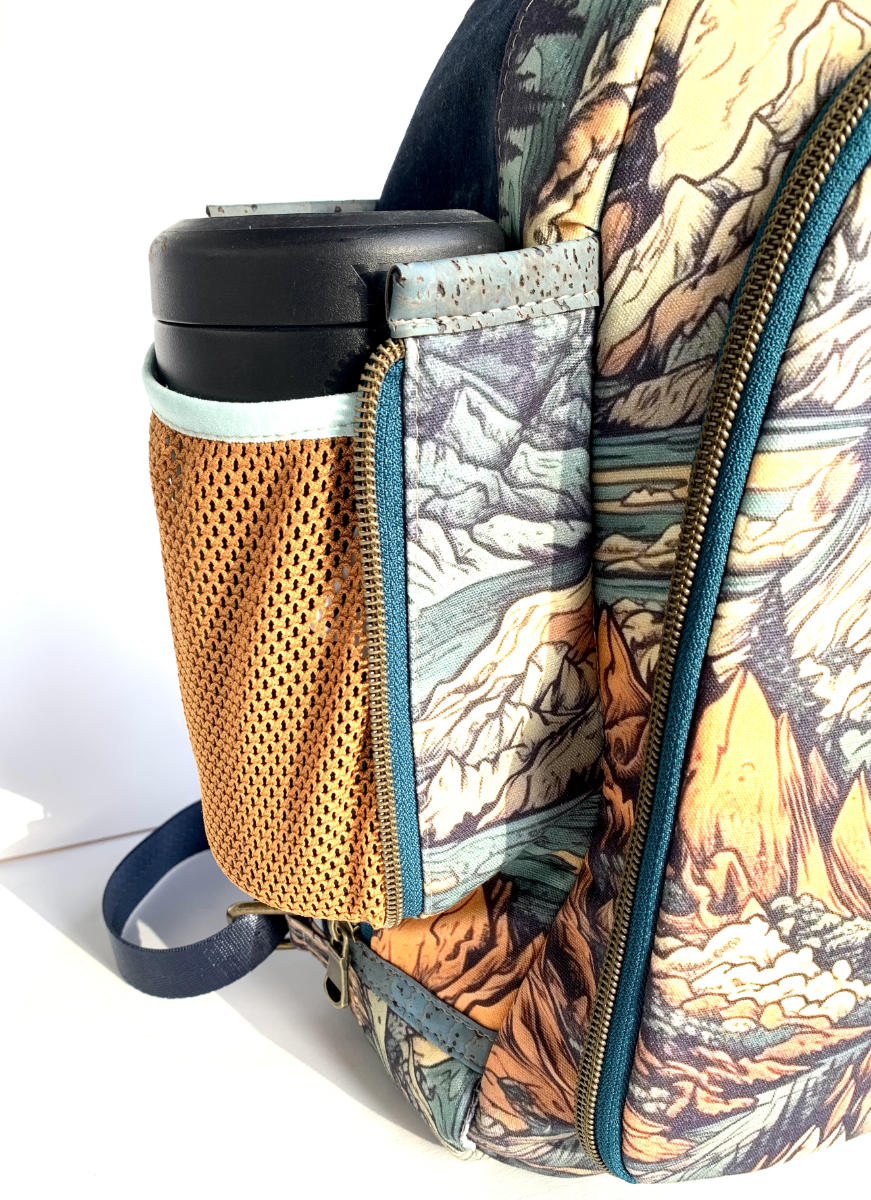
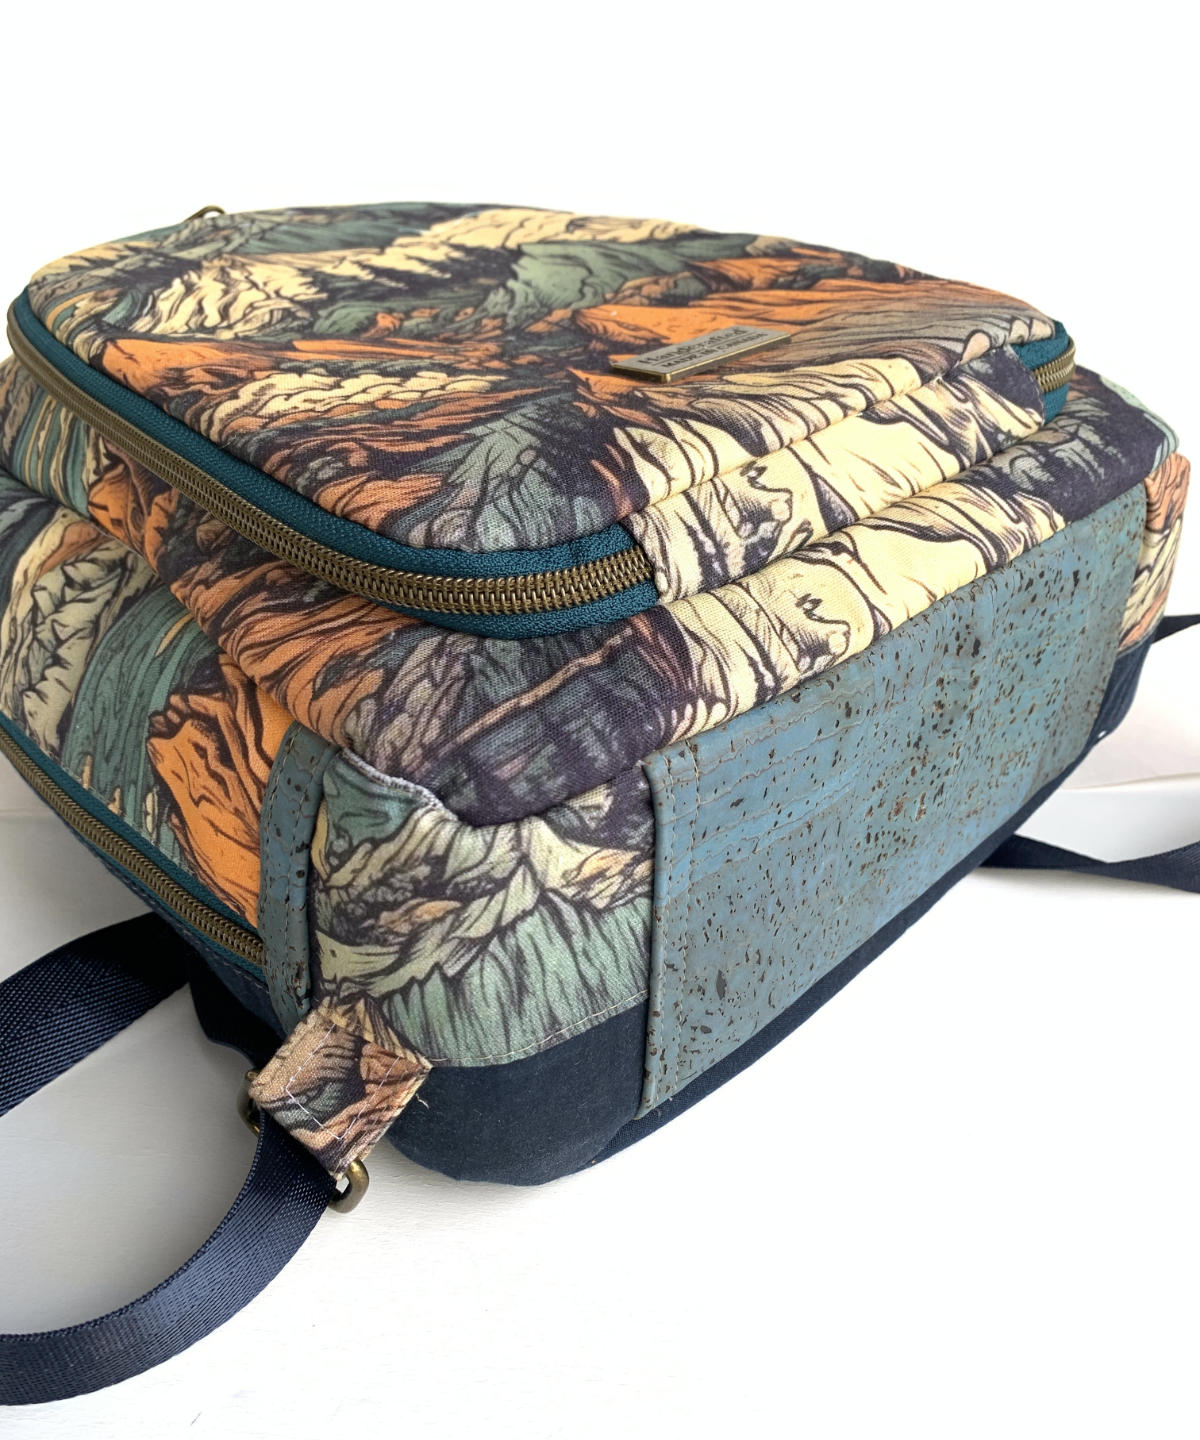
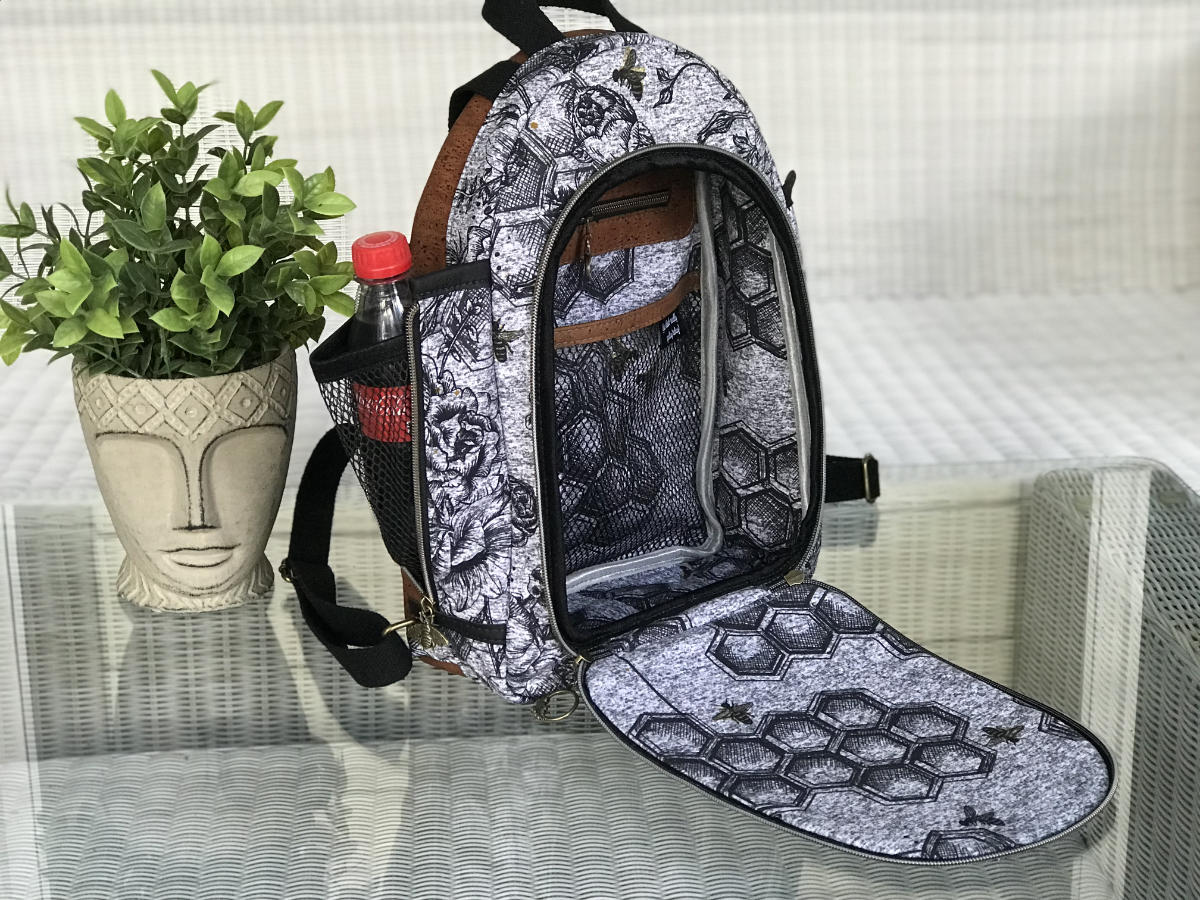
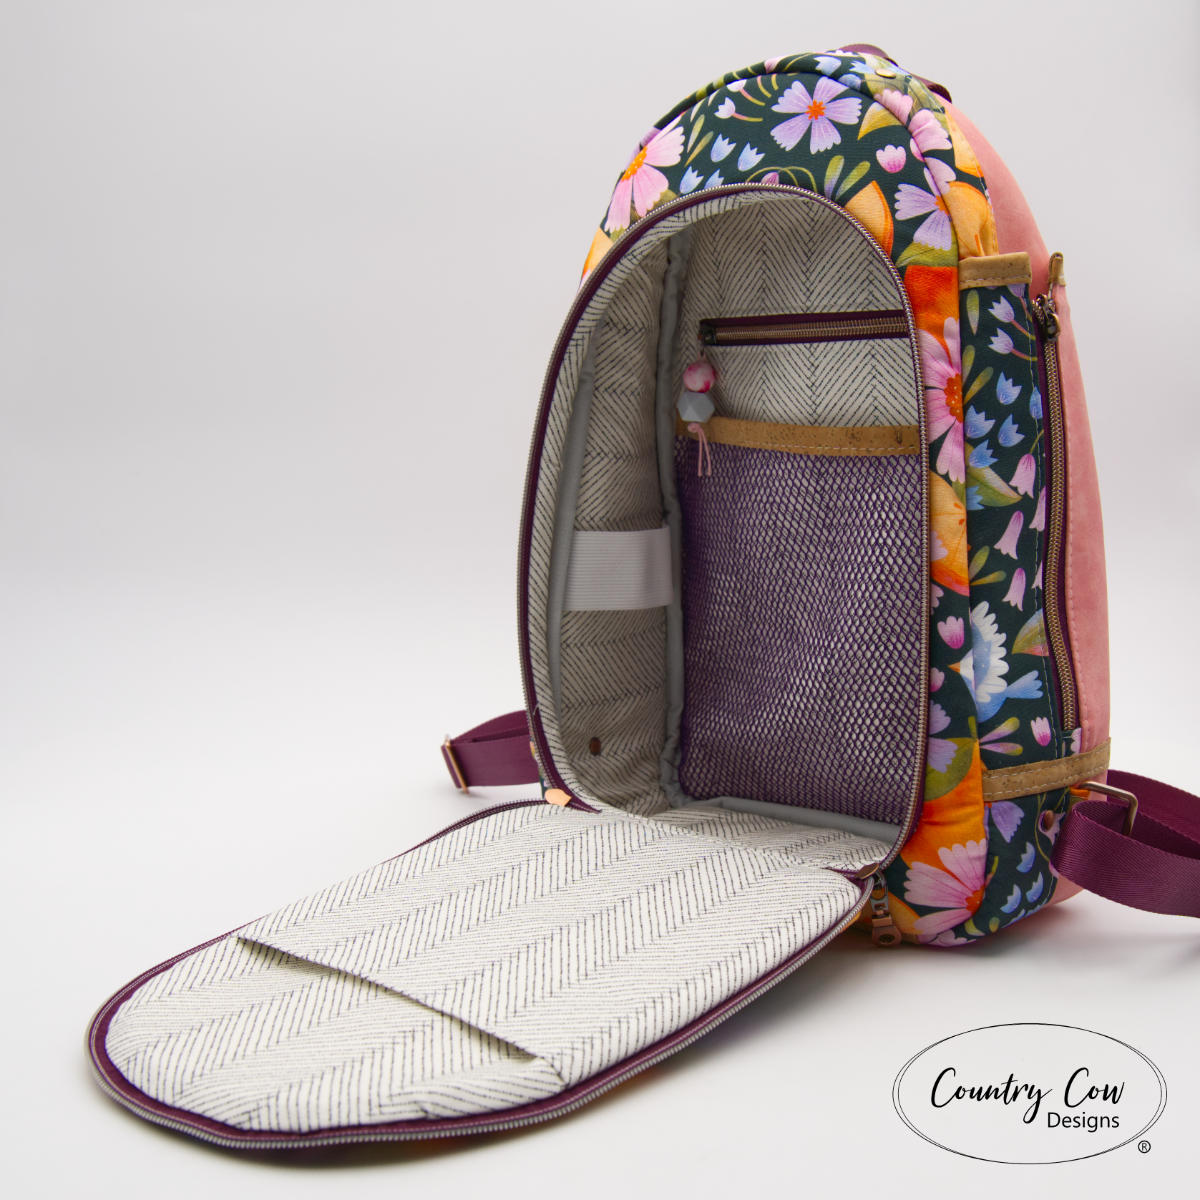
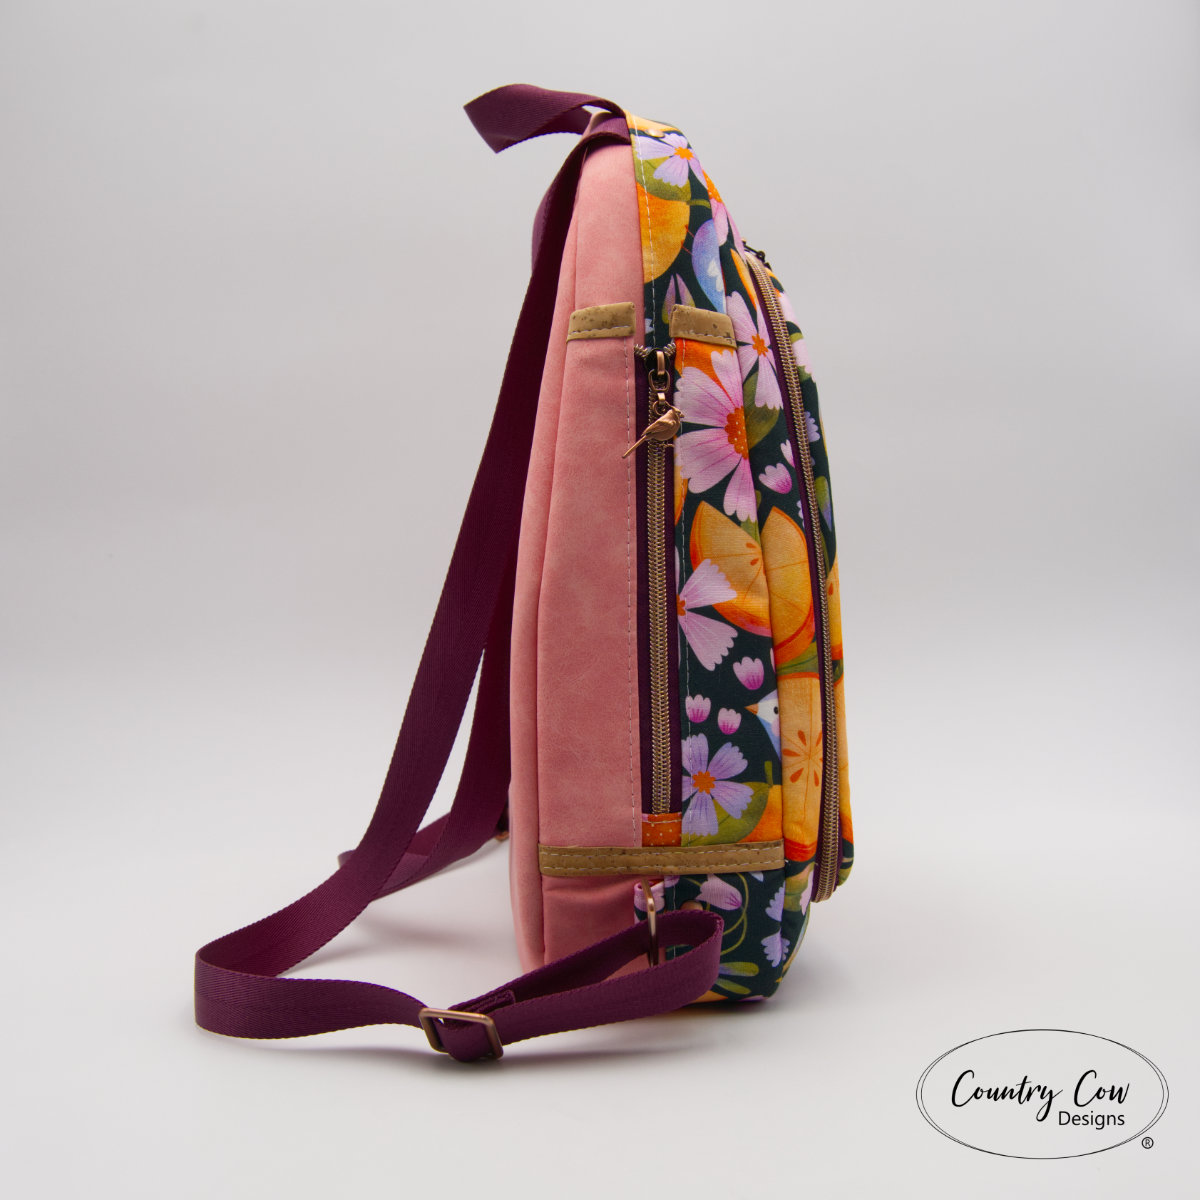
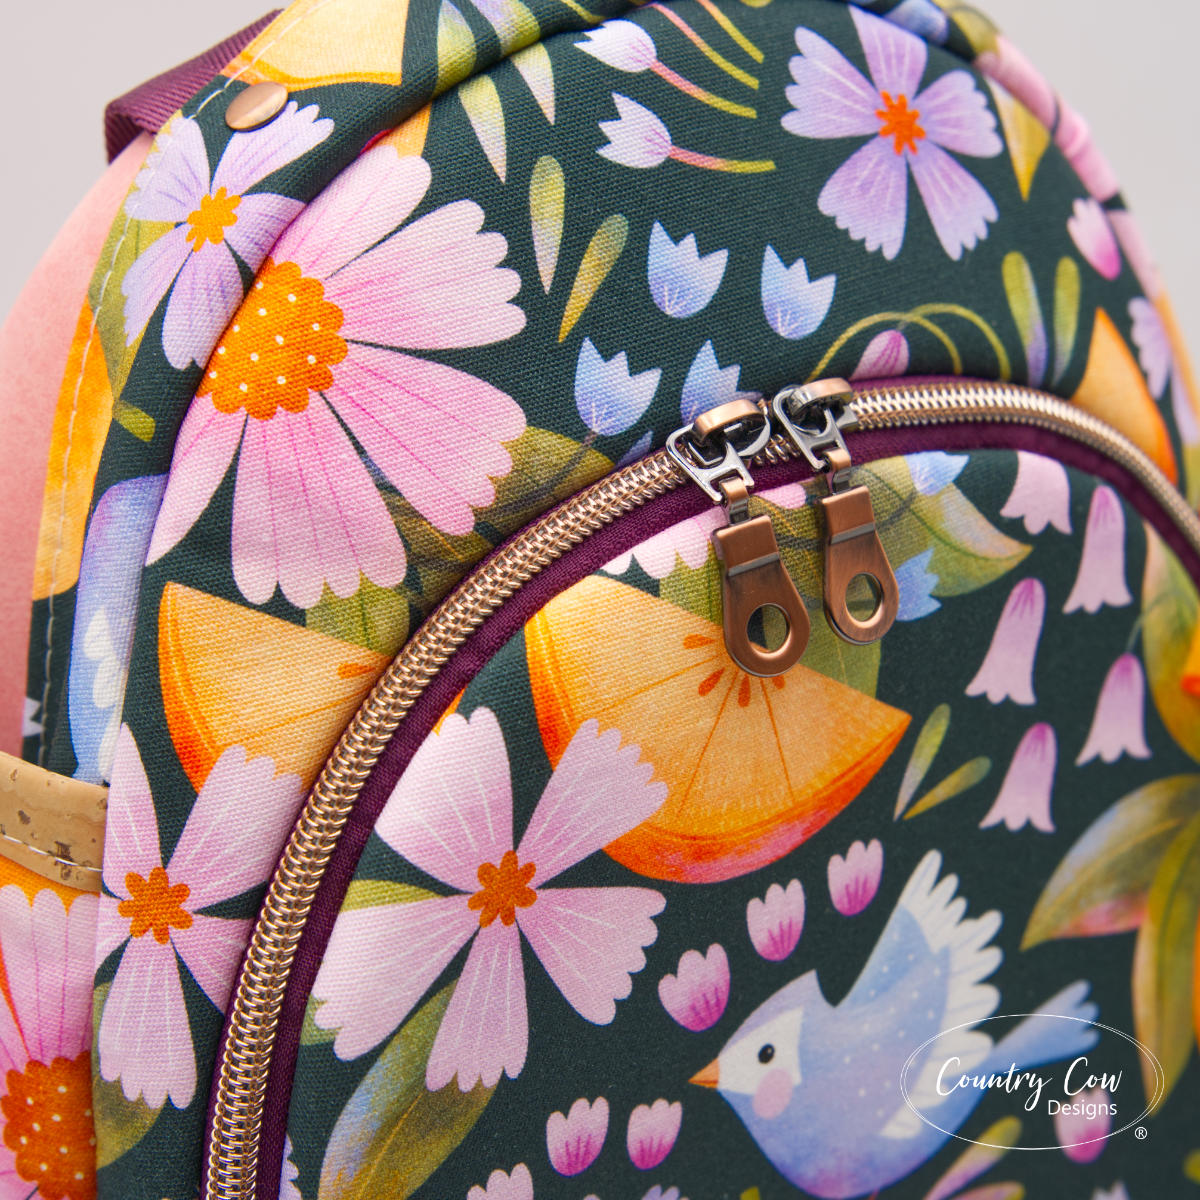
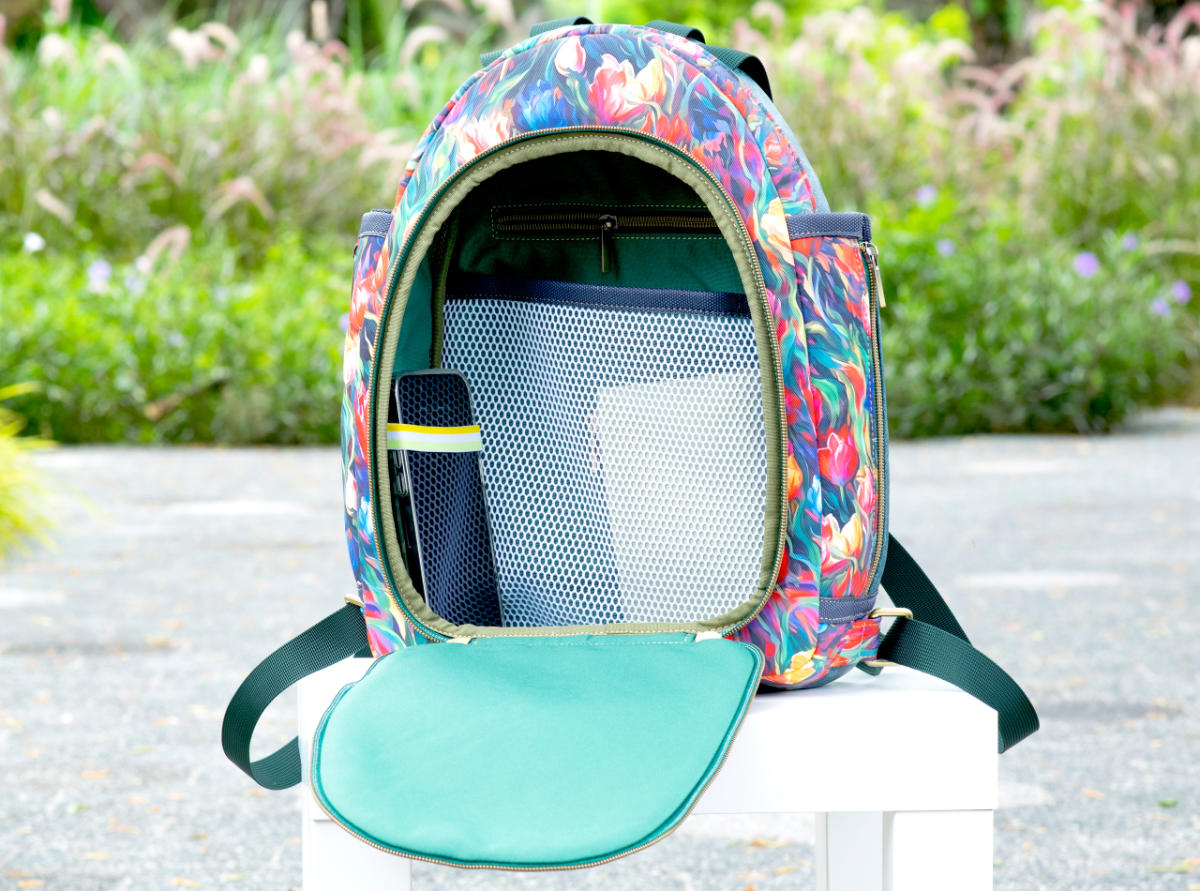
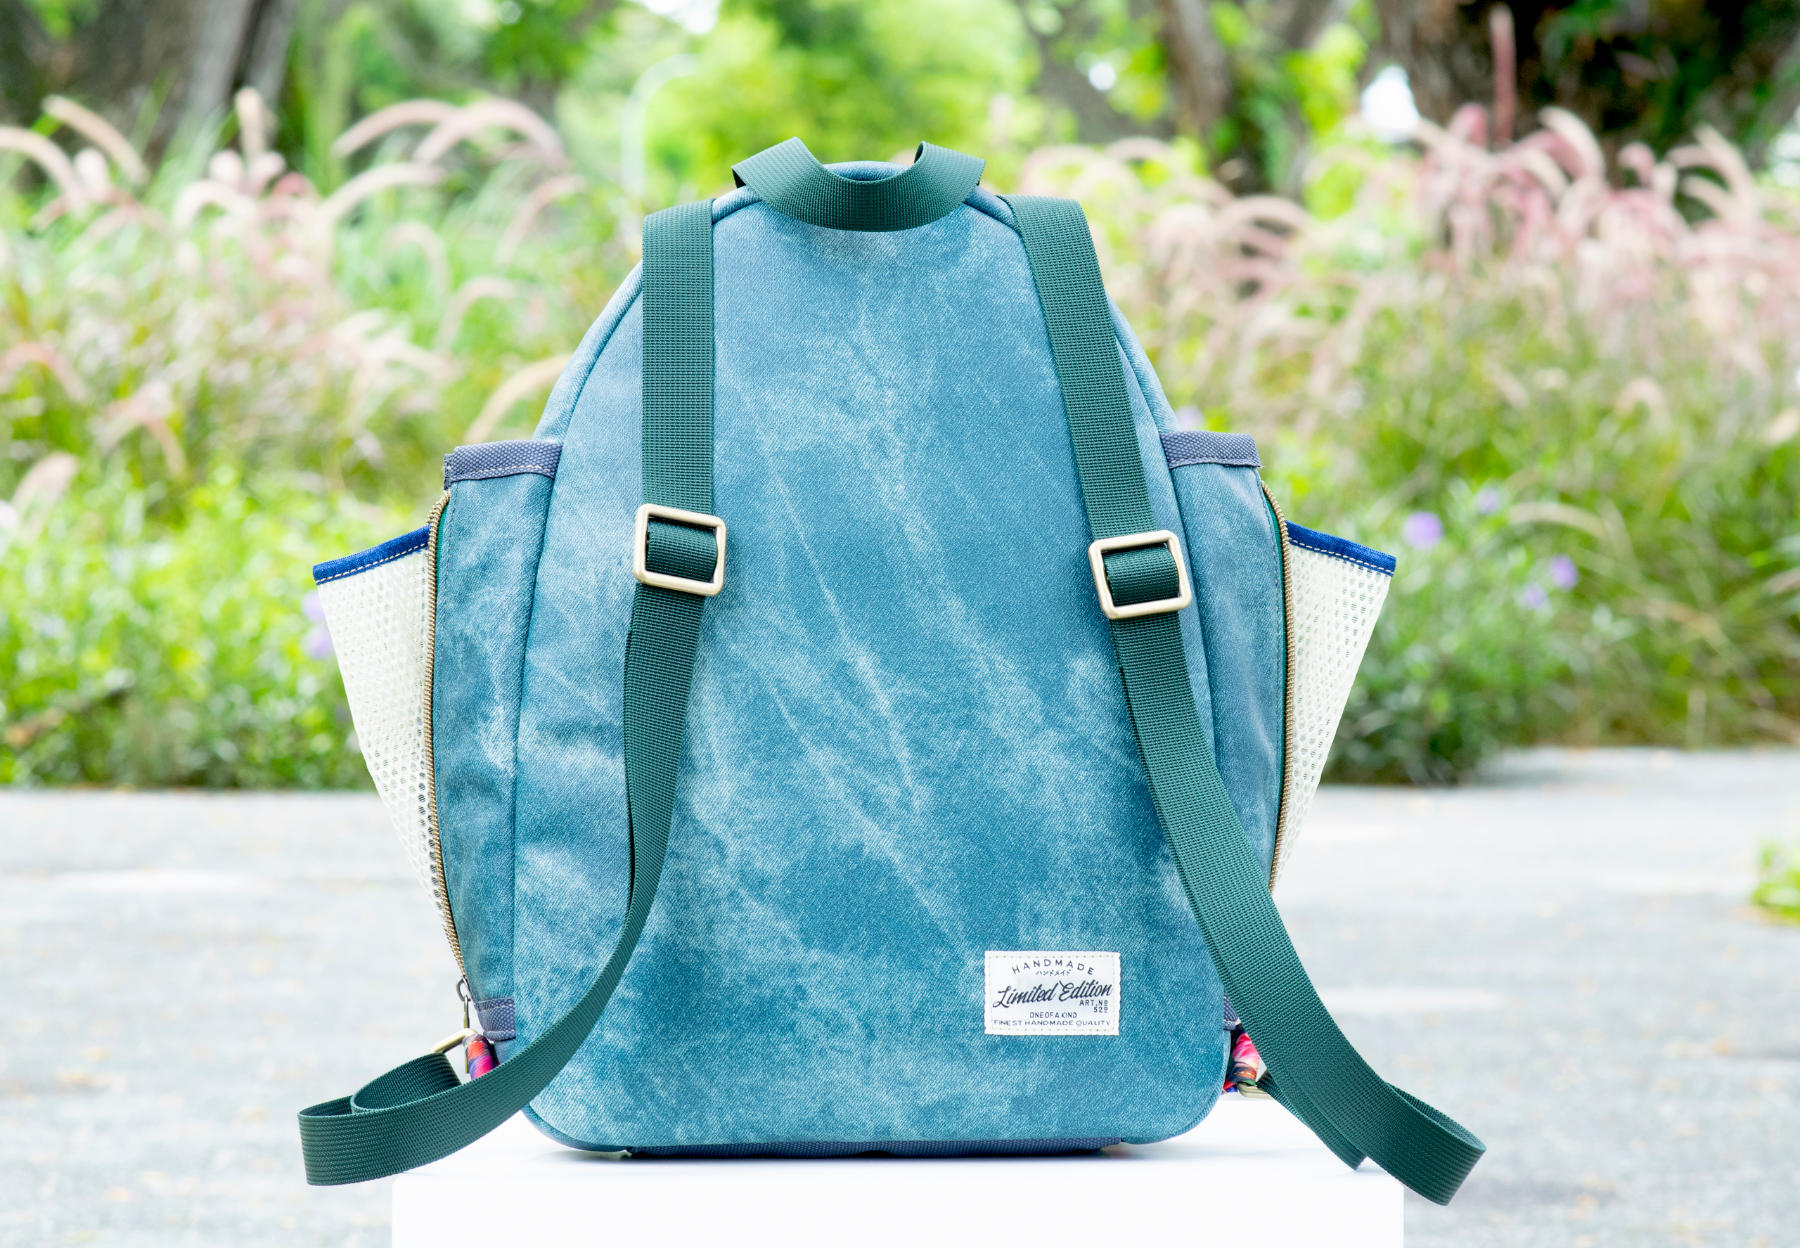
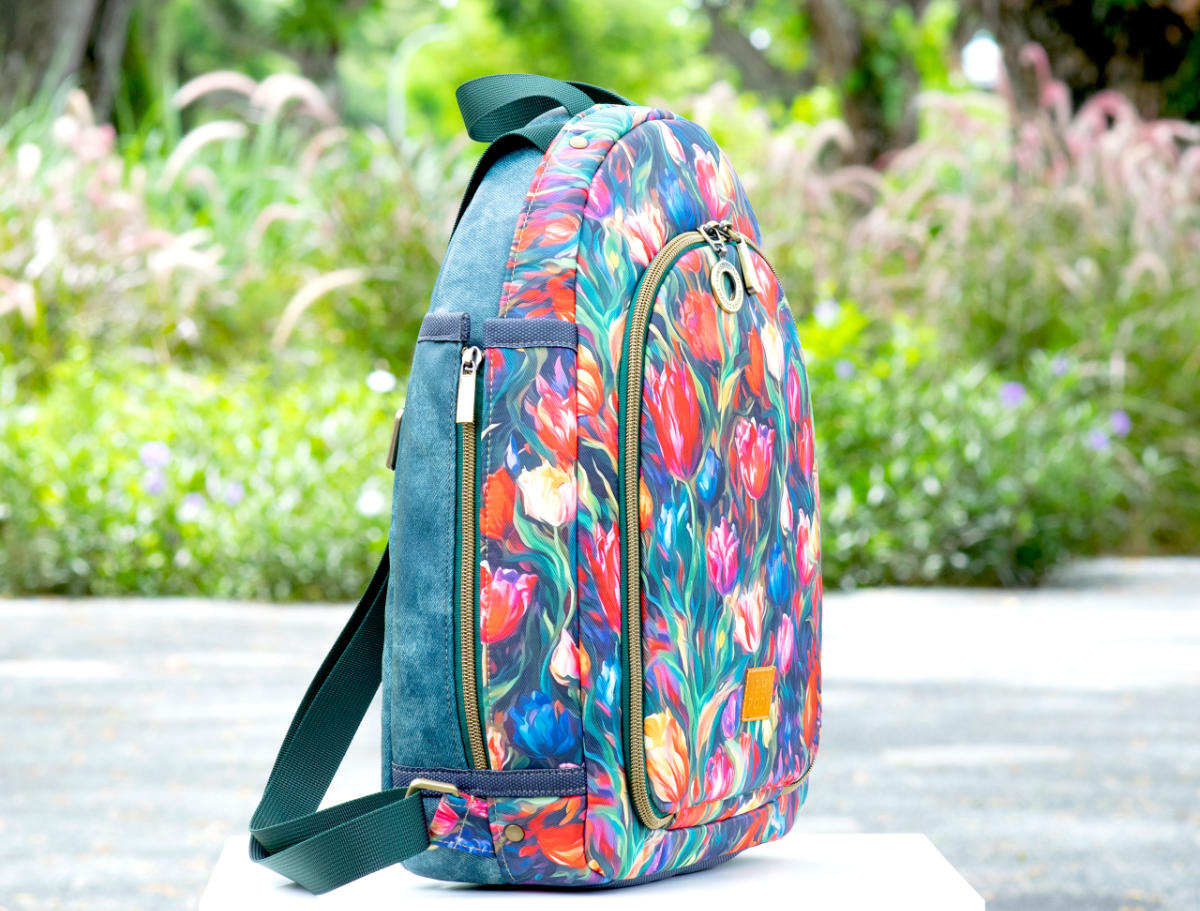
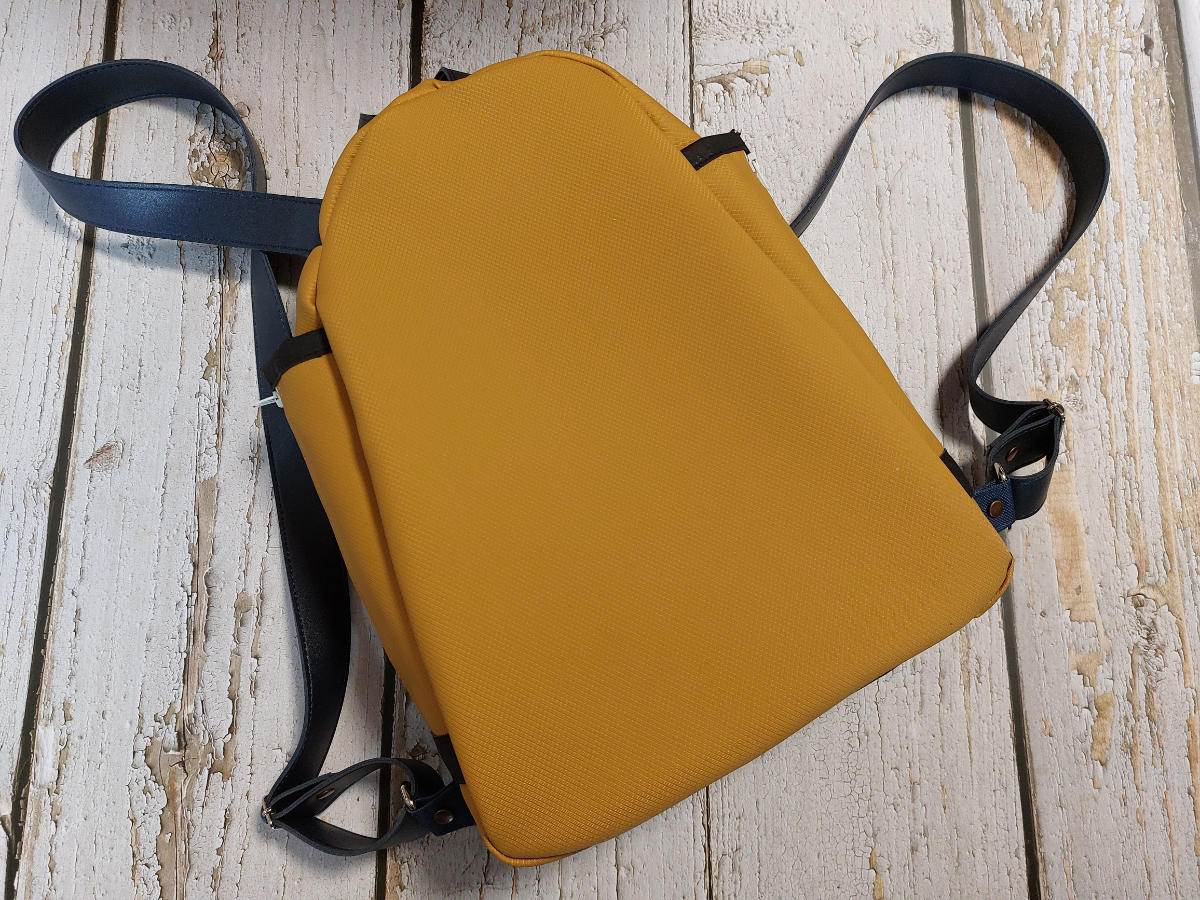
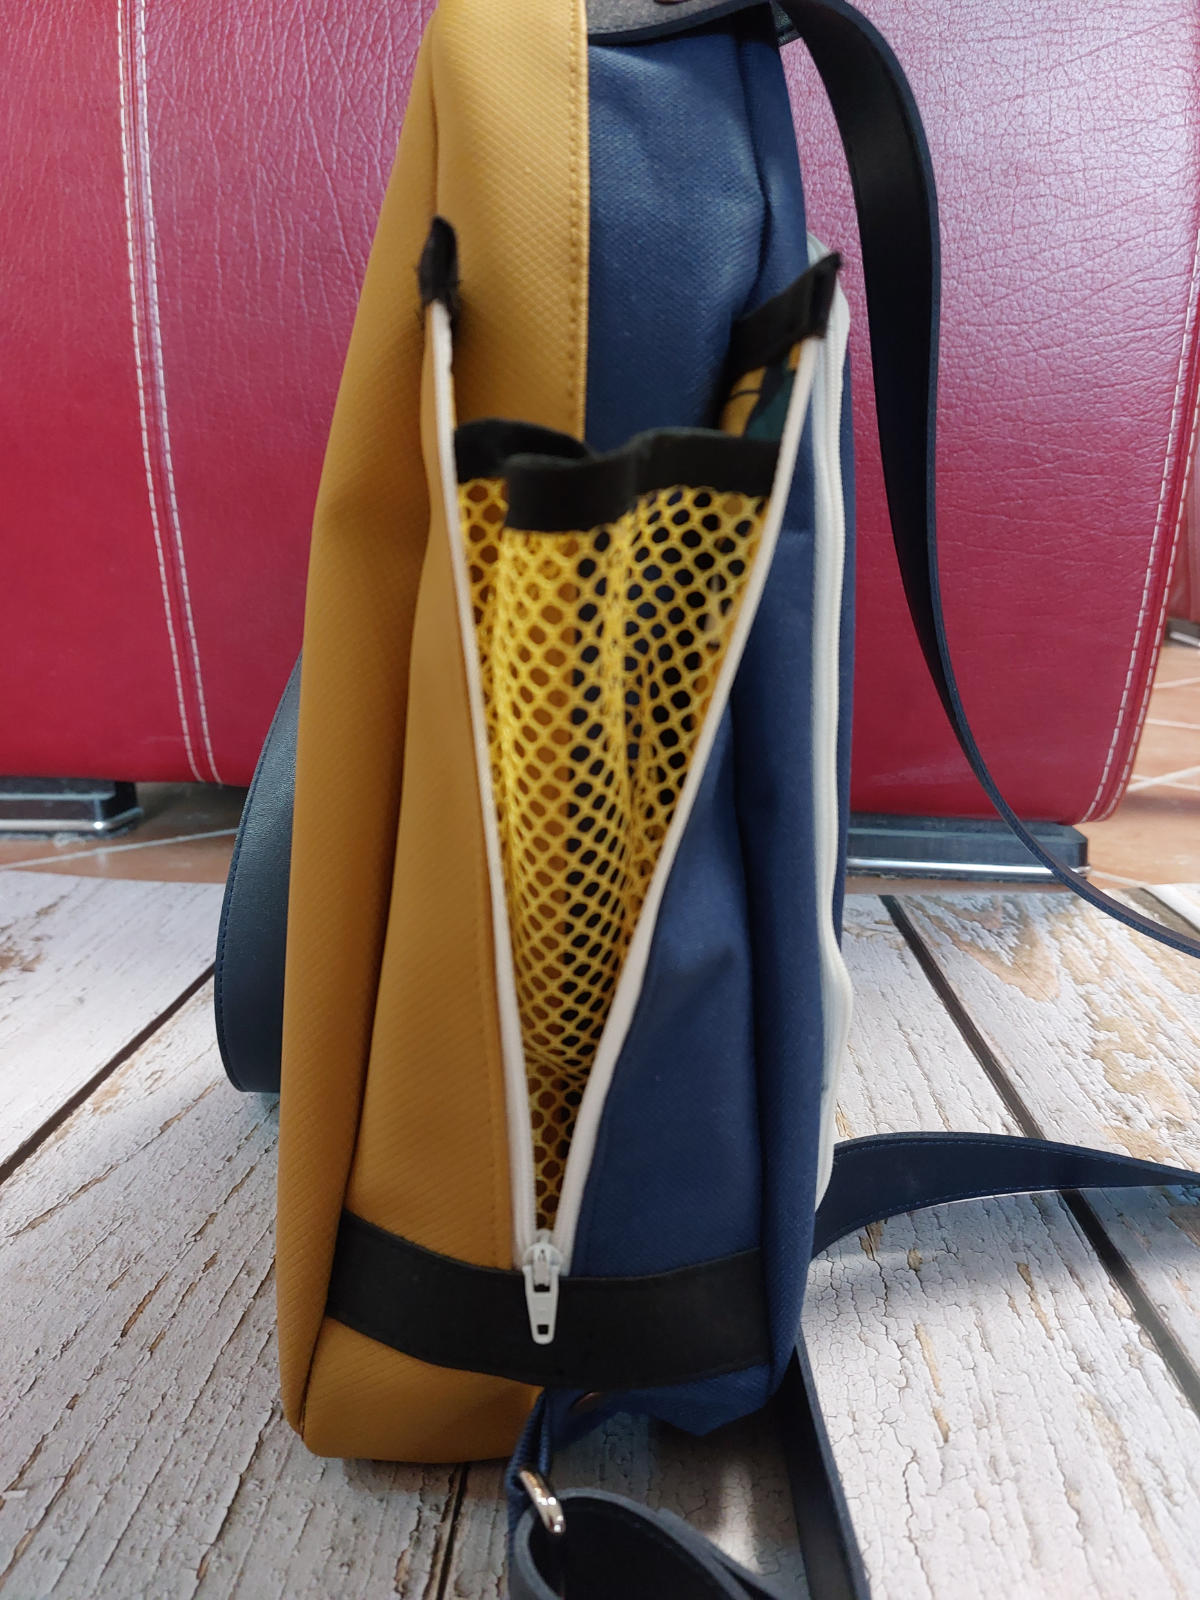
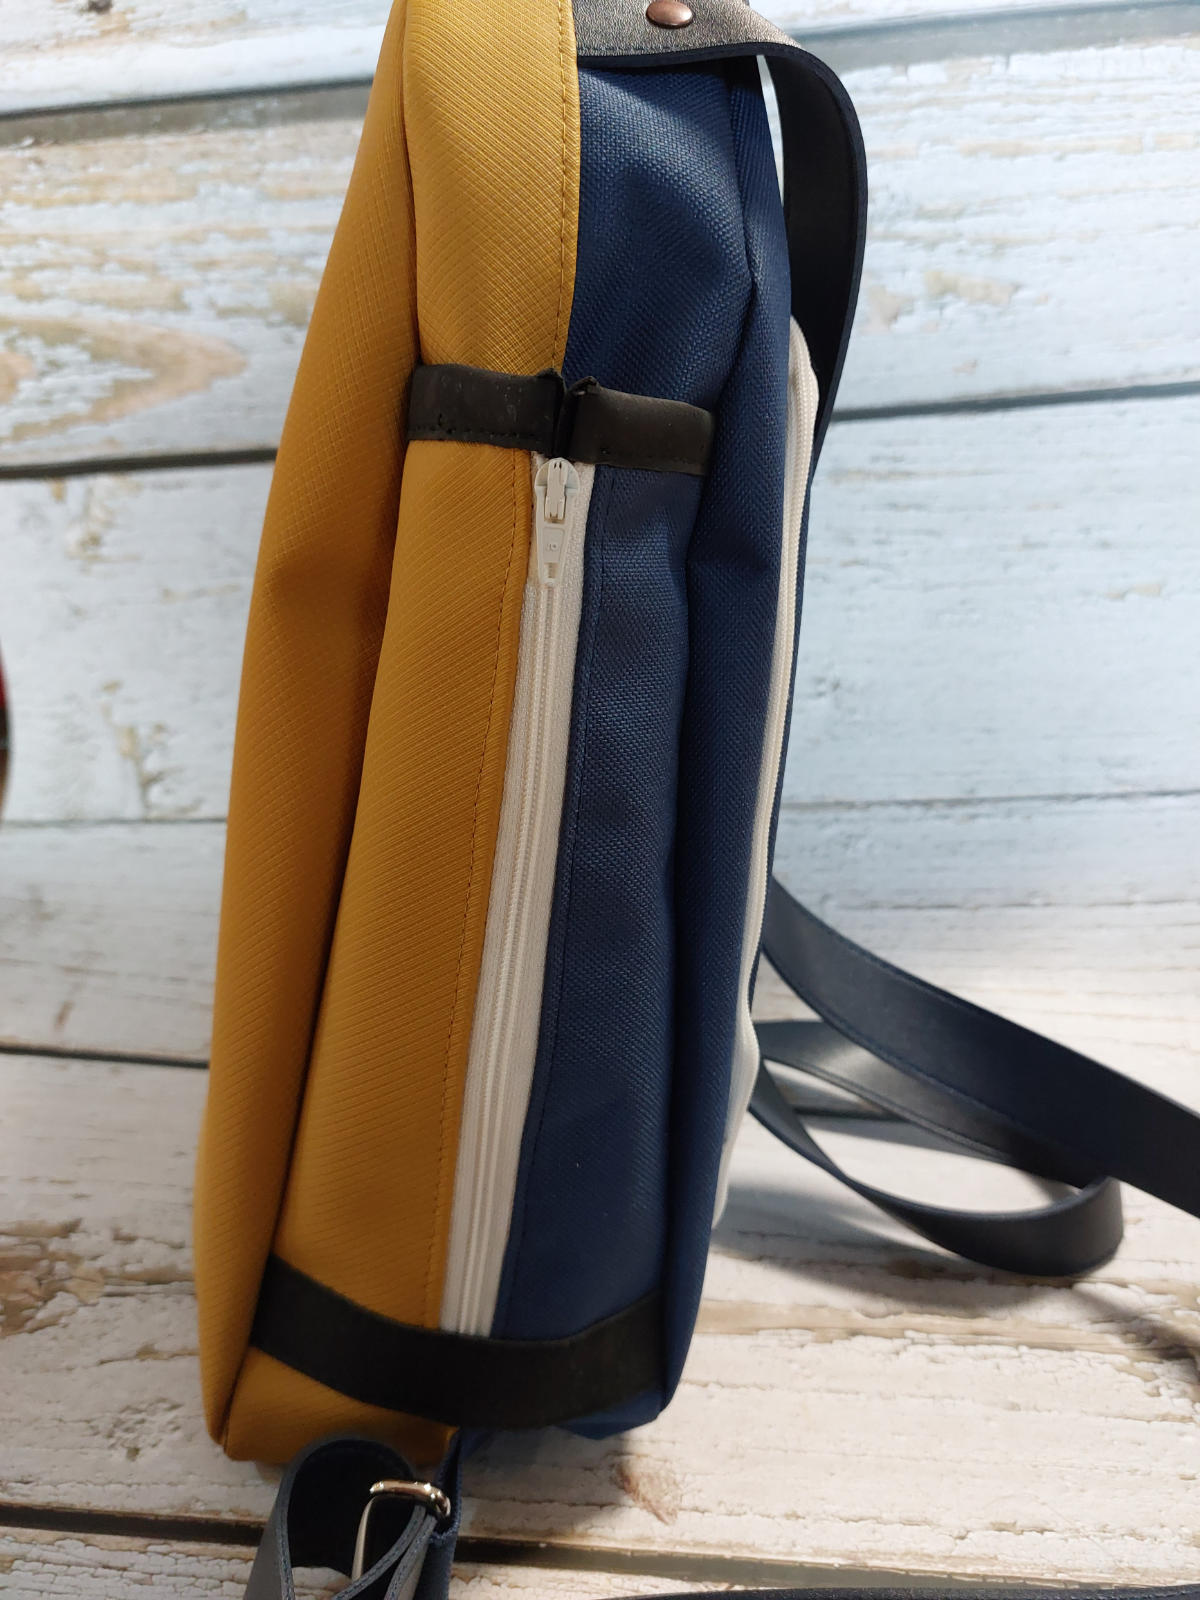
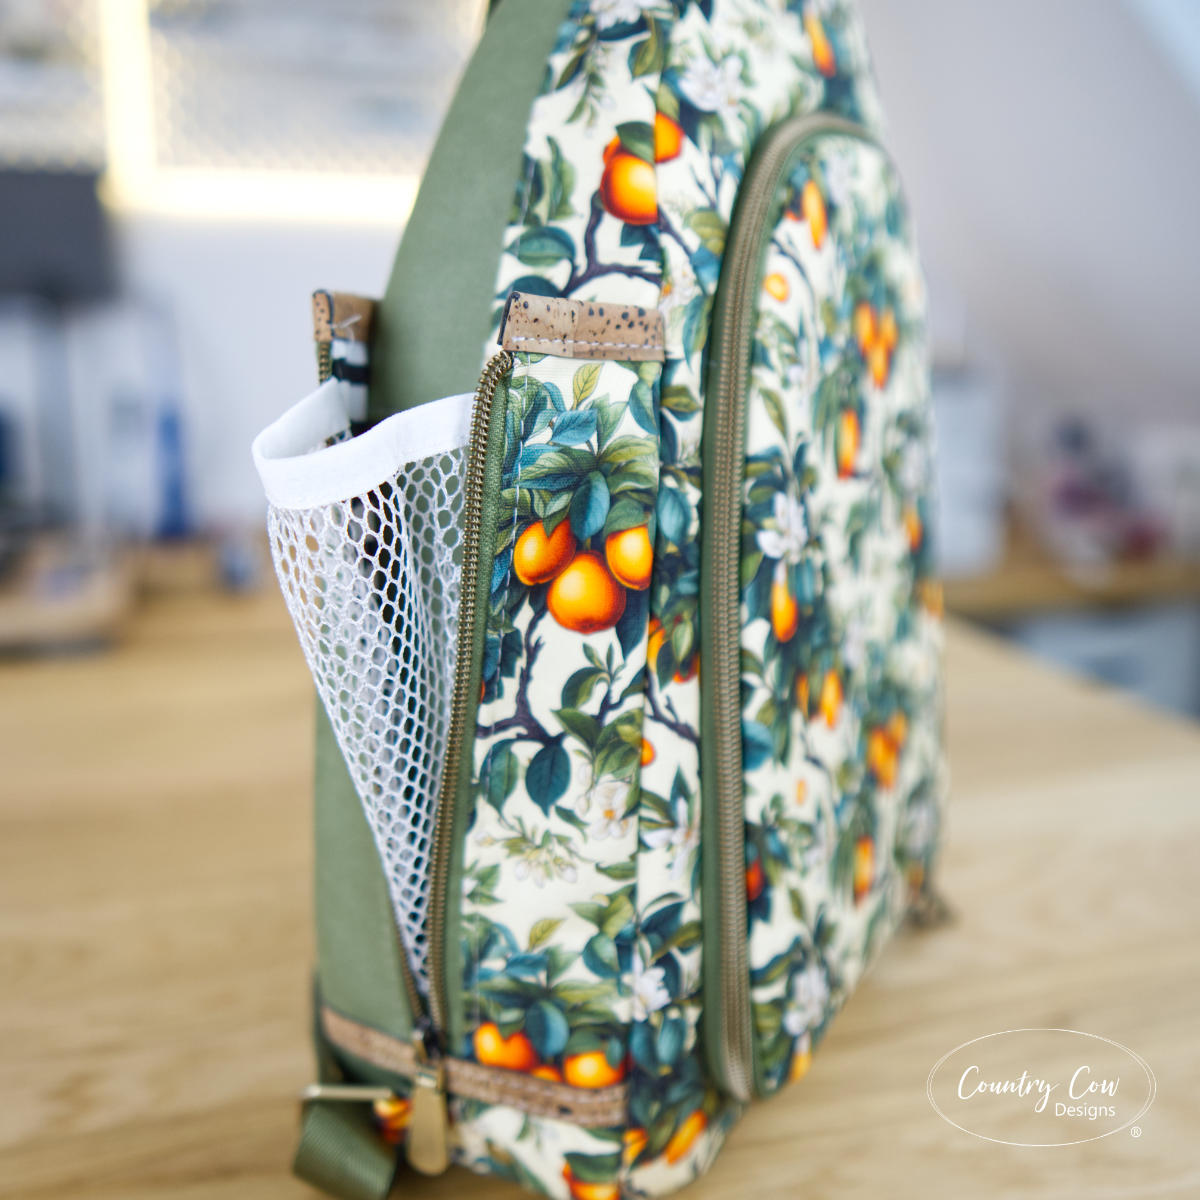
It can be worn either way, and we wanted it to look great however you wear it. So we designed it to be fully reversable, without the need to change or unhook your straps! It’s as simple as putting it on your back, whichever way round you prefer. You’ll notice in the photos that there’s a centre seam running around the gusset. This meant we had to get creative with the side pockets. Adam had the idea of making them expandable with a centre zip. This created a unique look and helped keep the illusion that it’s two completely different bags from the two different sides. The main opening of the bag is also quite unique. It opens up really wide with great access to the internal pockets.
WHAT LEVEL OF SEWING SKILL DO YOU NEED TO MAKE THIS BAG?
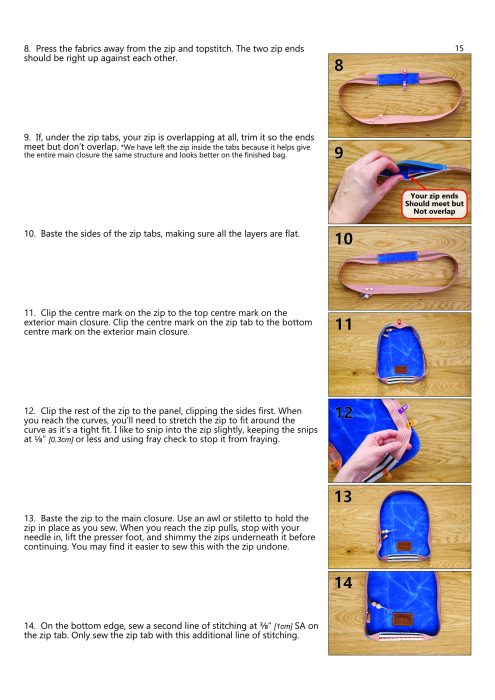
This bag pattern is for advanced sewists. The hardest part of the bag is the main zip opening, as you’re sewing a complete circle, with some tight curves on the bottom edge. To make this a little easier, we’ve designed the zip opening using binding. Although we’ve included instructions to sew the zip on using the standard method, we strongly recommend following the binding method in the pattern as it will make your bag looks it’s very best, and makes it simpler to sew. For the rest of the bag, you’ll need to be prepared to sew curves. We’ve released a full video tutorial to show step-by-step how to make the bag. You can watch the video tutorial before you buy the pattern, so you can see exactly what’s involved. We hope you give it a go and maybe learn some new sewing techniques along the way.
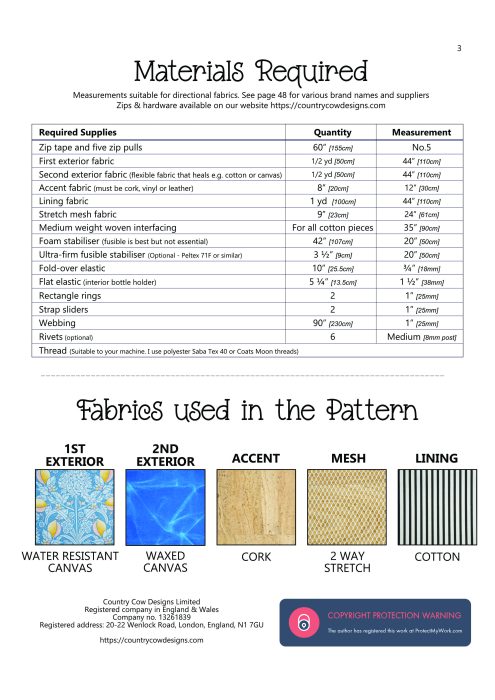
Fabrics & Stabilisers
We’ve got a short preparation video on our YouTube channel. The video is specific to the Two Faced backpack pattern and will help you decide on materials and get ready to sew your bag. Watch the video on the Country Cow Designs YouTube channel.
Cotton is the easiest material to work with when making this bag as it makes the curves easier. We only recommend using vinyl, cork, leather or waxed canvas if you’re a very experienced bag maker and comfortable sewing these materials. Whatever materials you choose, be sure that you consider the limitations of your sewing machine. There are a couple places where the layers will build up.
For a nice sturdy bag, we recommend fusible foam for the stabiliser but you can use something like a fleece if you want a slouchier finish. The pattern instructions include more details on stabilisers in the “additional information” section.
WHAT FEATURES DOES THIS BAG HAVE?
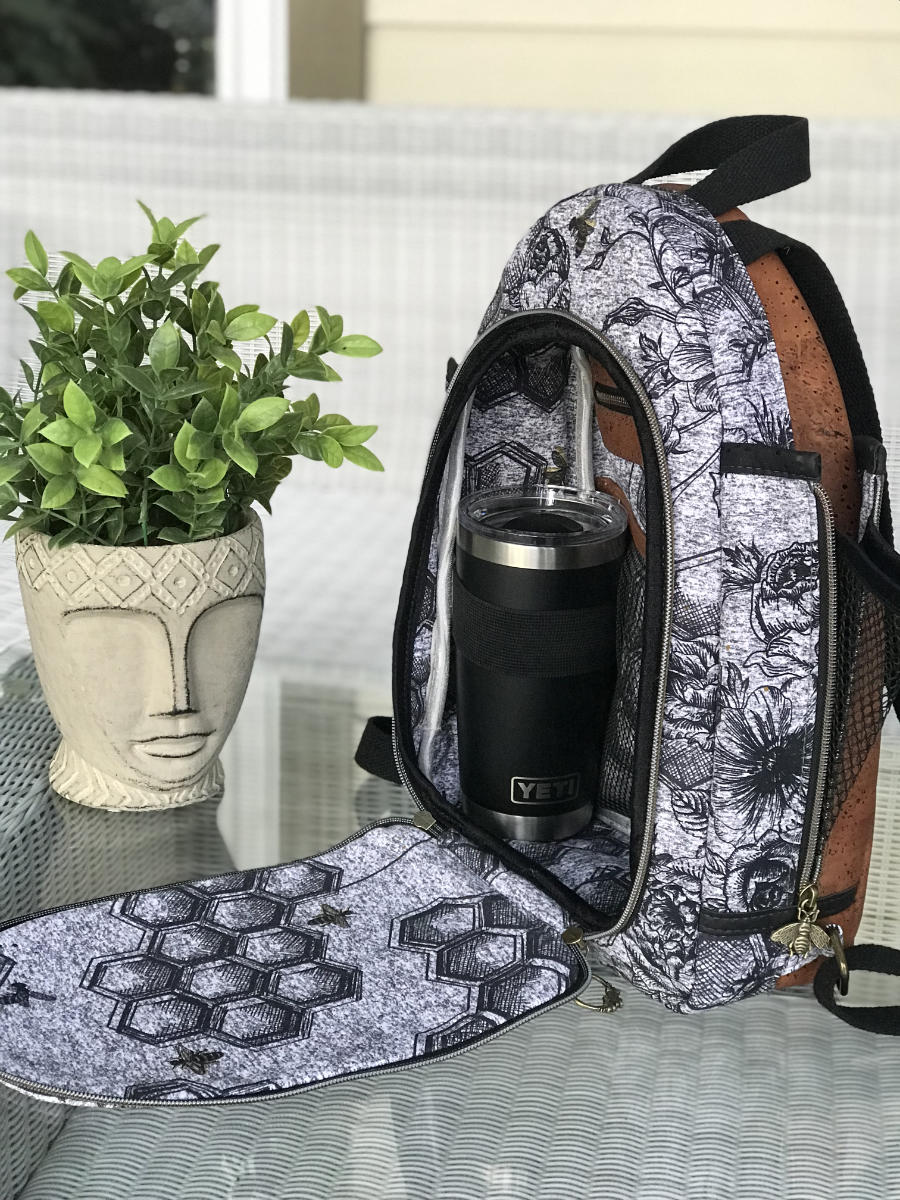
All the pockets for this bag are optional. You can opt to skip any of them without any problems.
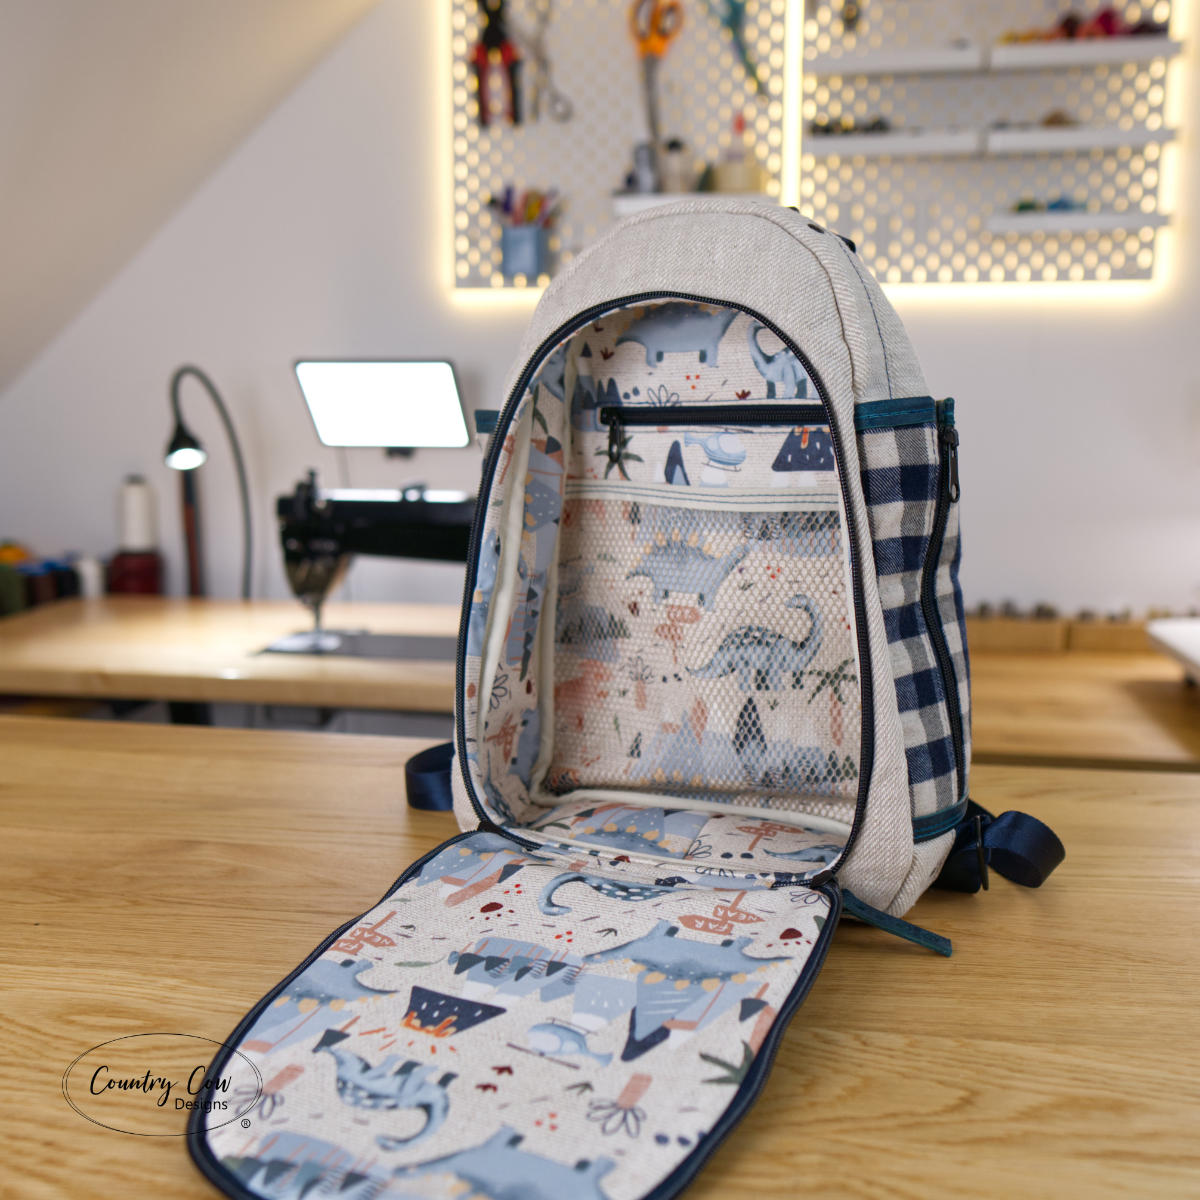
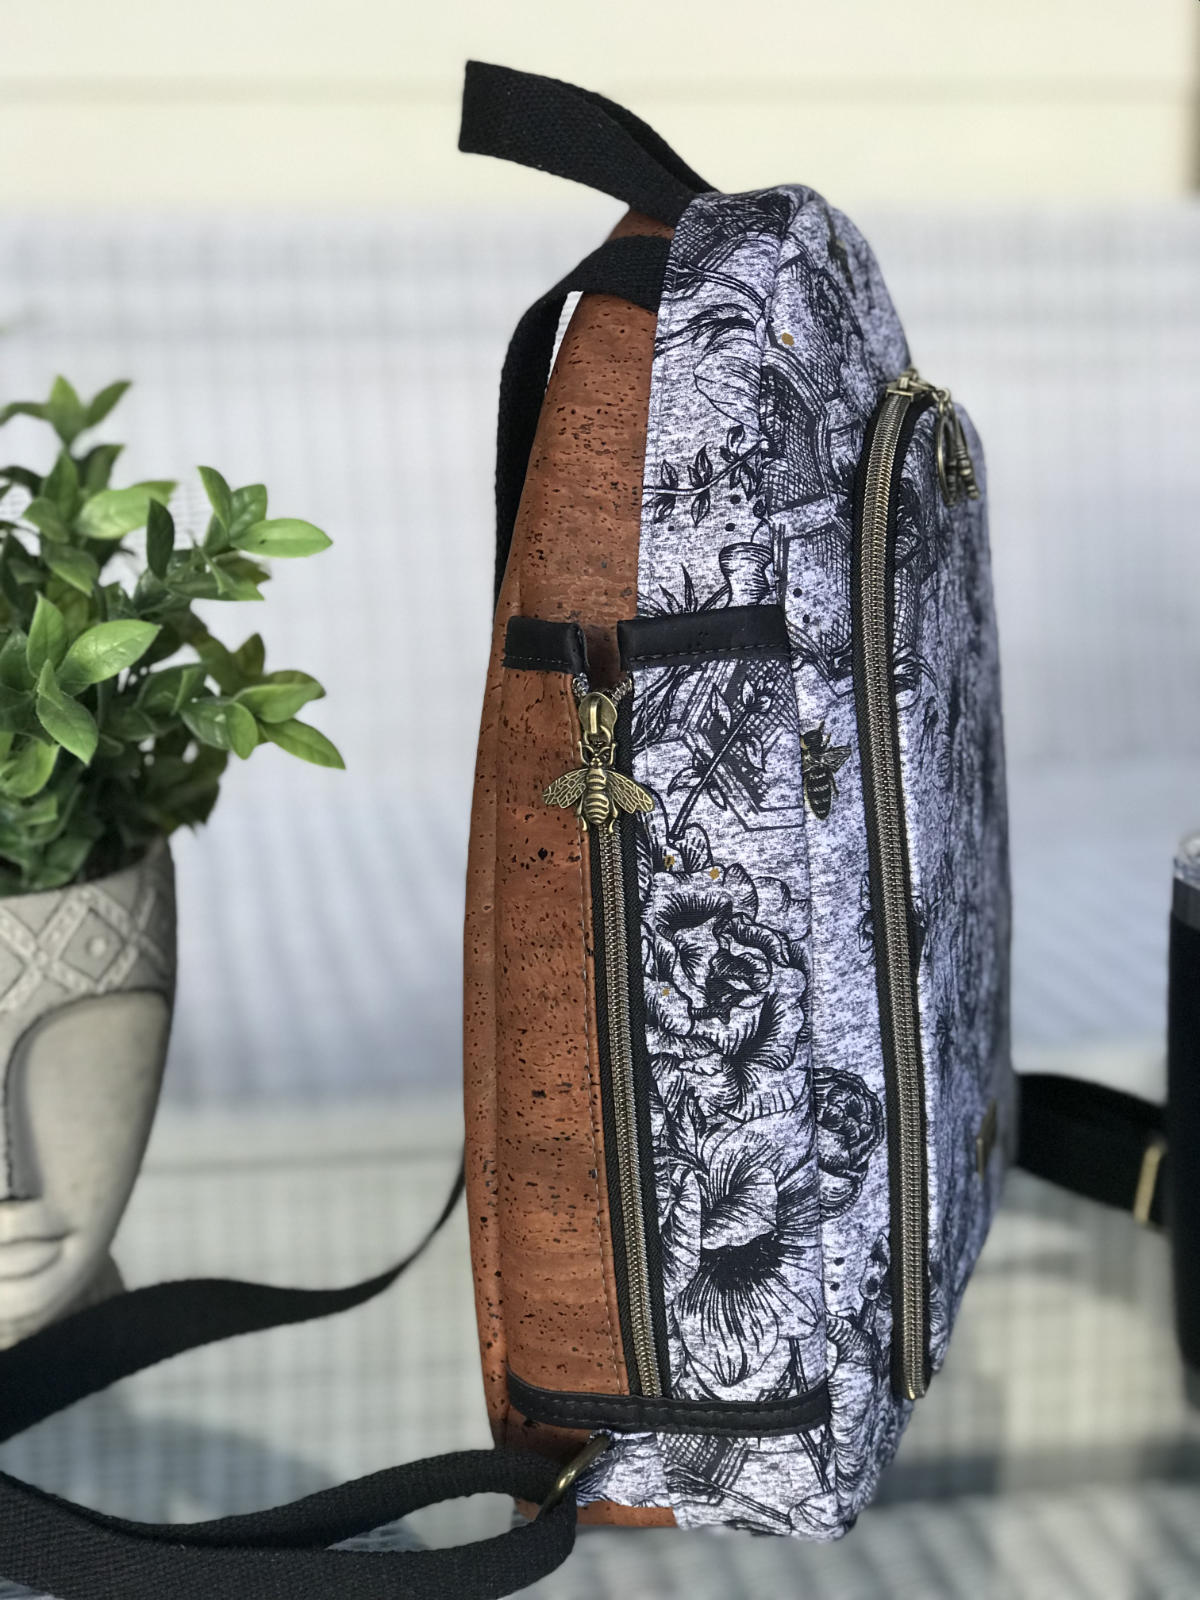
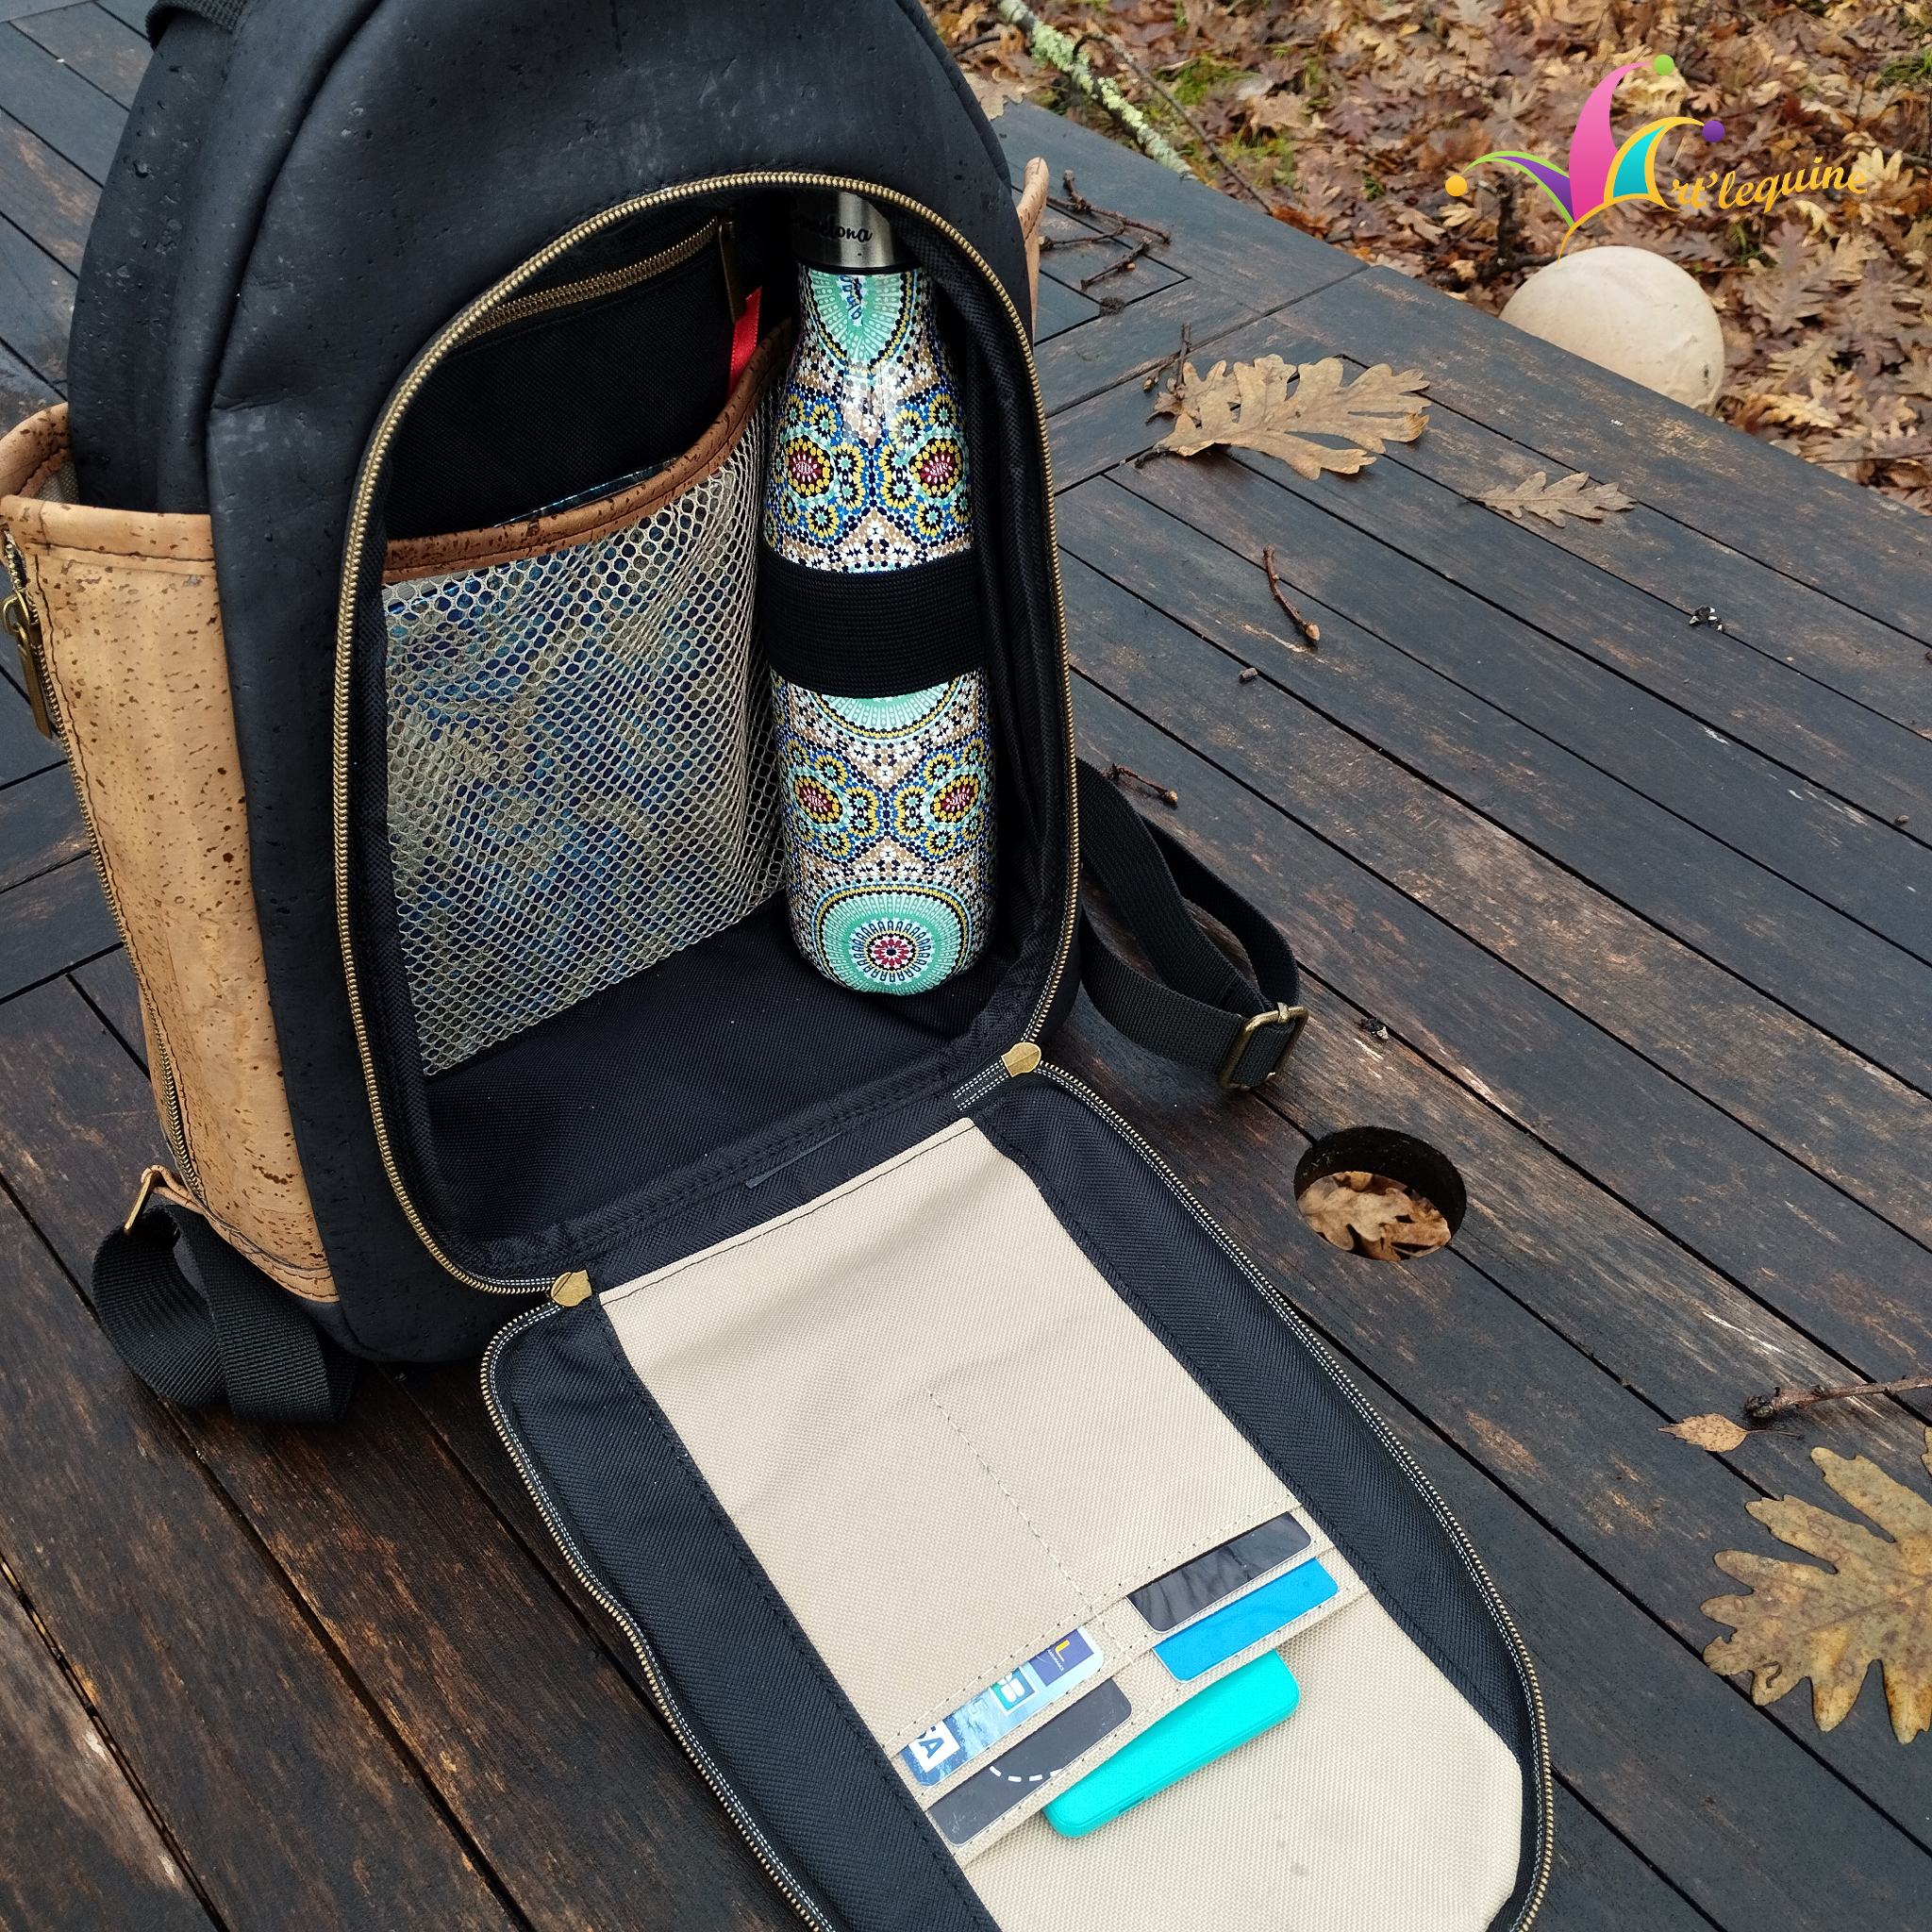
- Two exterior expanding pockets
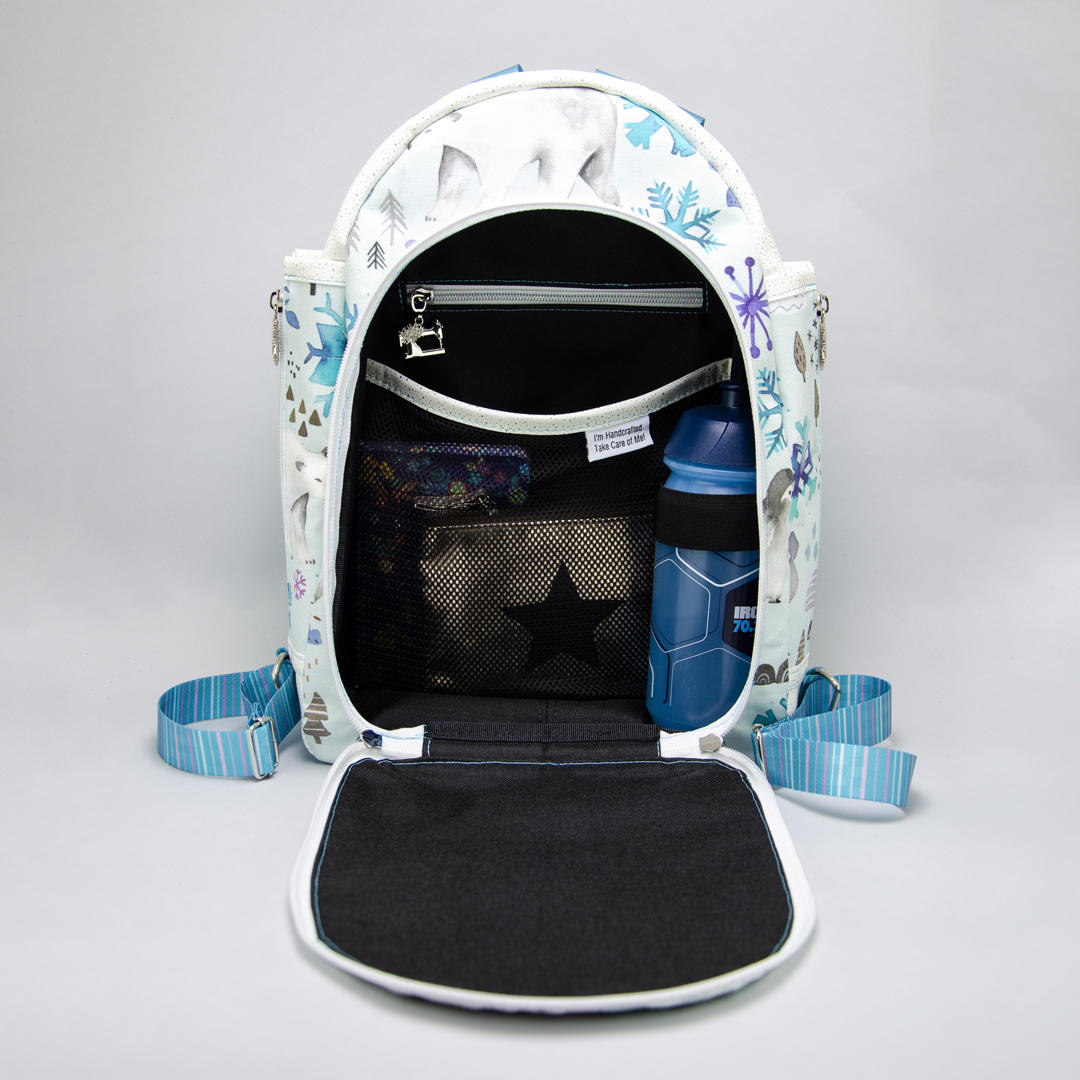
- Interior slip mesh pocket
- Interior zip pocket
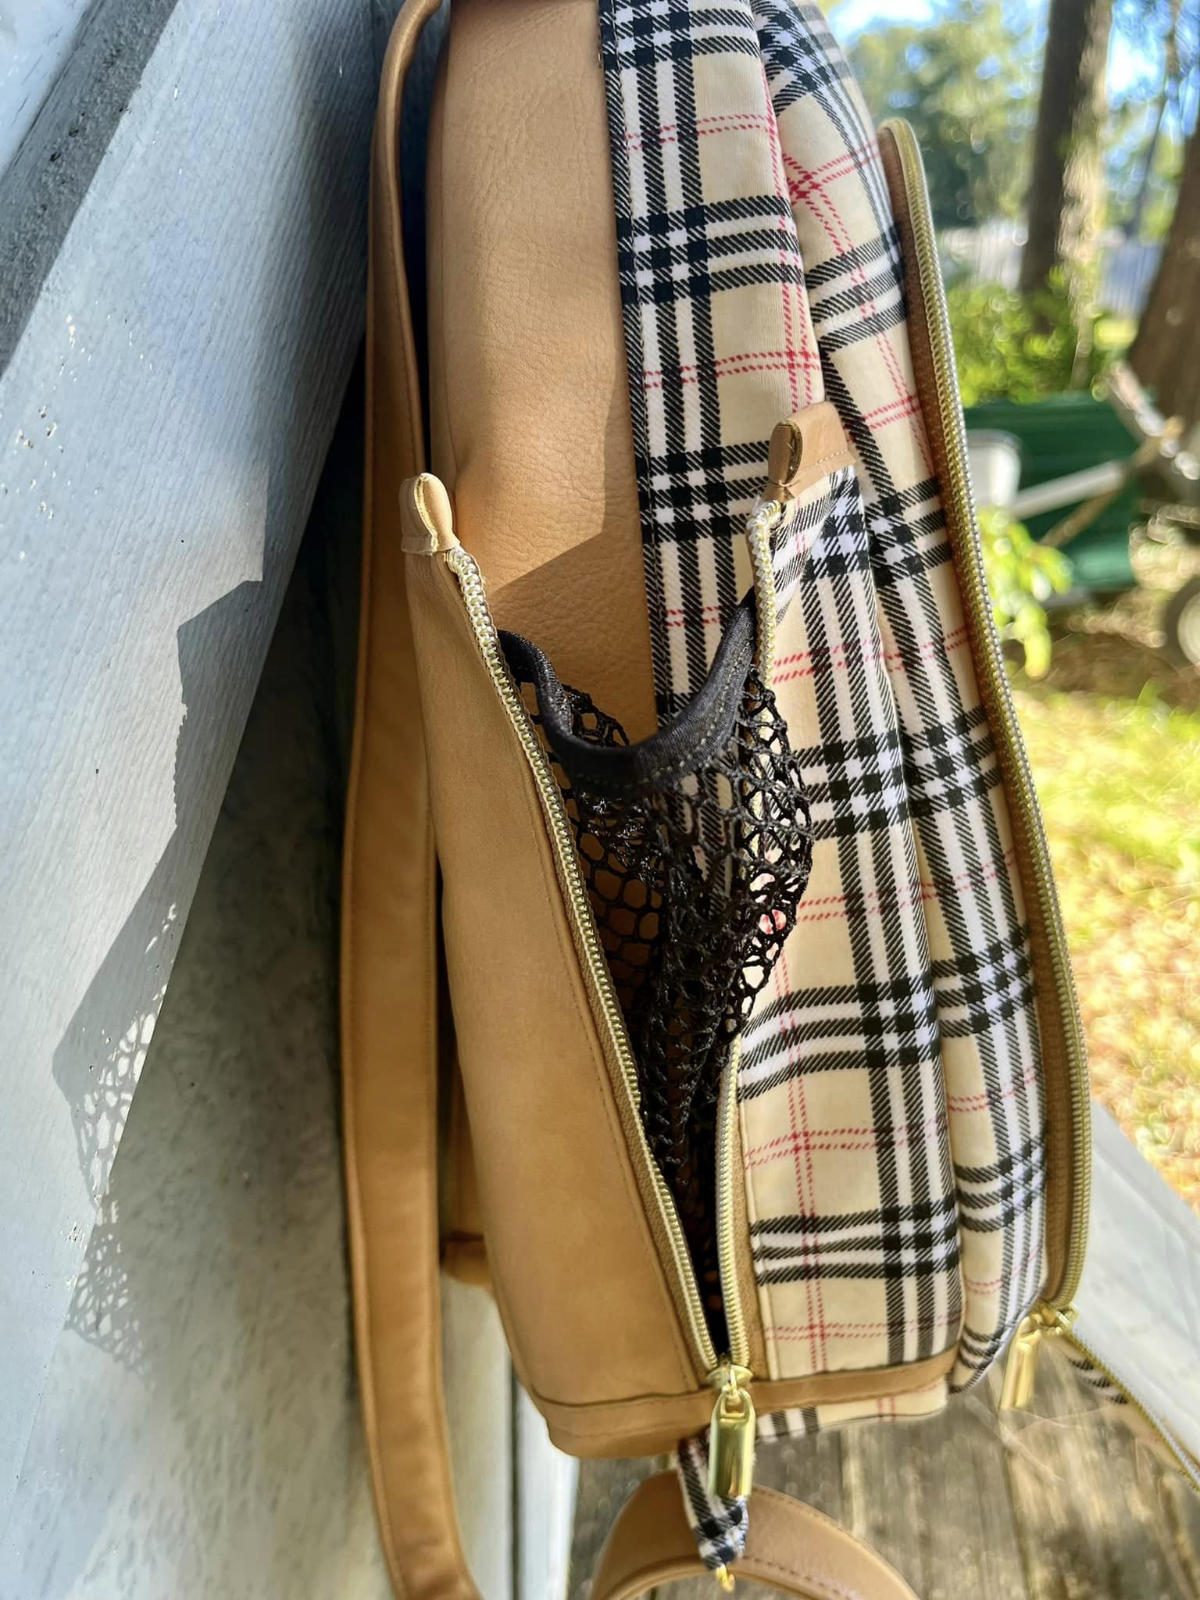
- Interior bottle holder strap
- Interior card slots and slip pocket
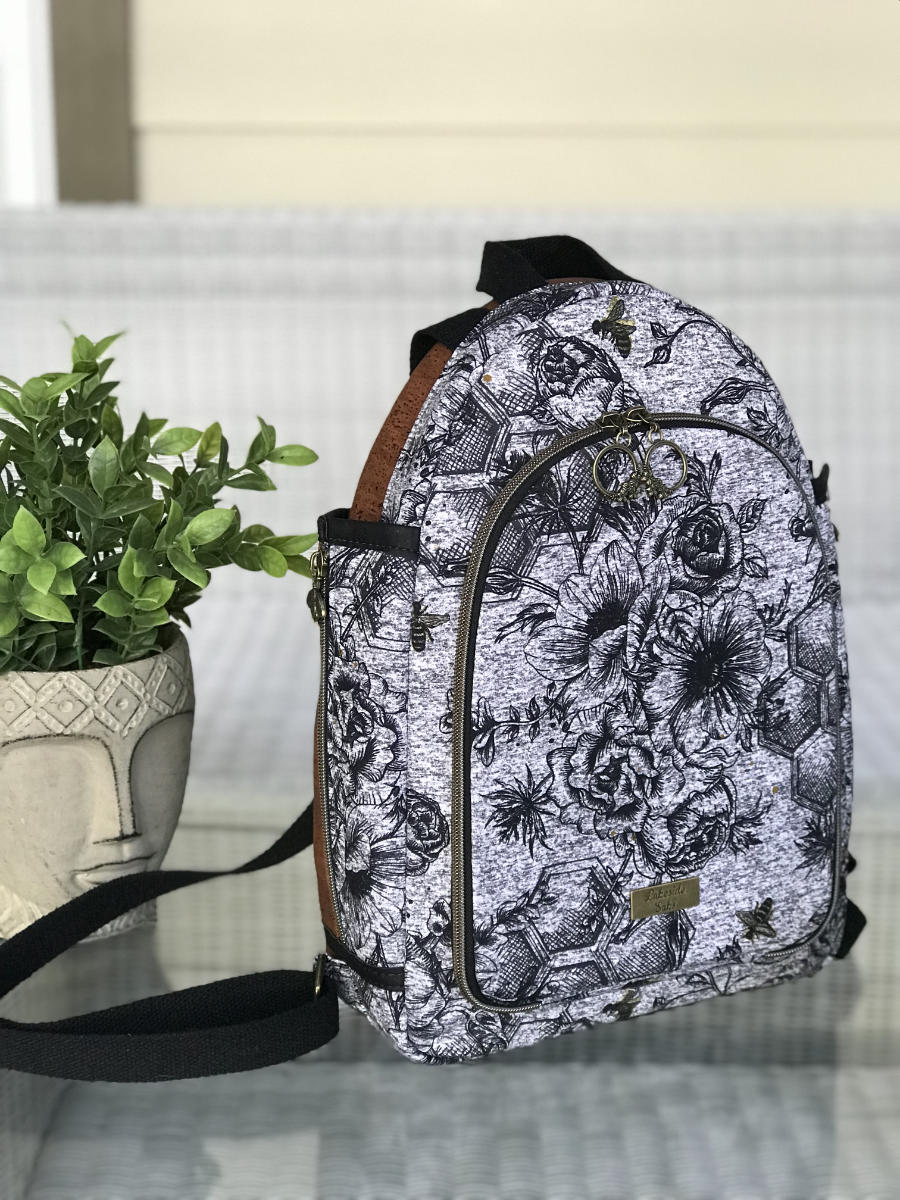
- Reversible
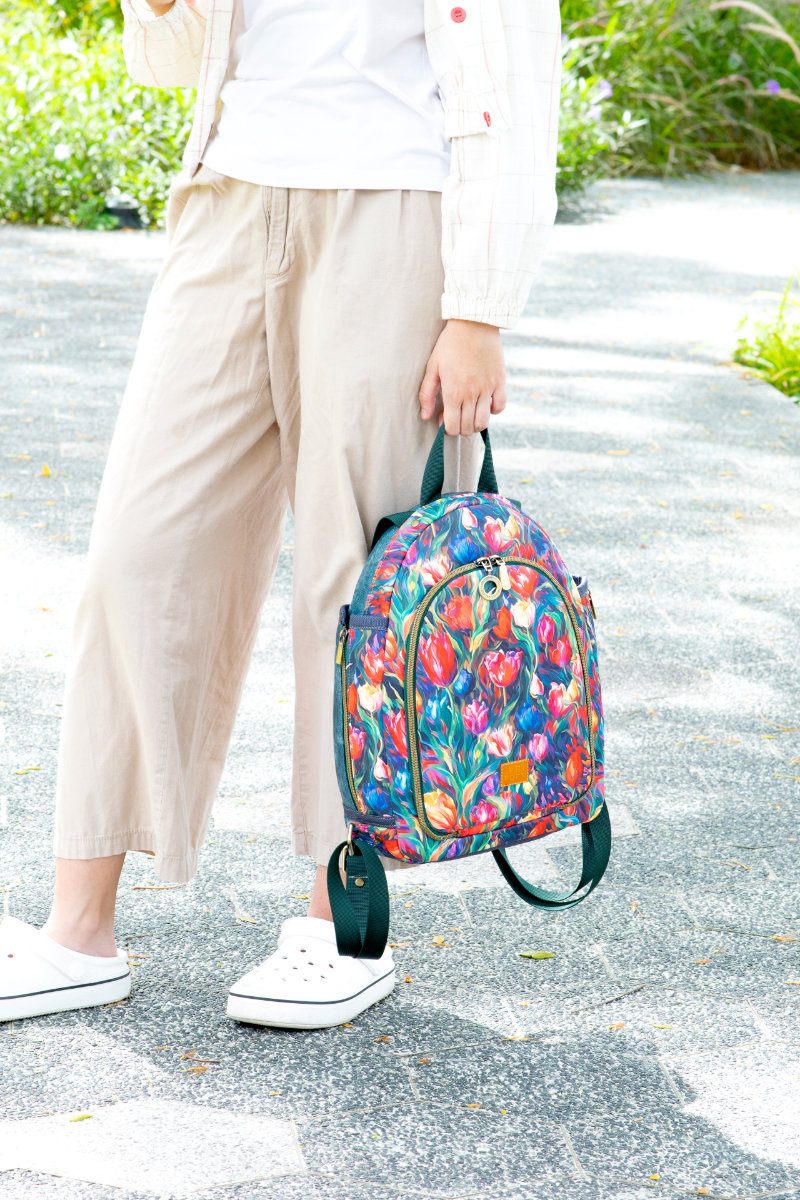
- Grab handle

Other Features
- Imperial and metric measurements
- Provided in both A4 paper and letter paper sizes to ensure a smooth printing experience wherever you live in the world
- A0 pattern pieces if you prefer to use a projector or get your pattern pieces printed by a print shop
- SVG files for those using cutting machines such as Cricut or Cameo
- Available in English or French
We’re confident you’re going to love this pattern and pick up some new techniques to use in your future makes.
Grab a copy of the pattern from Friday 5th January. Leave a comment below to let us know what you like about this bag pattern, or anything you’d like us to consider changing/adding for future patterns. We hope you enjoy making it as much as we have!
Jo & Adam
Grab your copy of the pattern here
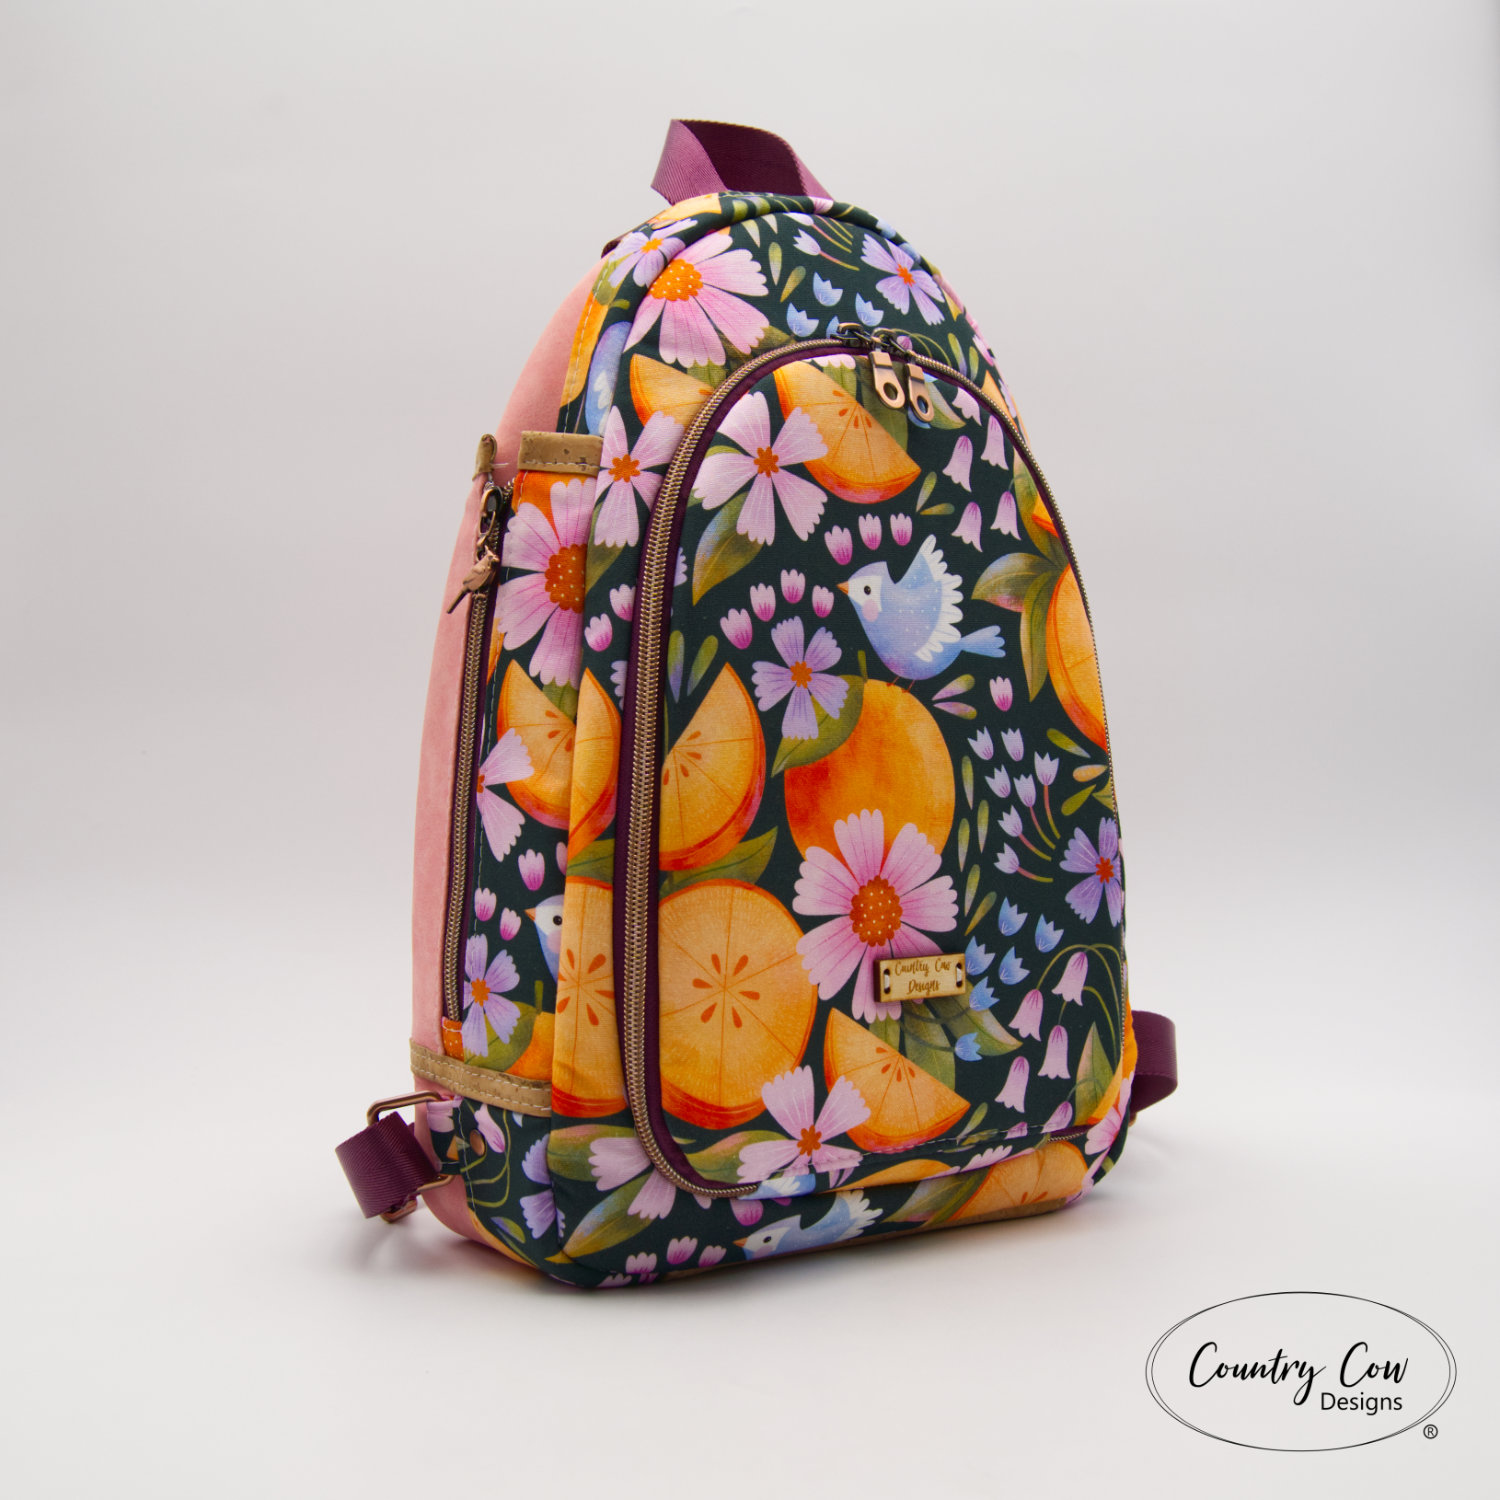
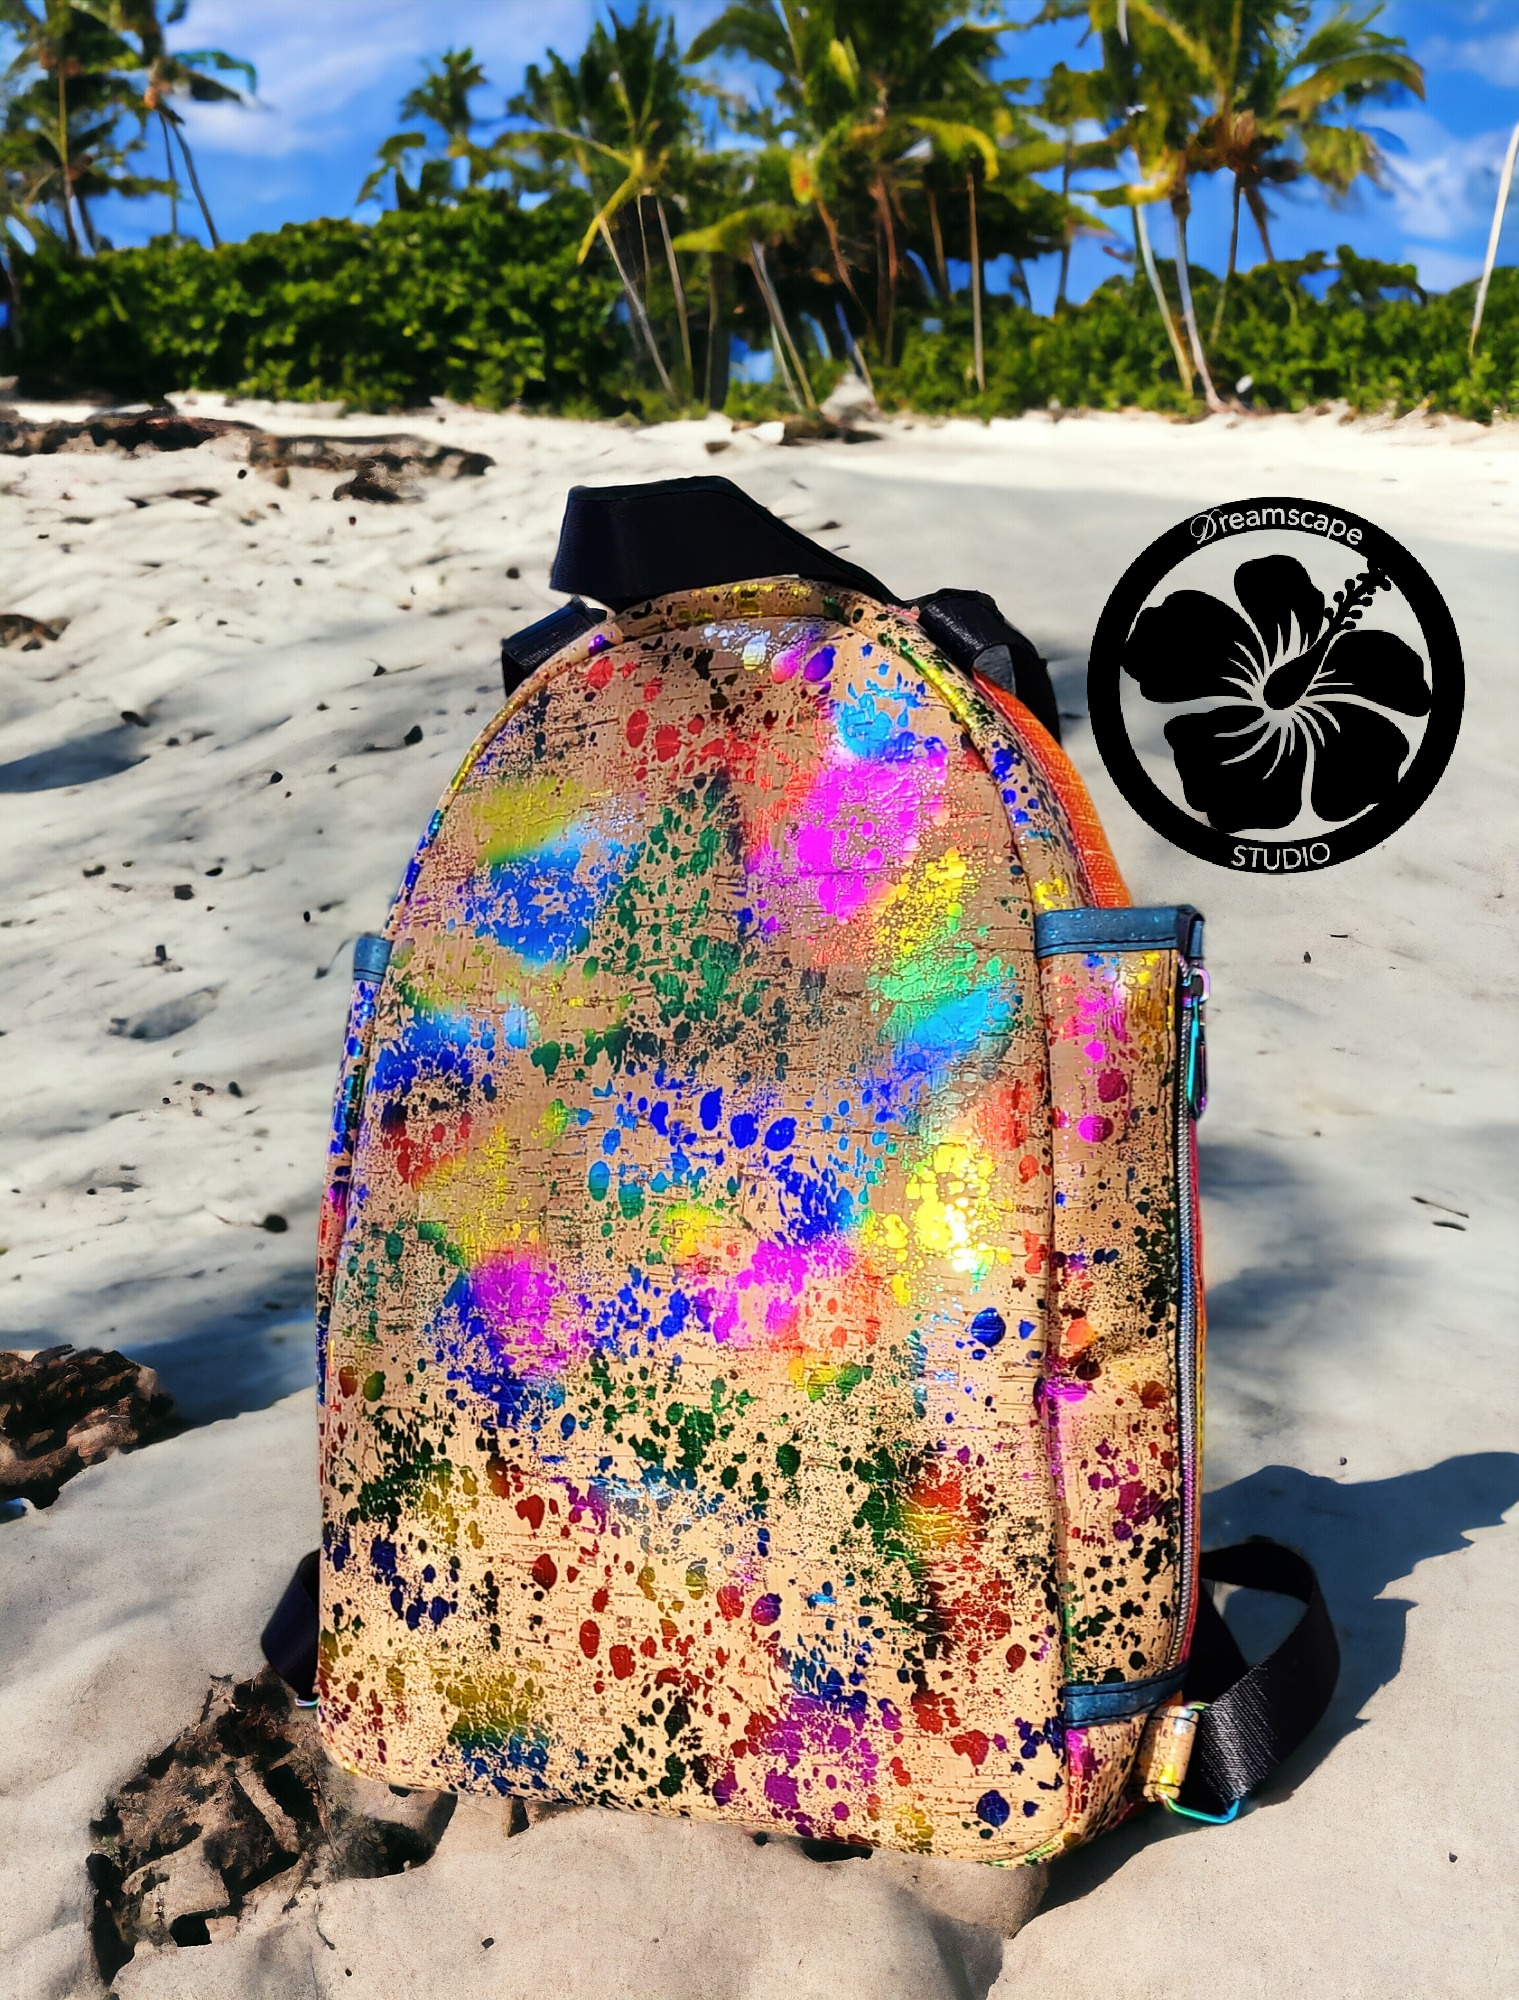
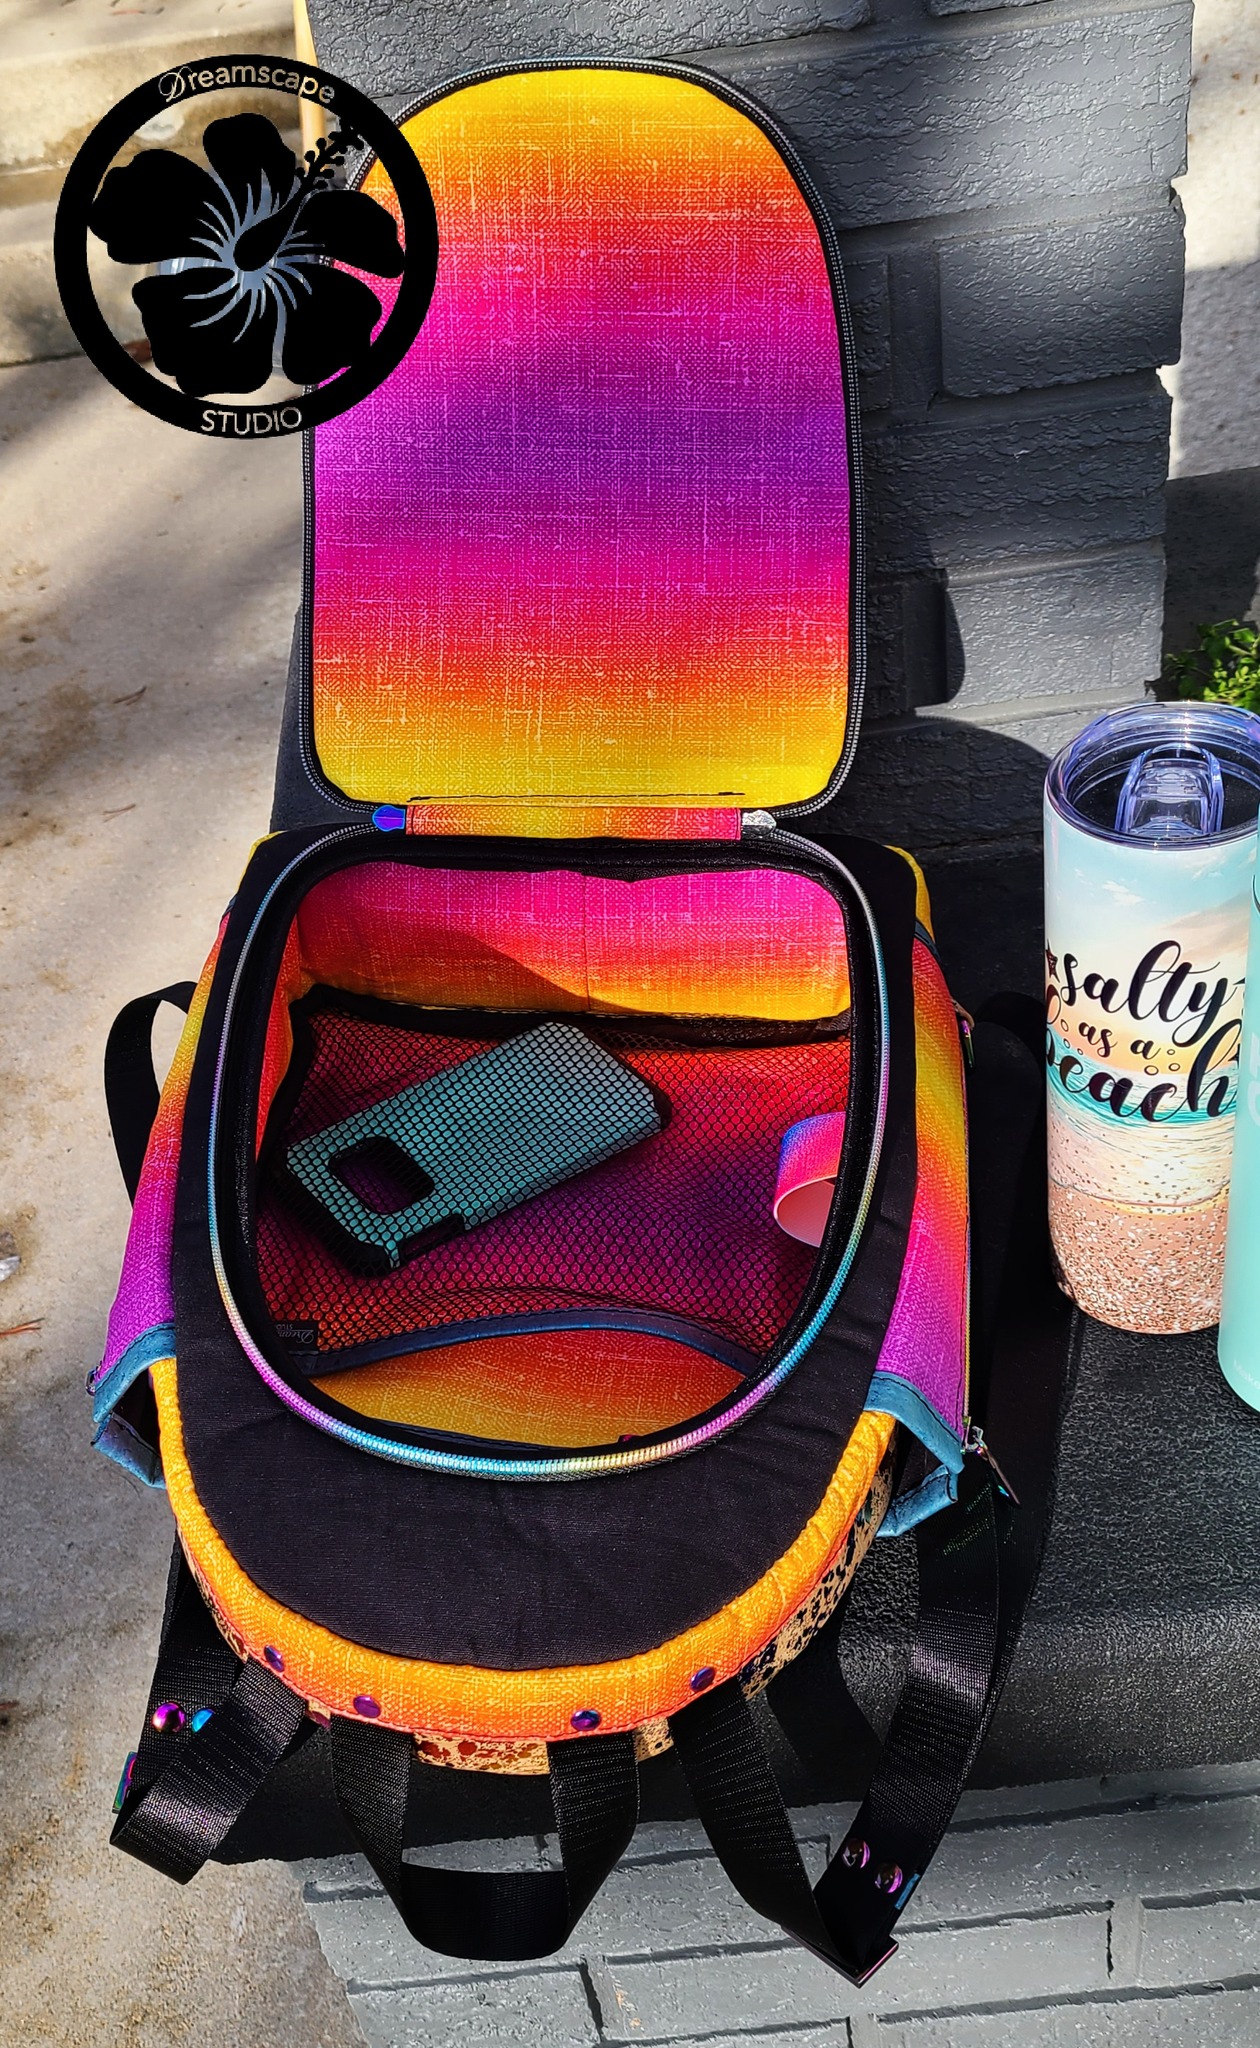
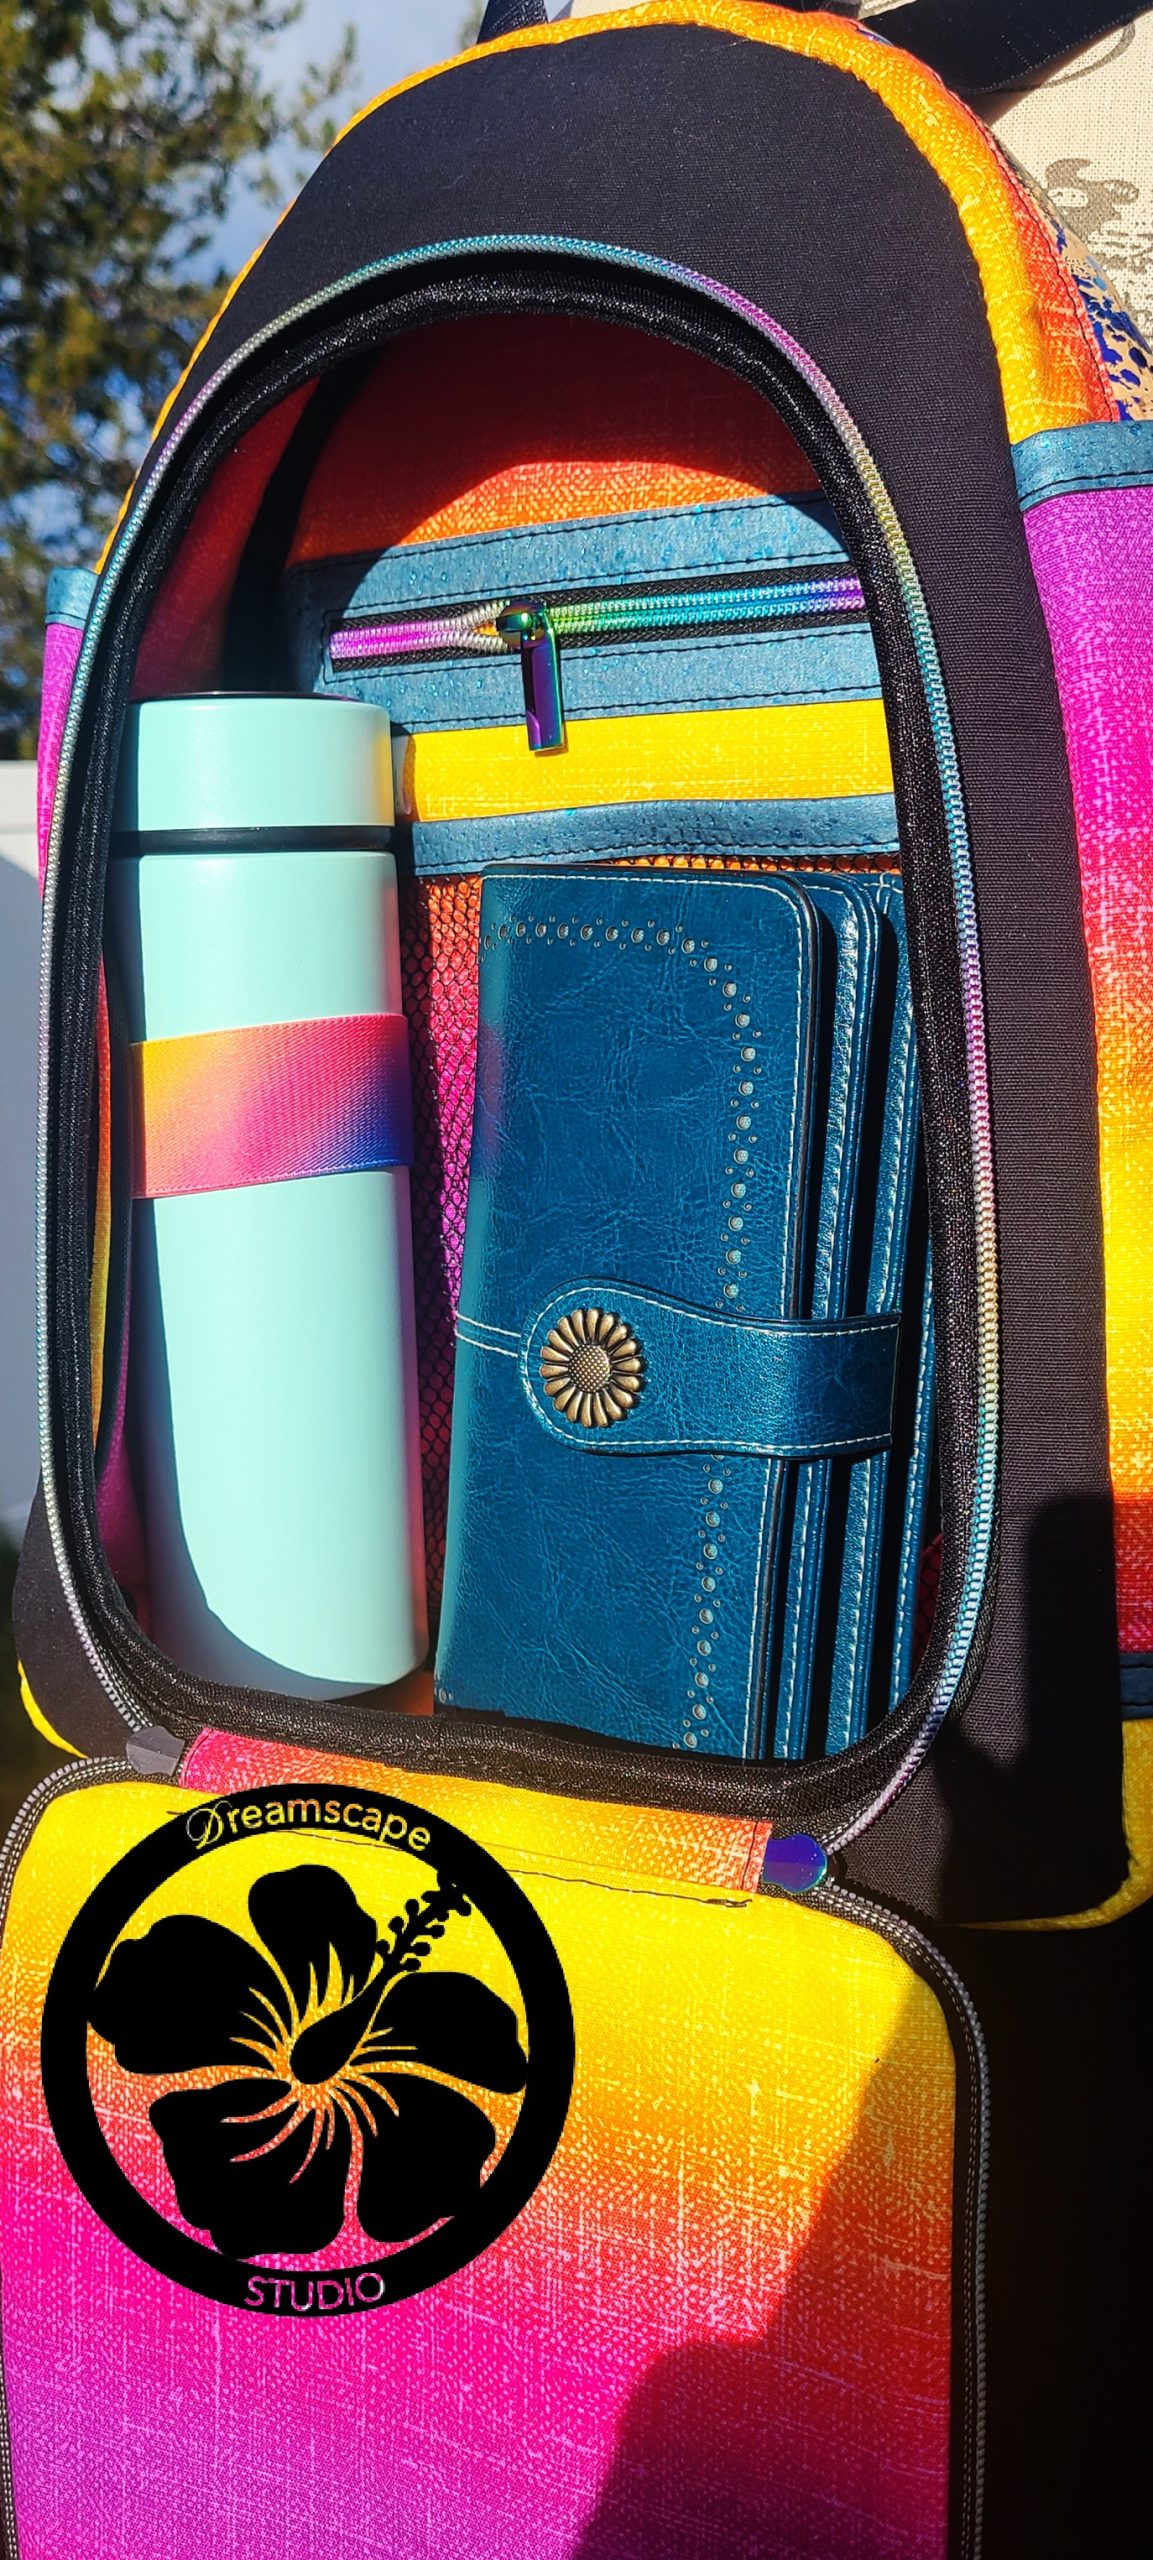
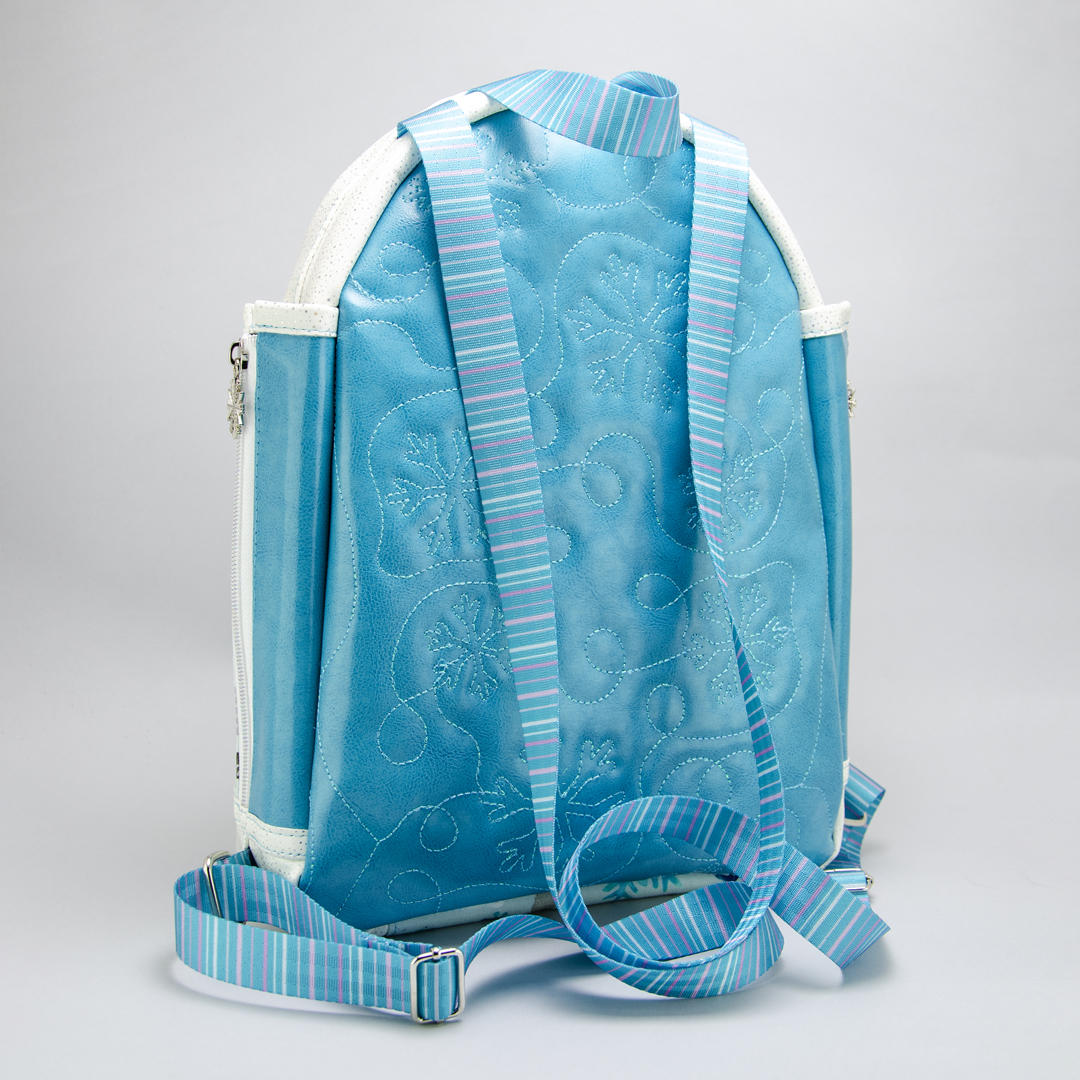
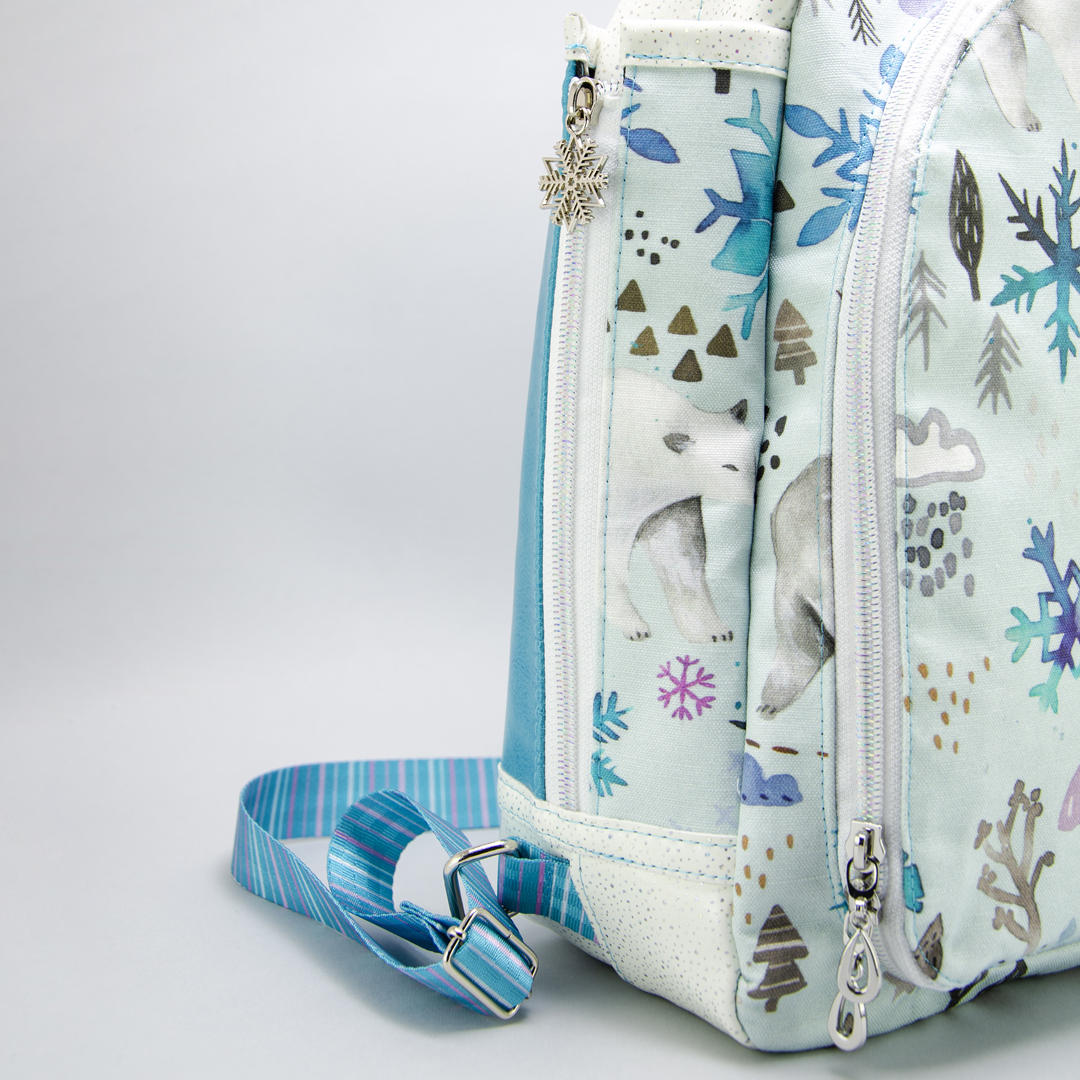
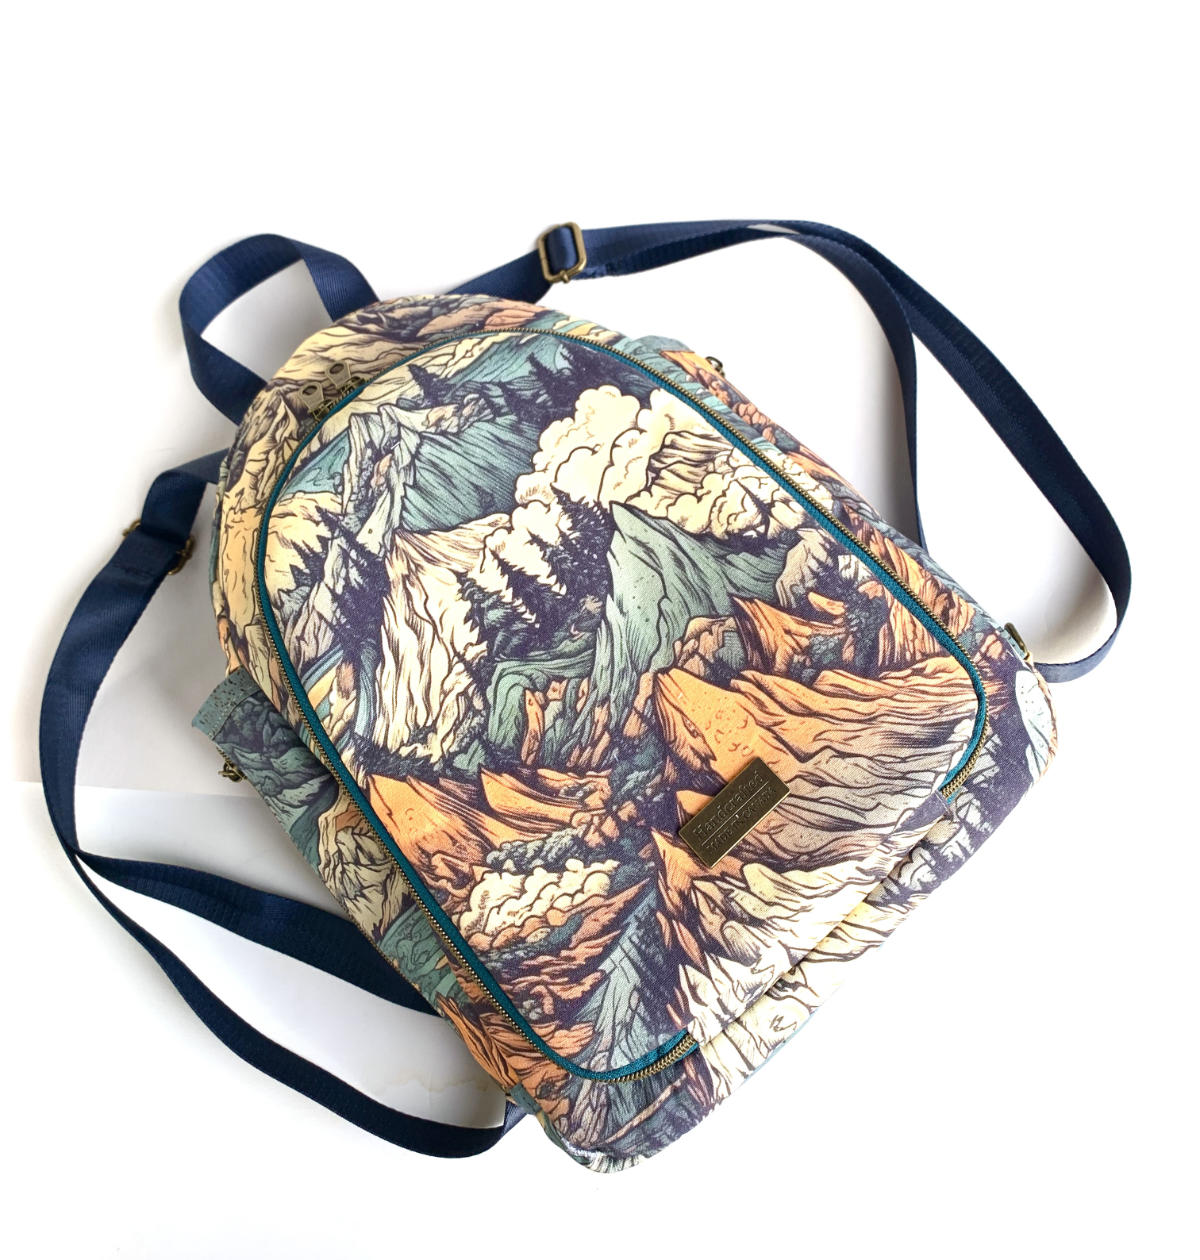
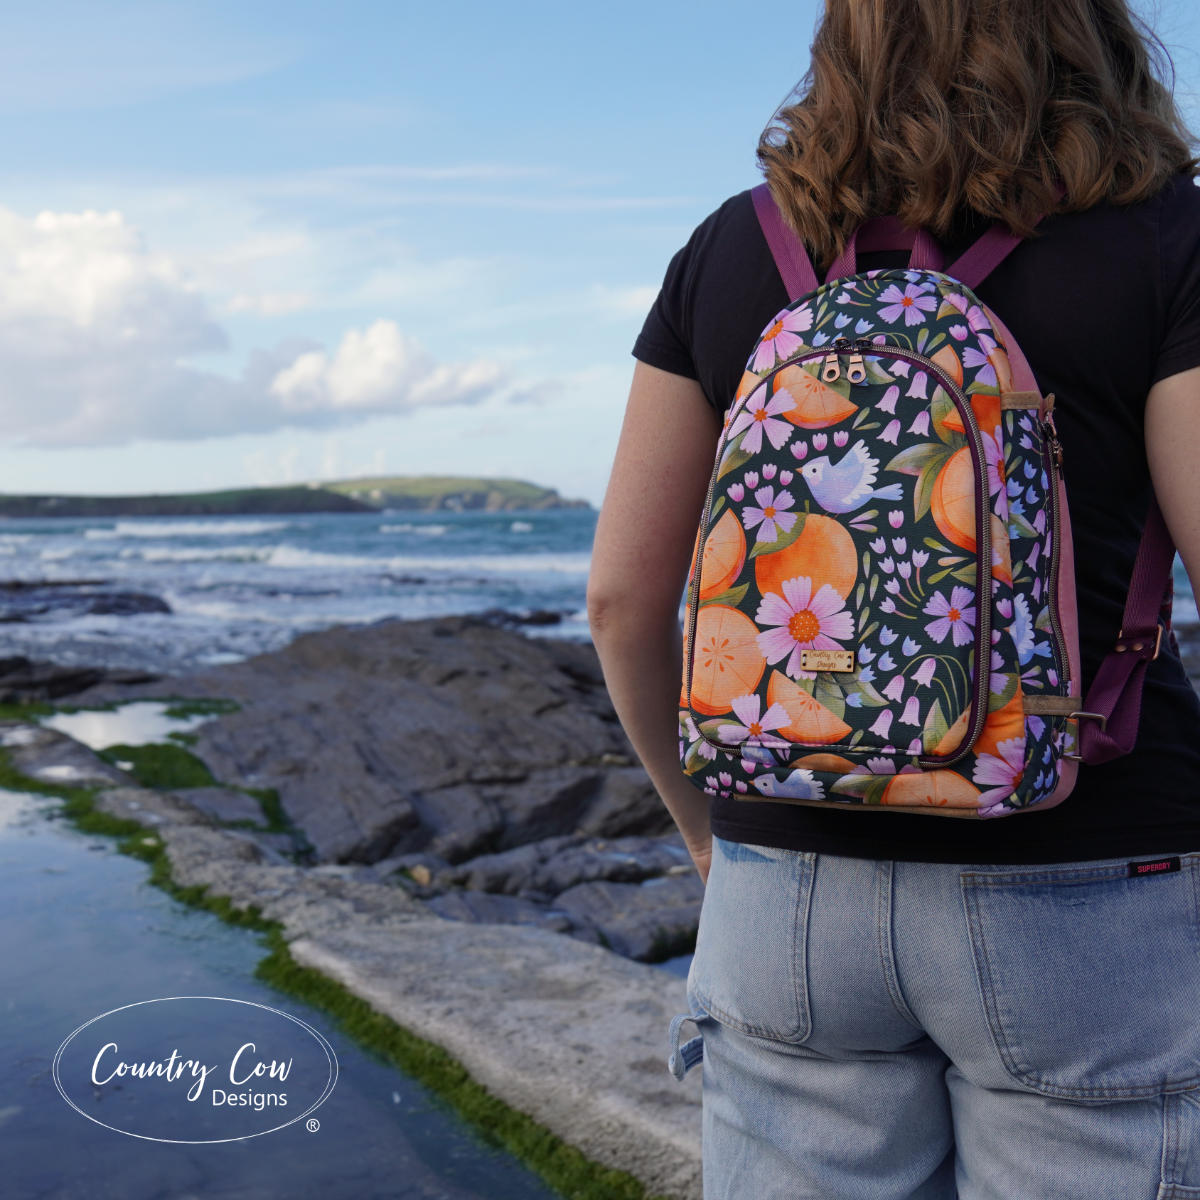
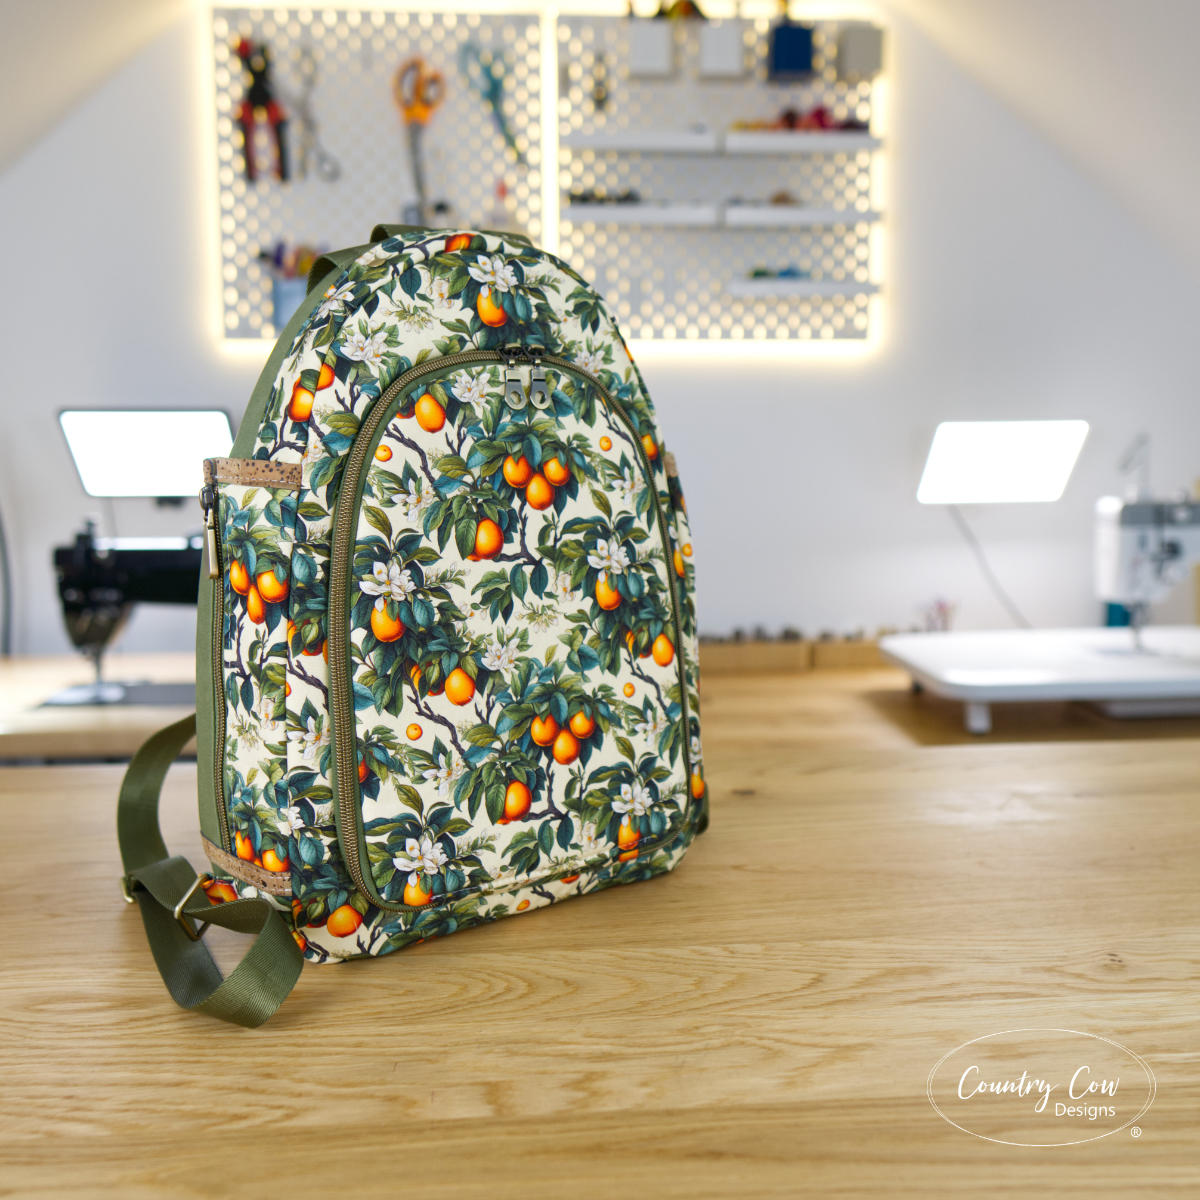
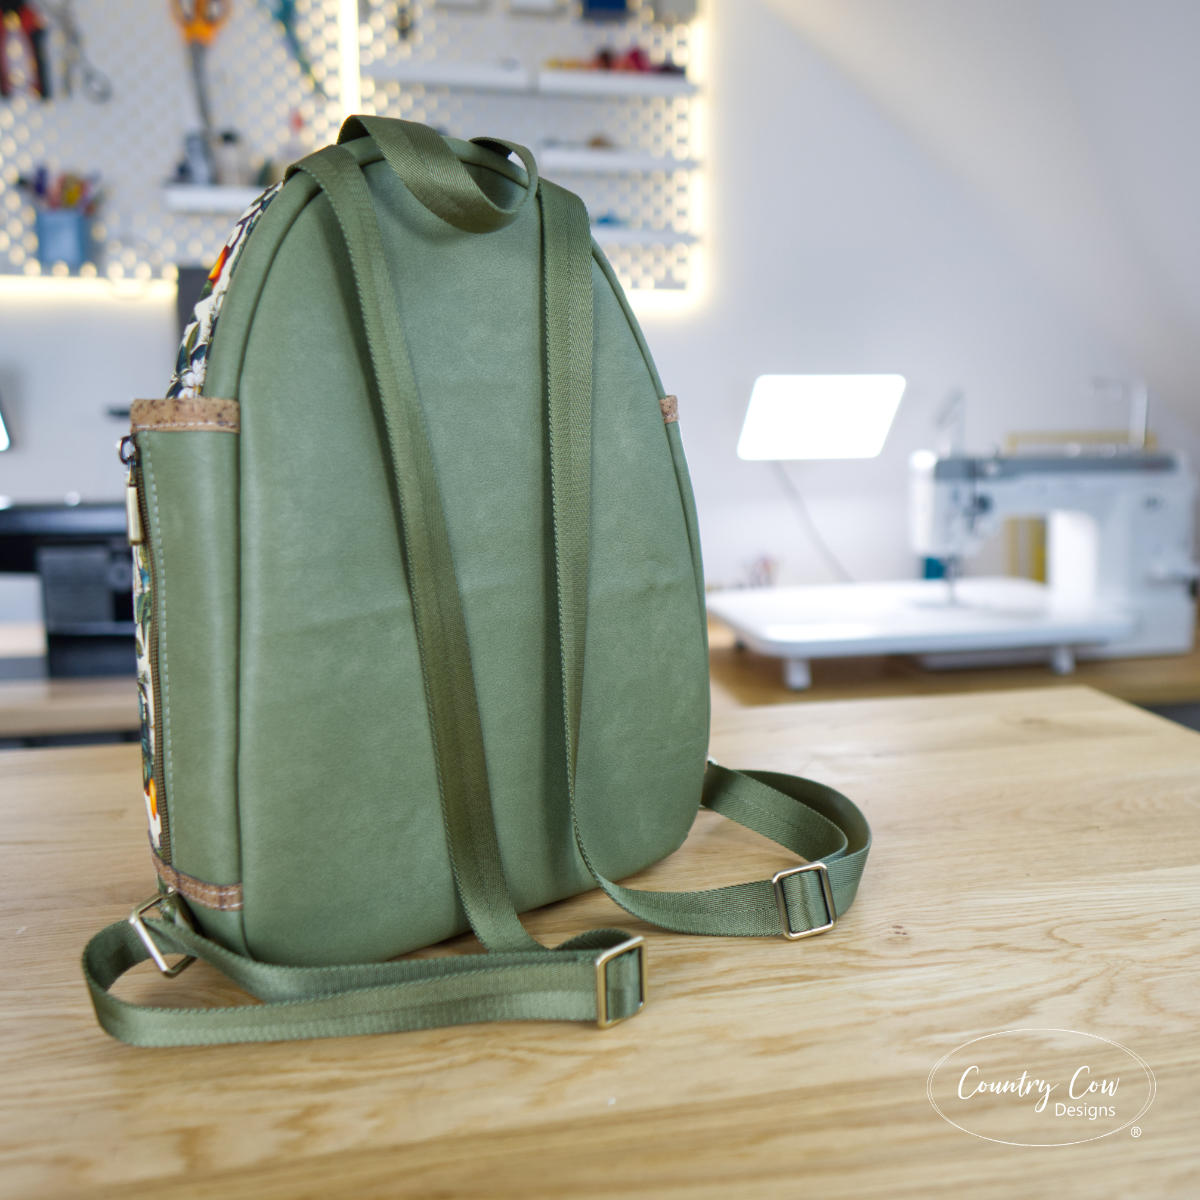
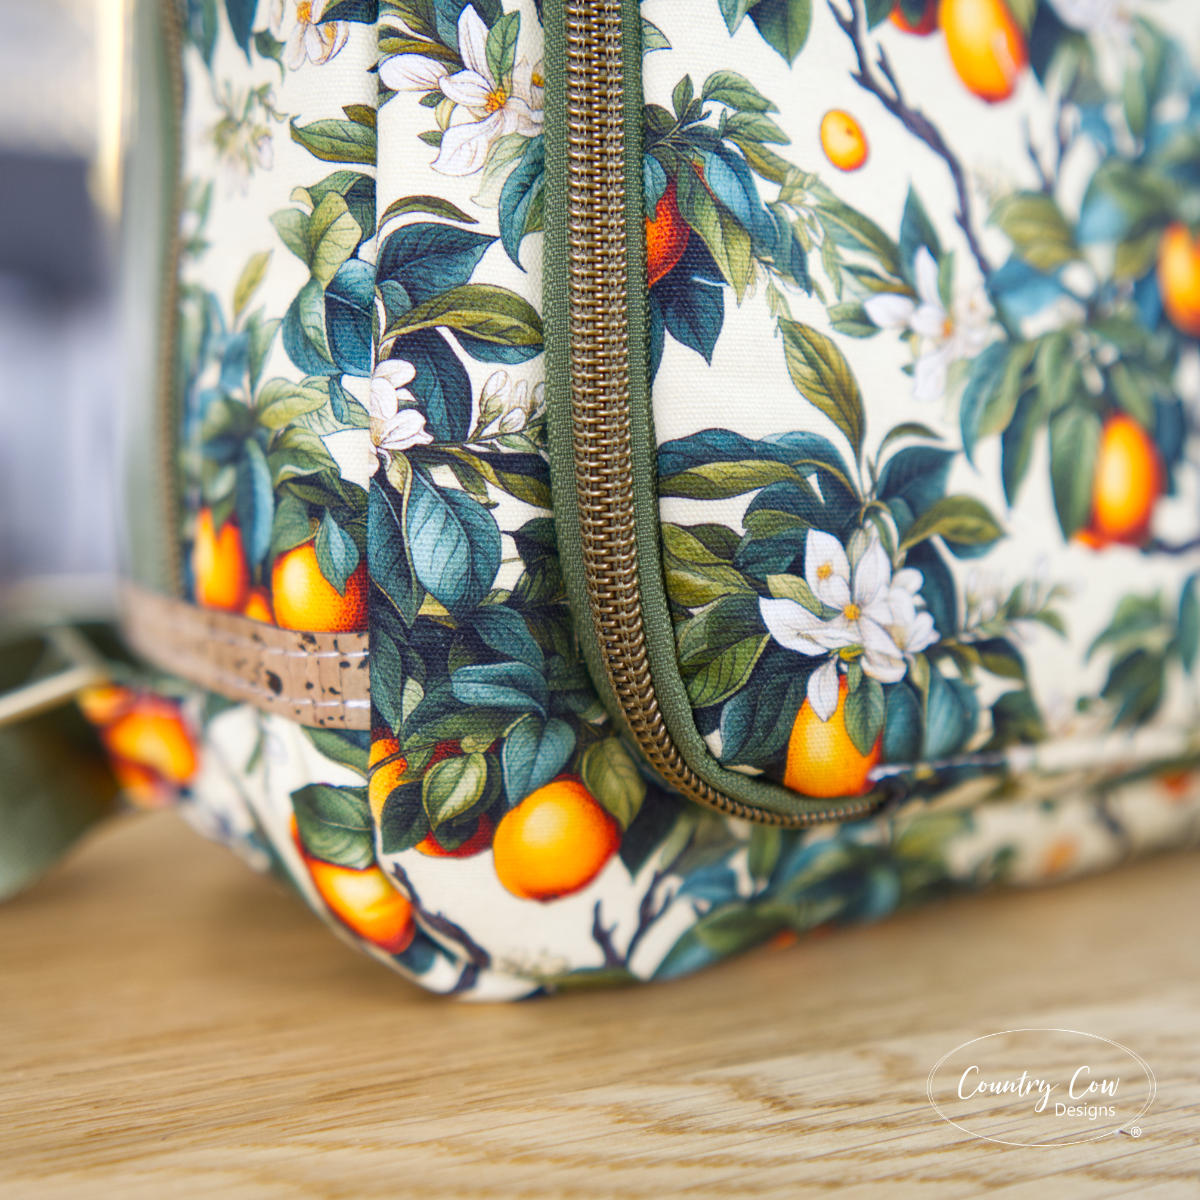
Tester photos to inspire you!
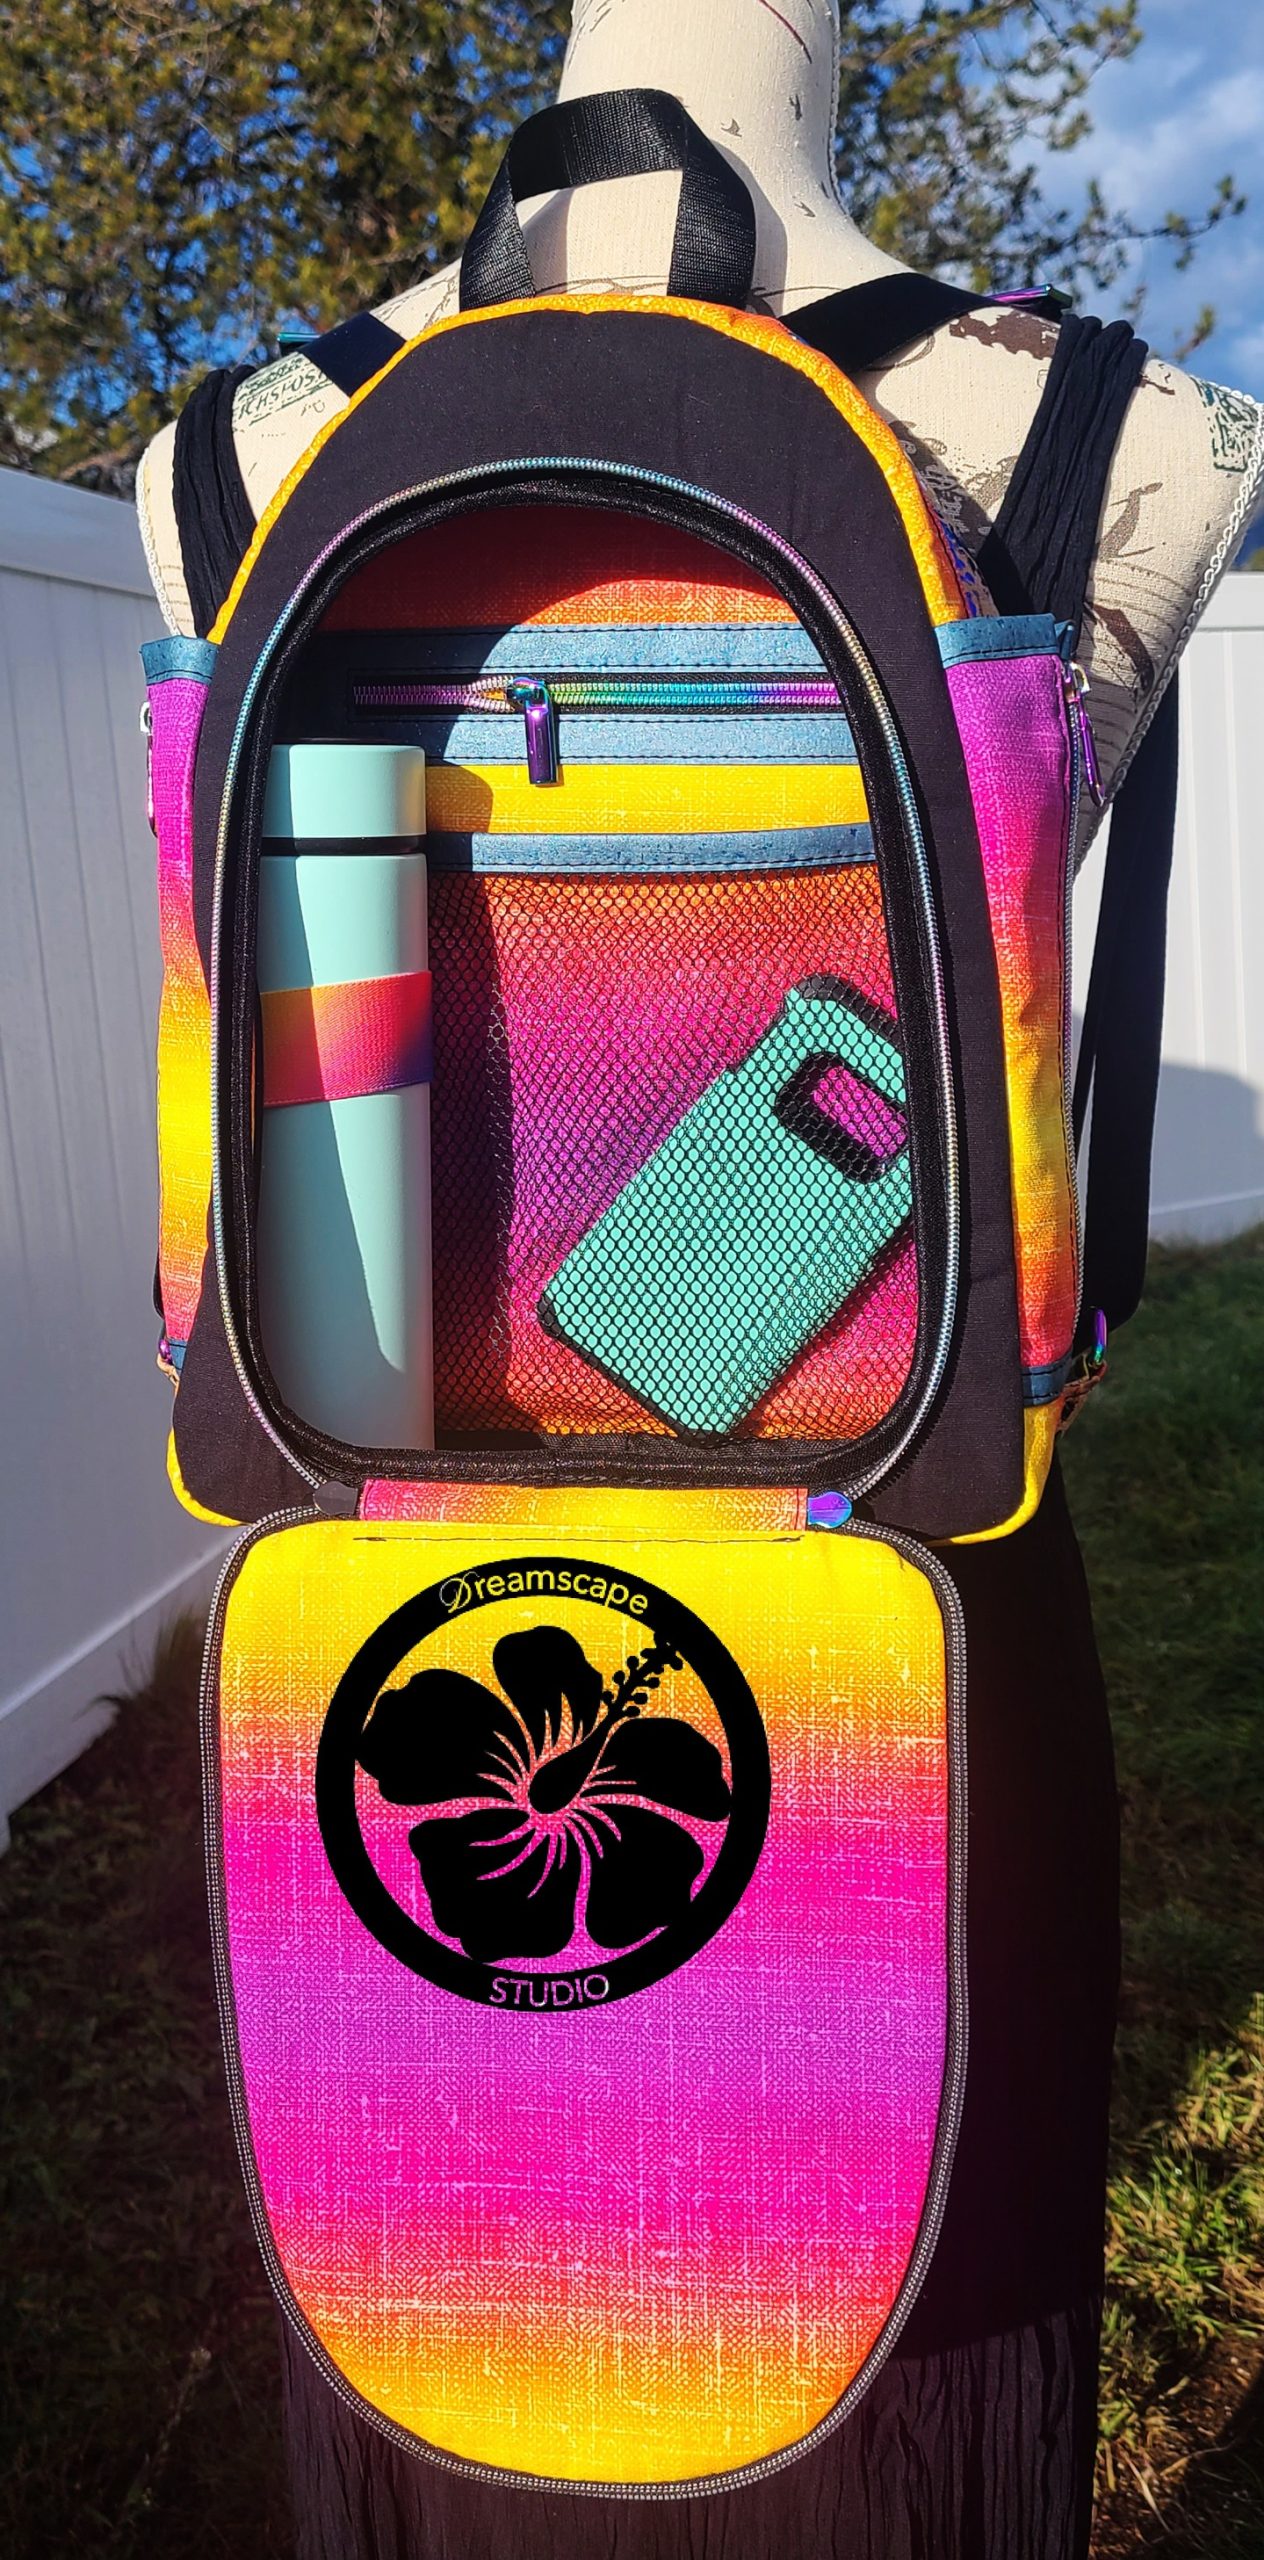
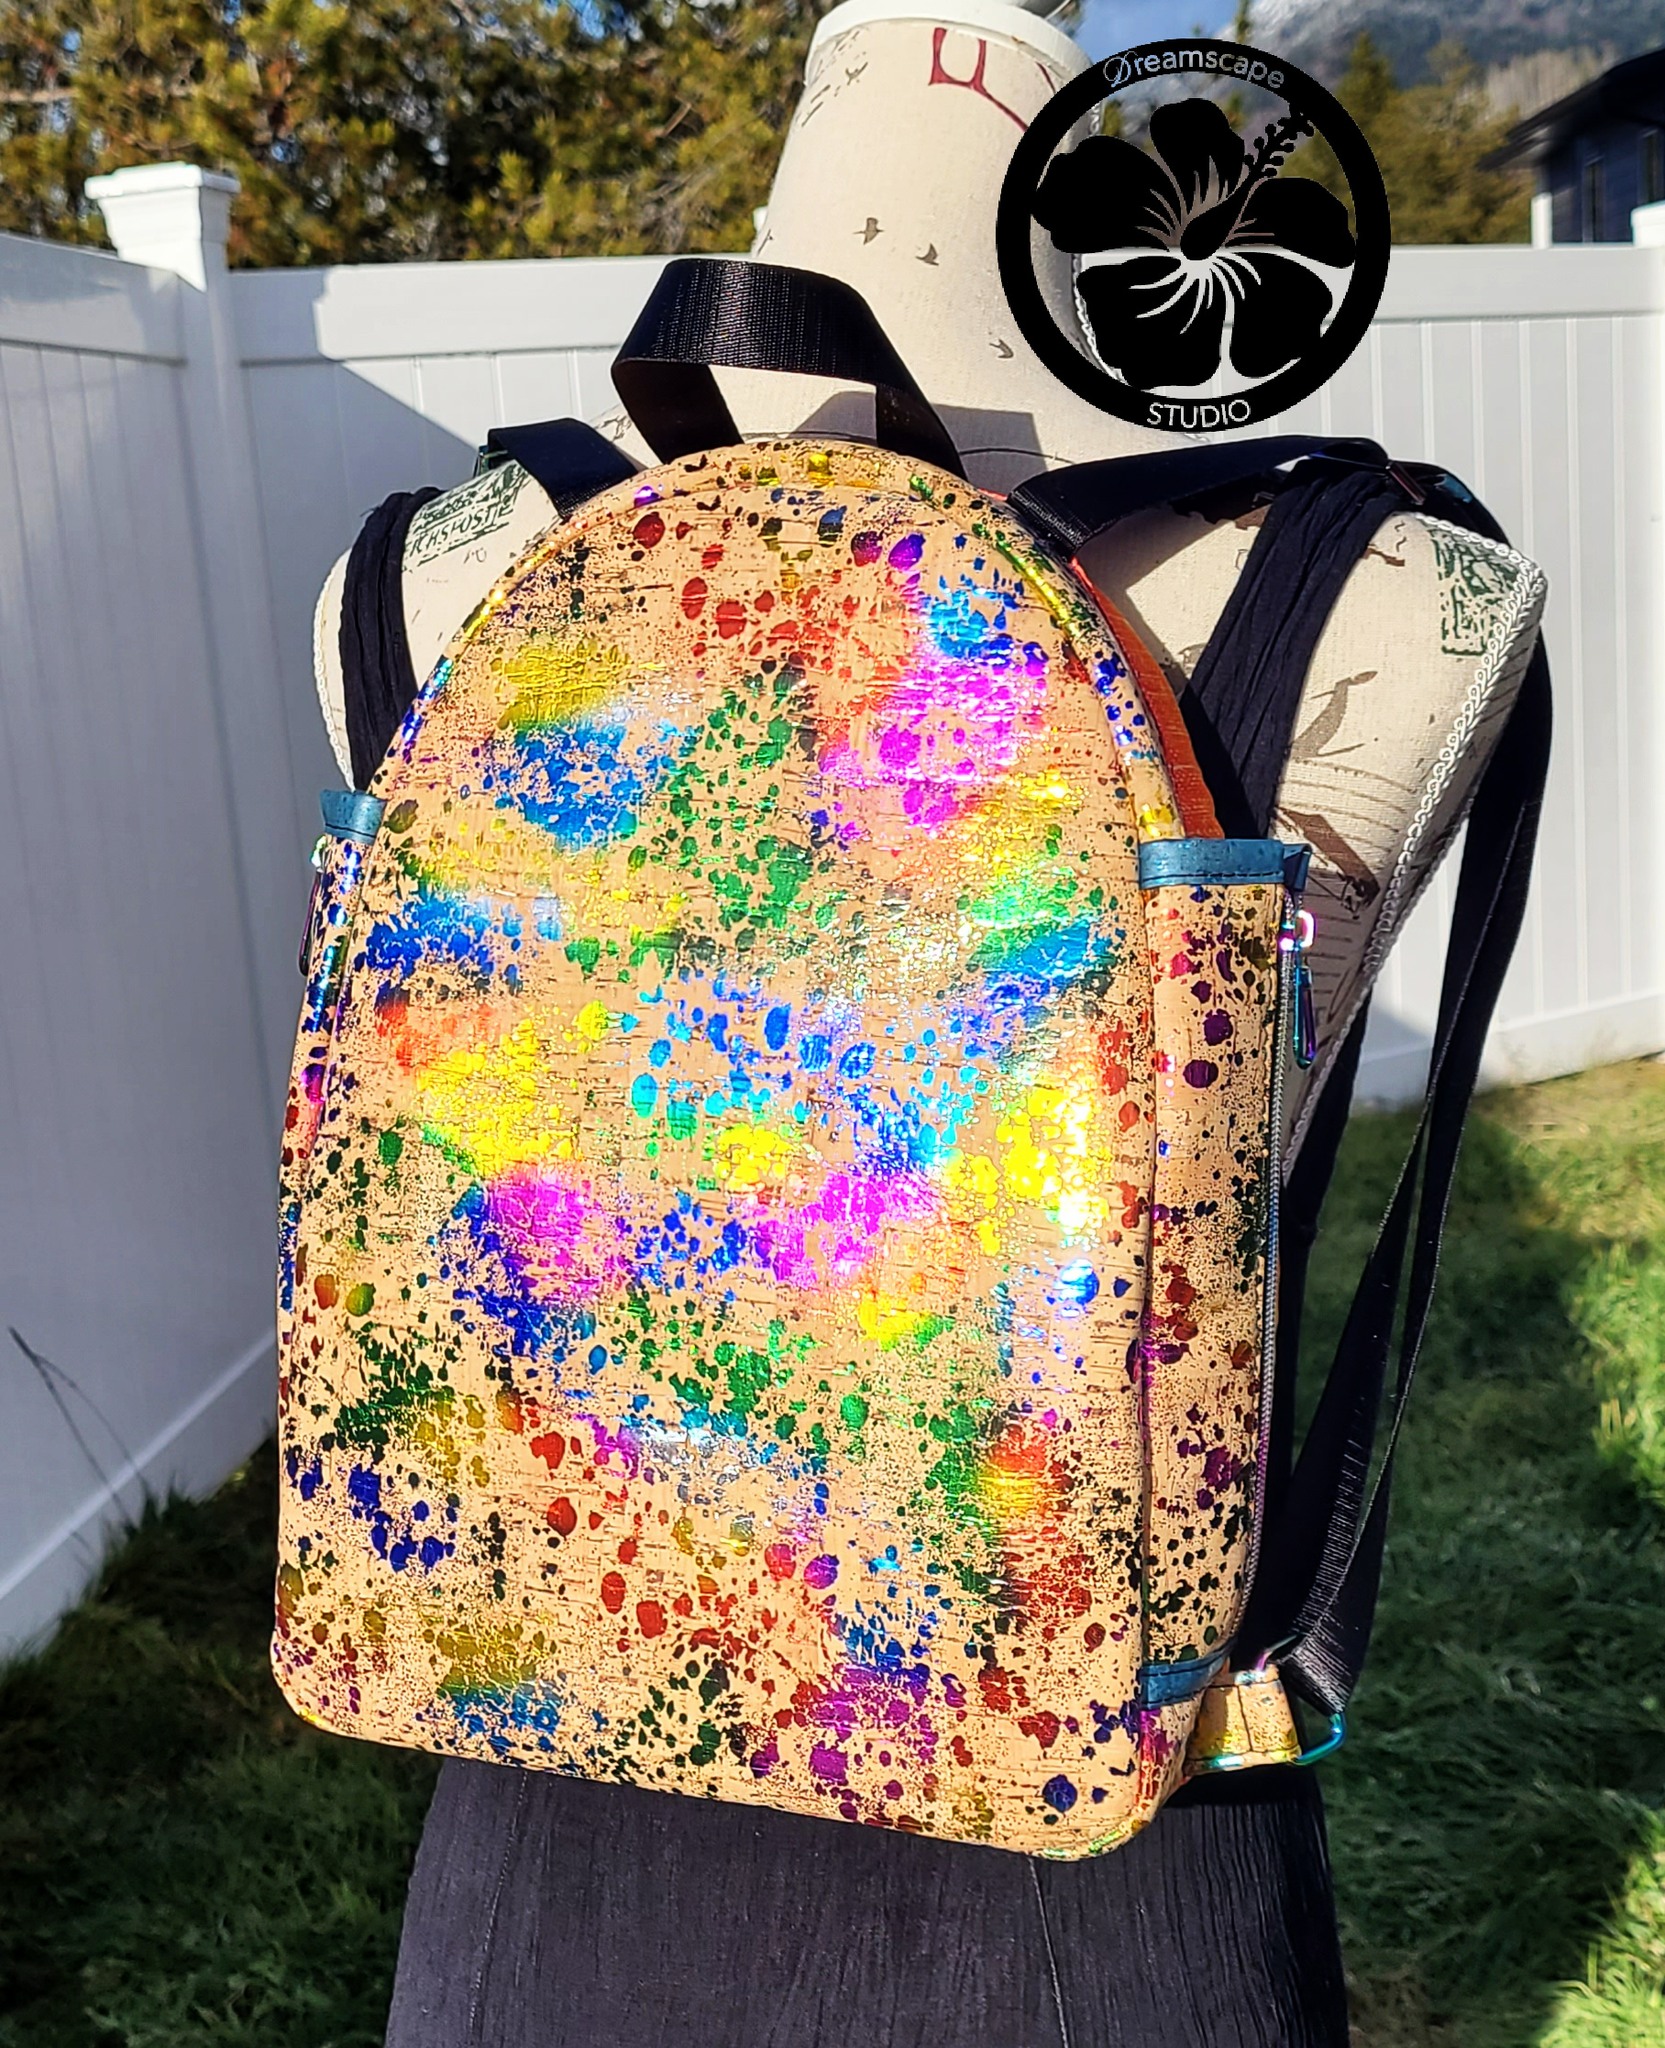
Made by Sue, Dreamscape Studio


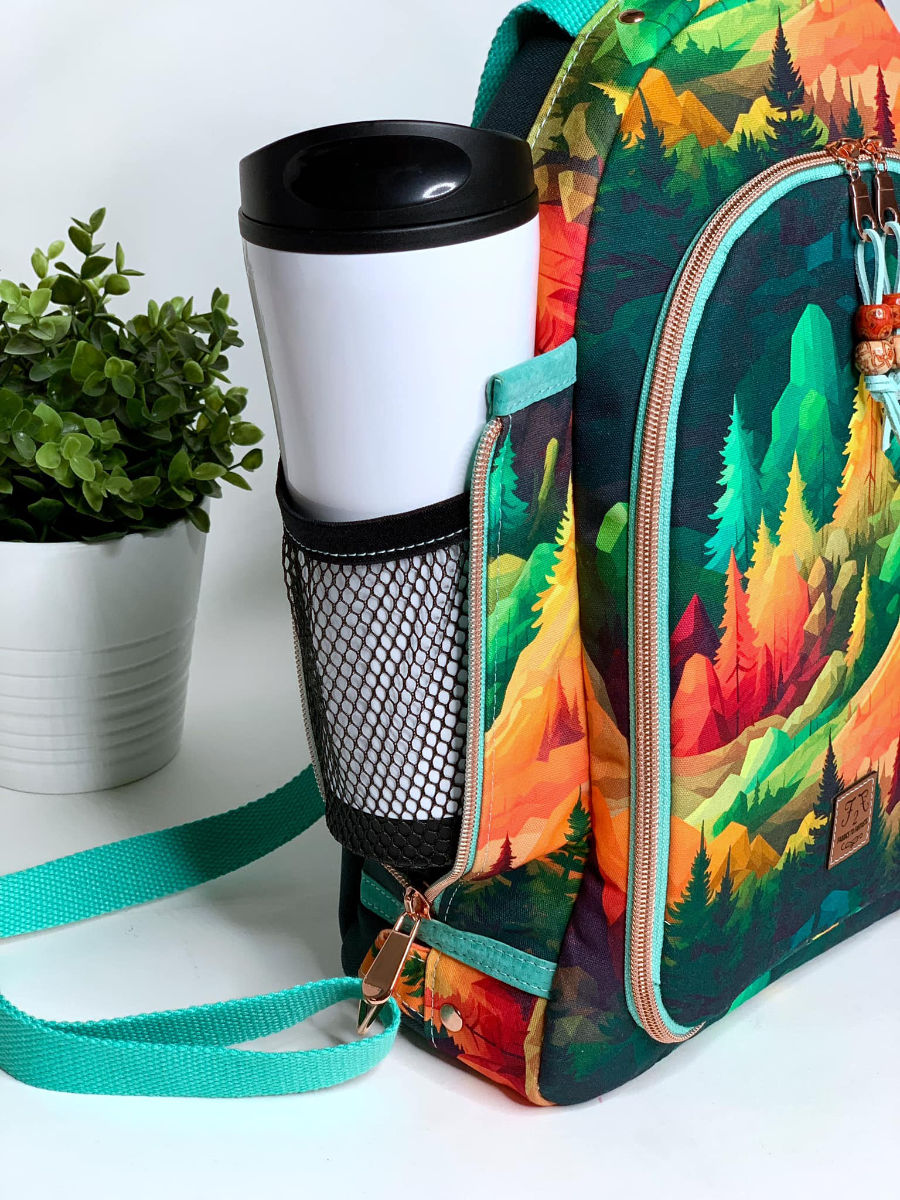
Made by Penny, Fabrics to Fantastic
I just finished the bag! Gosh, I love sewing your patterns!! Everything goes together perfectly


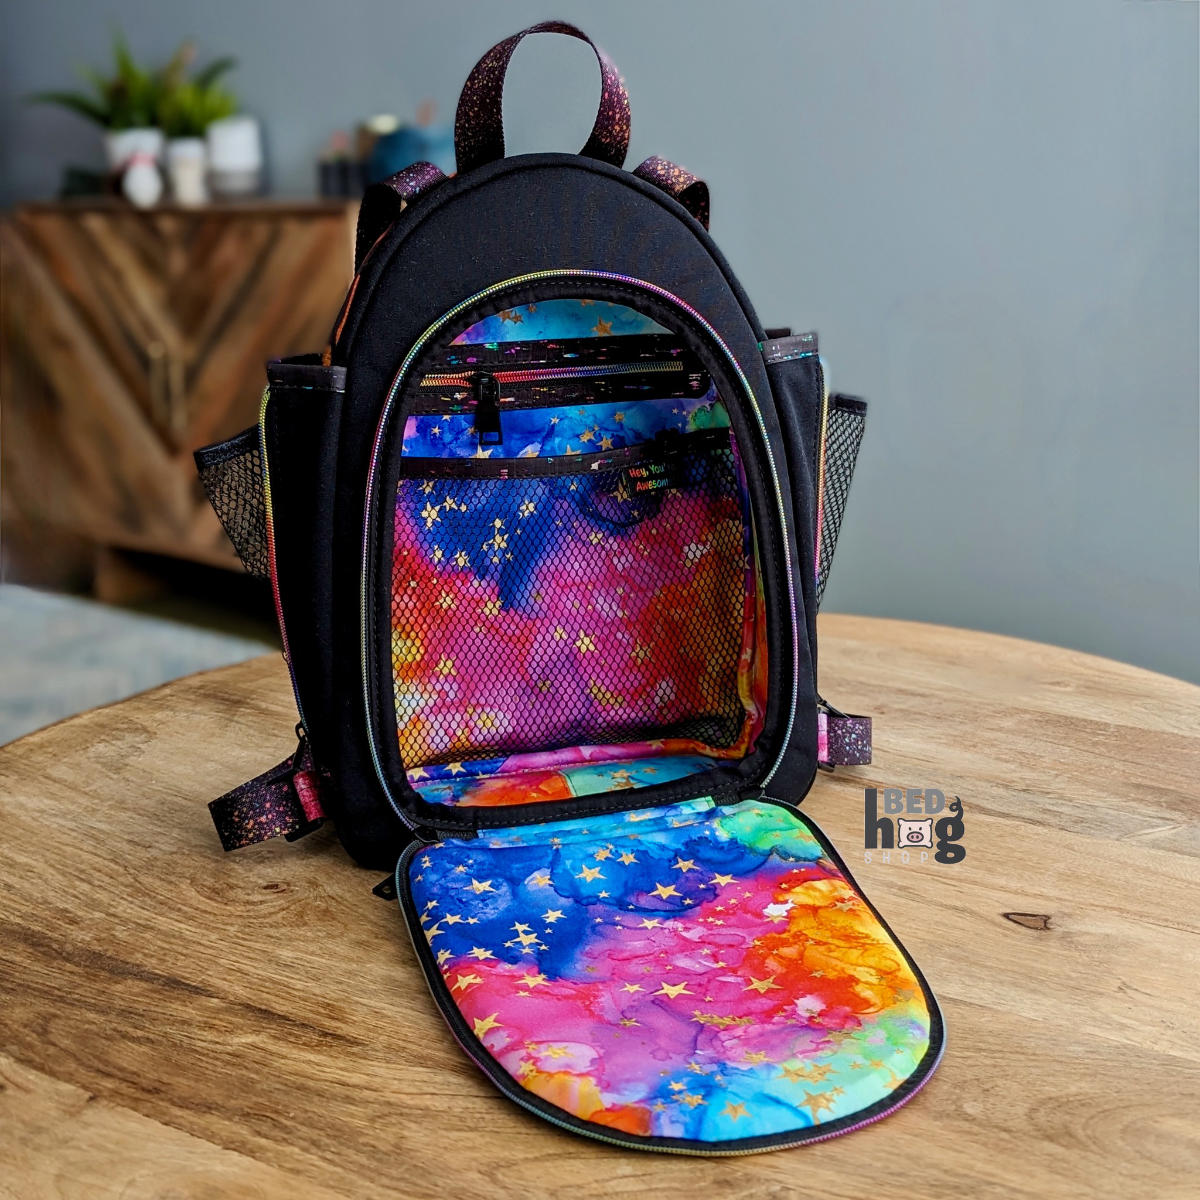
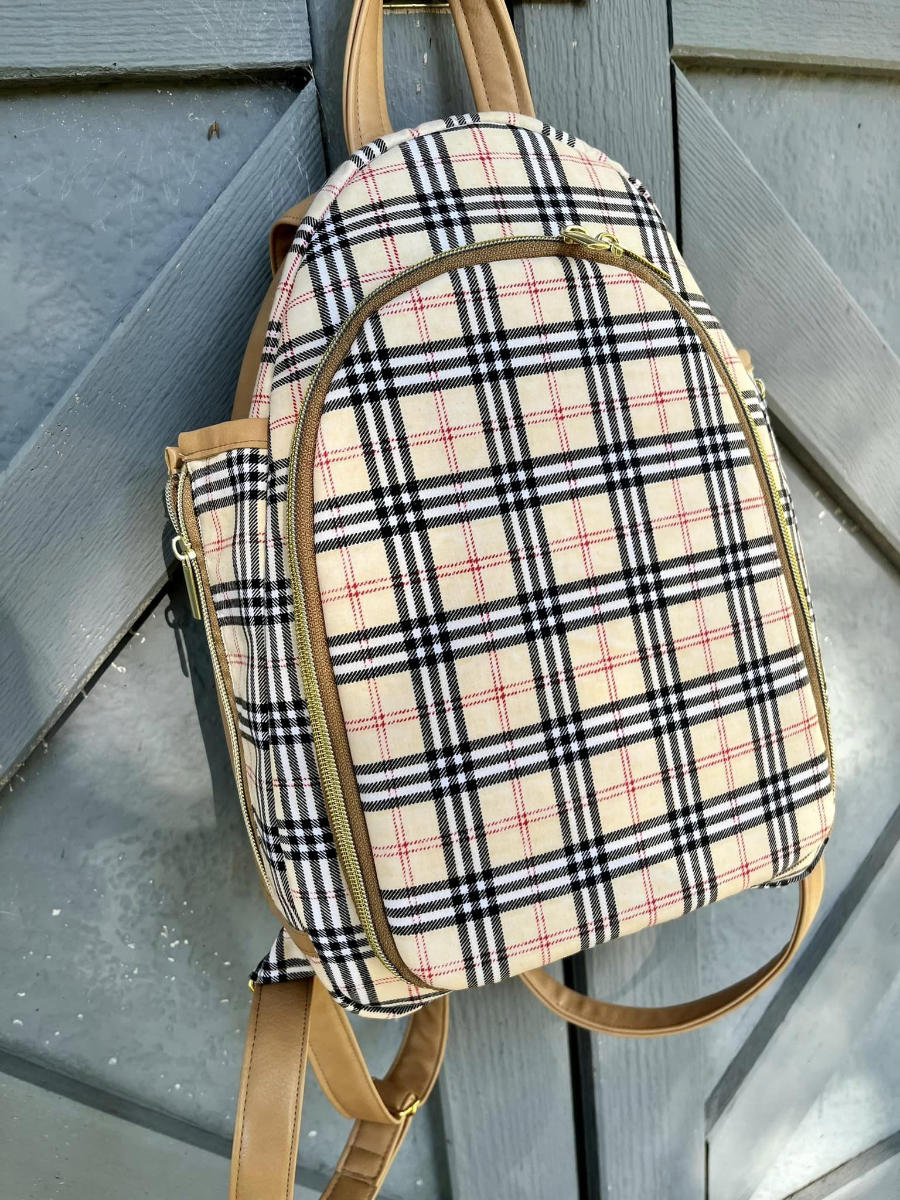
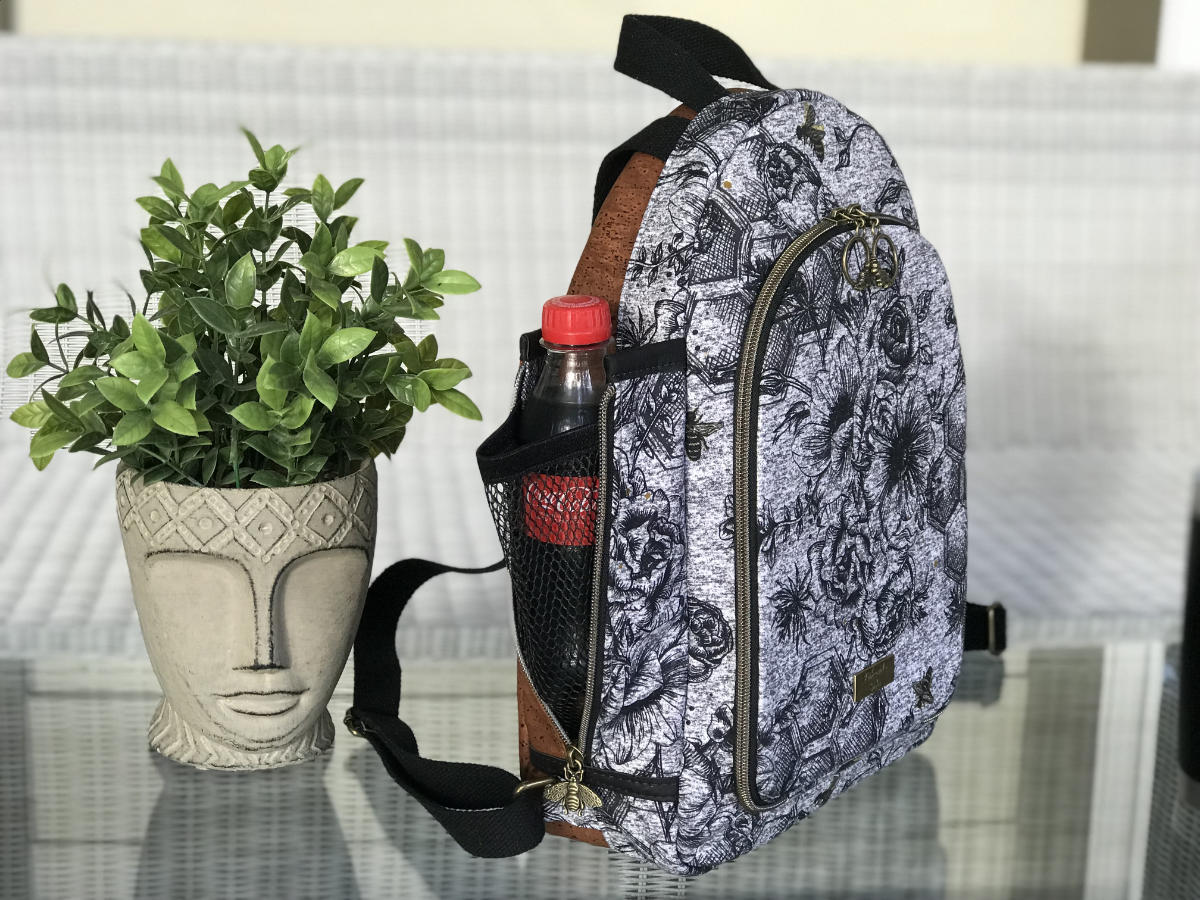
Made by Amy, BedHogShop
Amy added a cork overlay to the inside zip pocket (instructions for this are not included in the pattern)

Made by Becca, Turtle Trax Too


Made by Adam, Country Cow Designs
Adam used the alternative method to fit the main zip on this bag. As a result, you’ll notice extra puckering on the bottom corners. This is why we recommend using the binding method in the pattern. However, we’ve included both options just in case.


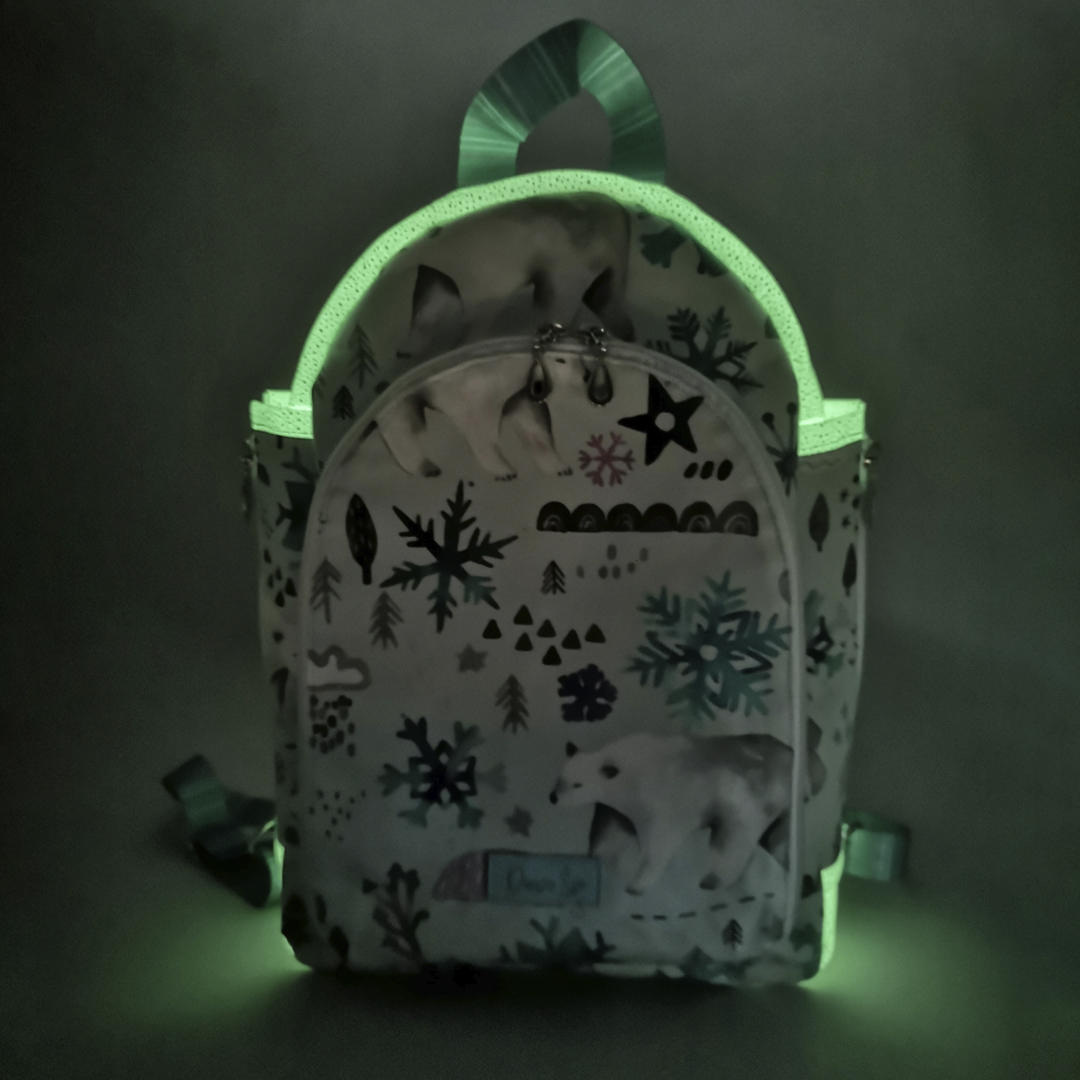
Made by Dunja Sije
Dunja quilted the plain exterior panel to show off a beautiful winter design, and also used glow in the dark vinyl for an extra special look in the dark.


Made by Michelle, Barabooboo Designs


Made by Nancy, Lakeside Saks
“Everything went together perfectly. I love it when the gusset fits with no problems. I was super nervous about using foam on the front panels with the zipper so I used Bouncy Firm which is like Decovil light cut out of the seams and it worked perfectly. I have foam on the back and gusset. This pattern is absolutely amazing , I love the water bottle holder such a unique design.”


Made by Jo, Country Cow Designs
This bag was an earlier prototype so there are some differences compared to the final pattern.


Made by Chera, Phipody
“Big thanks for having me on your tester team! Loving this pattern….Agree, it’s an advanced pattern.
I stopped and rested after finishing the main closure at step 18, I hesitated due to a bit of a wonky zipper. Debated redoing it but decided to push forward and, happily, the result is great.
Amazing pattern, works perfectly if you follow the instructions.”


Made by Sabine


Made by Jo, Country Cow Designs
This bag was made while filming the video tutorial for this pattern


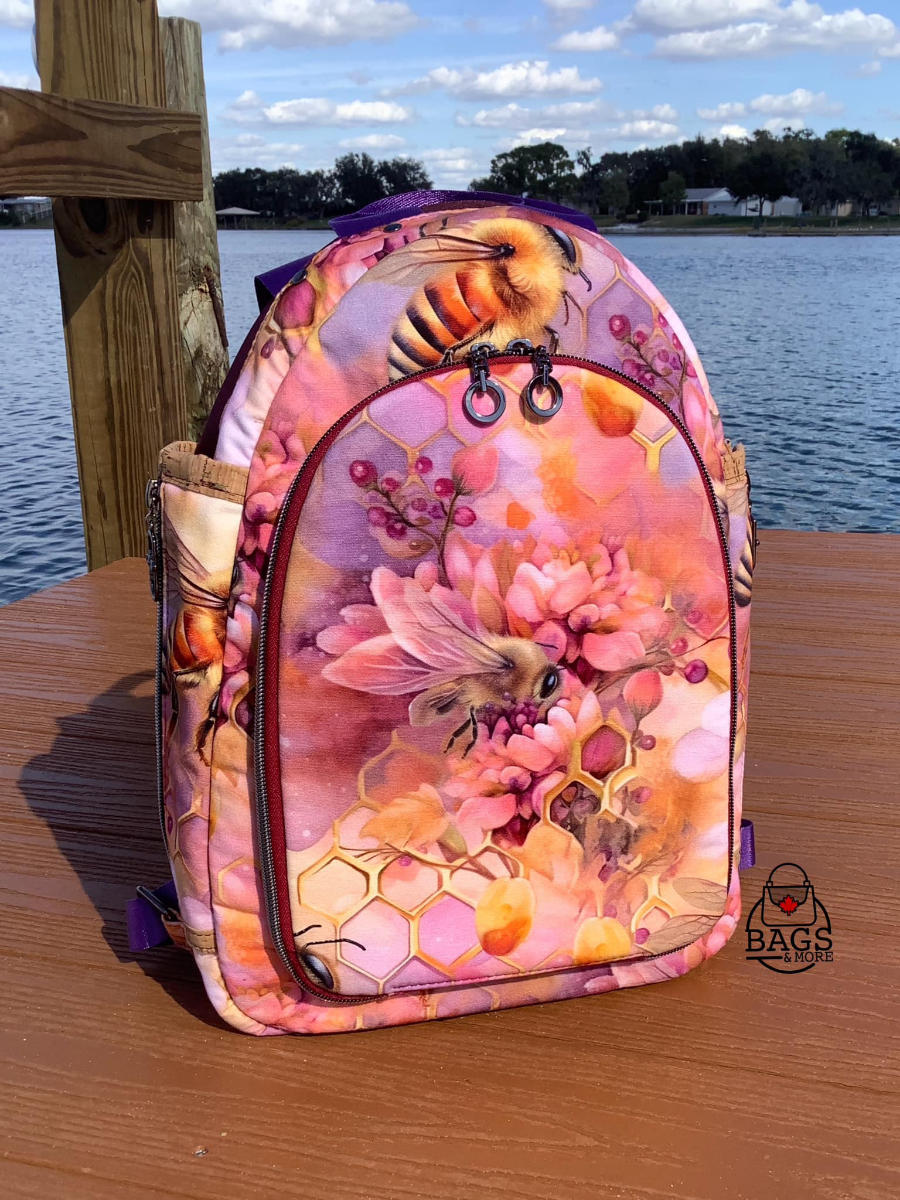
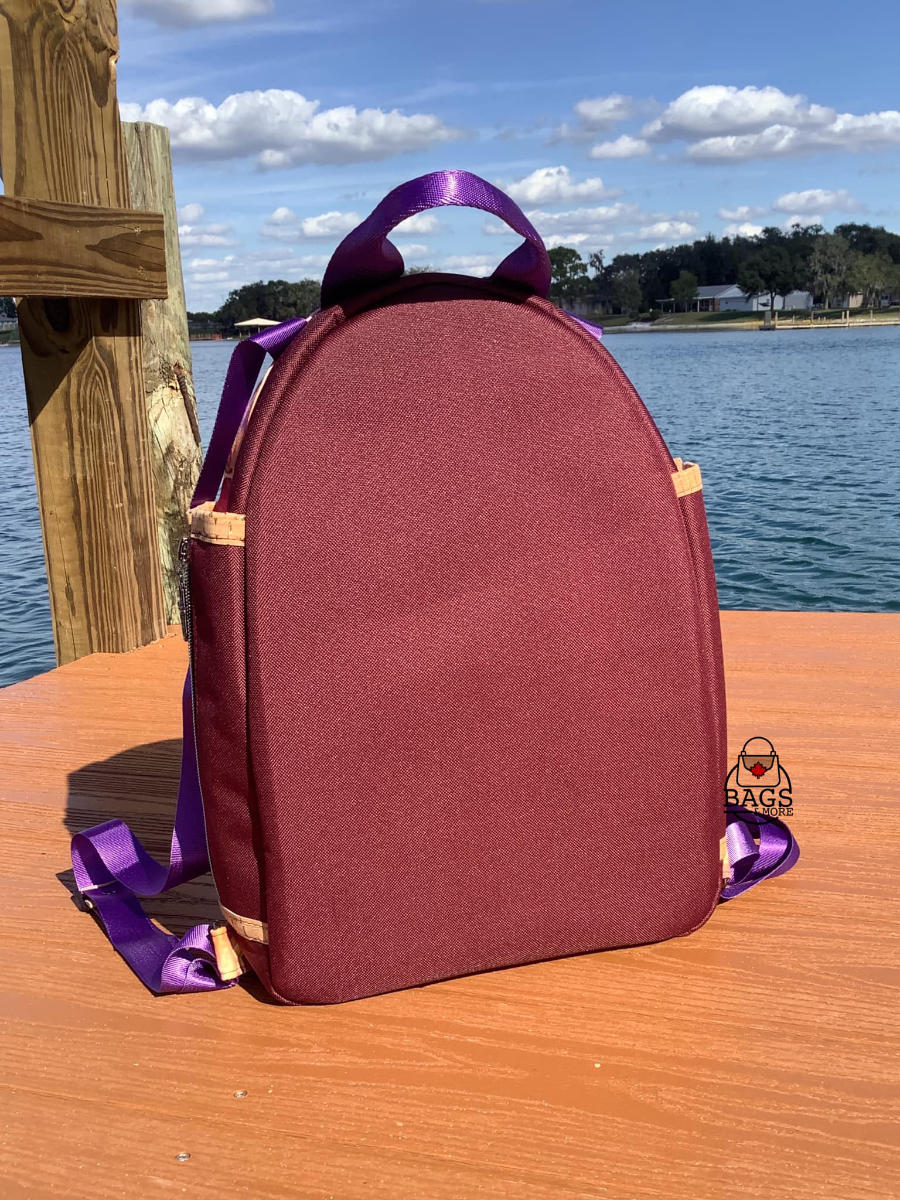
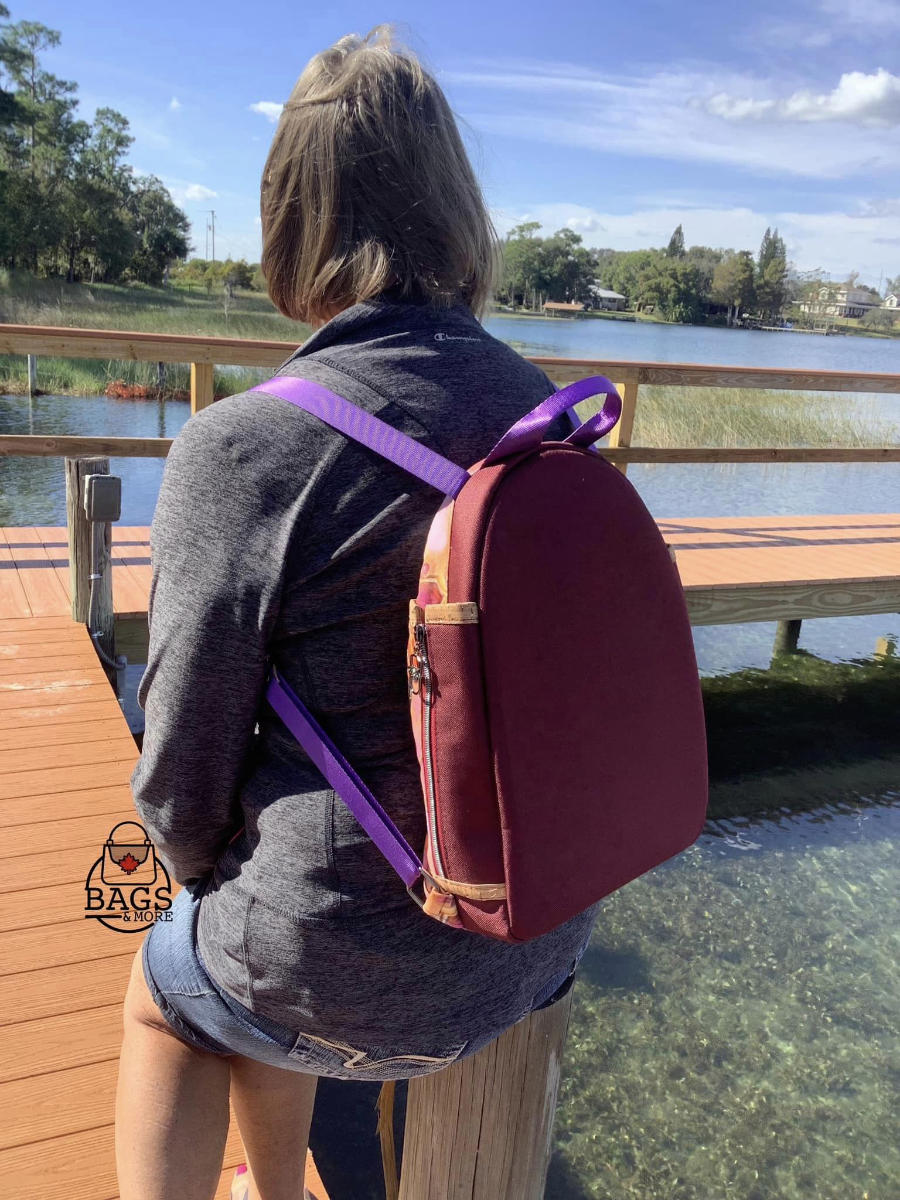
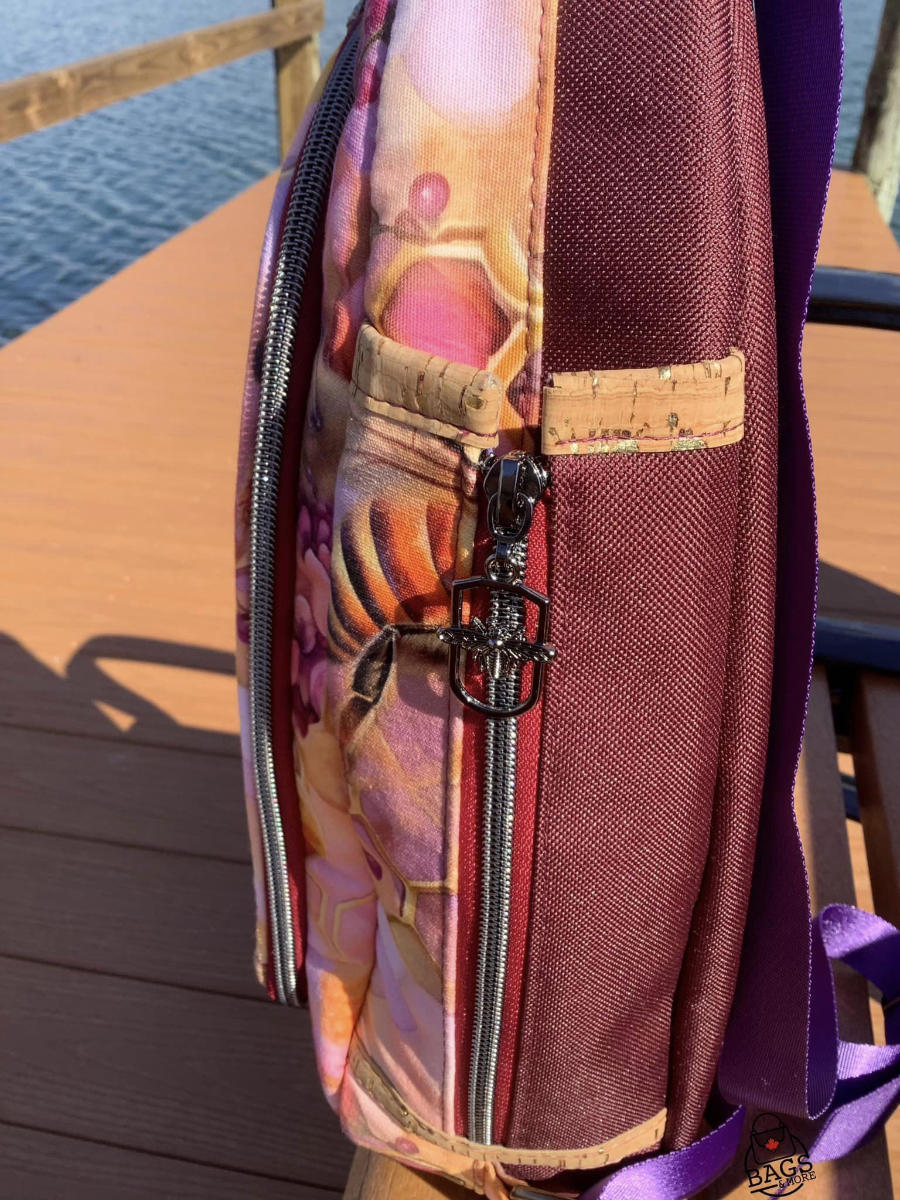
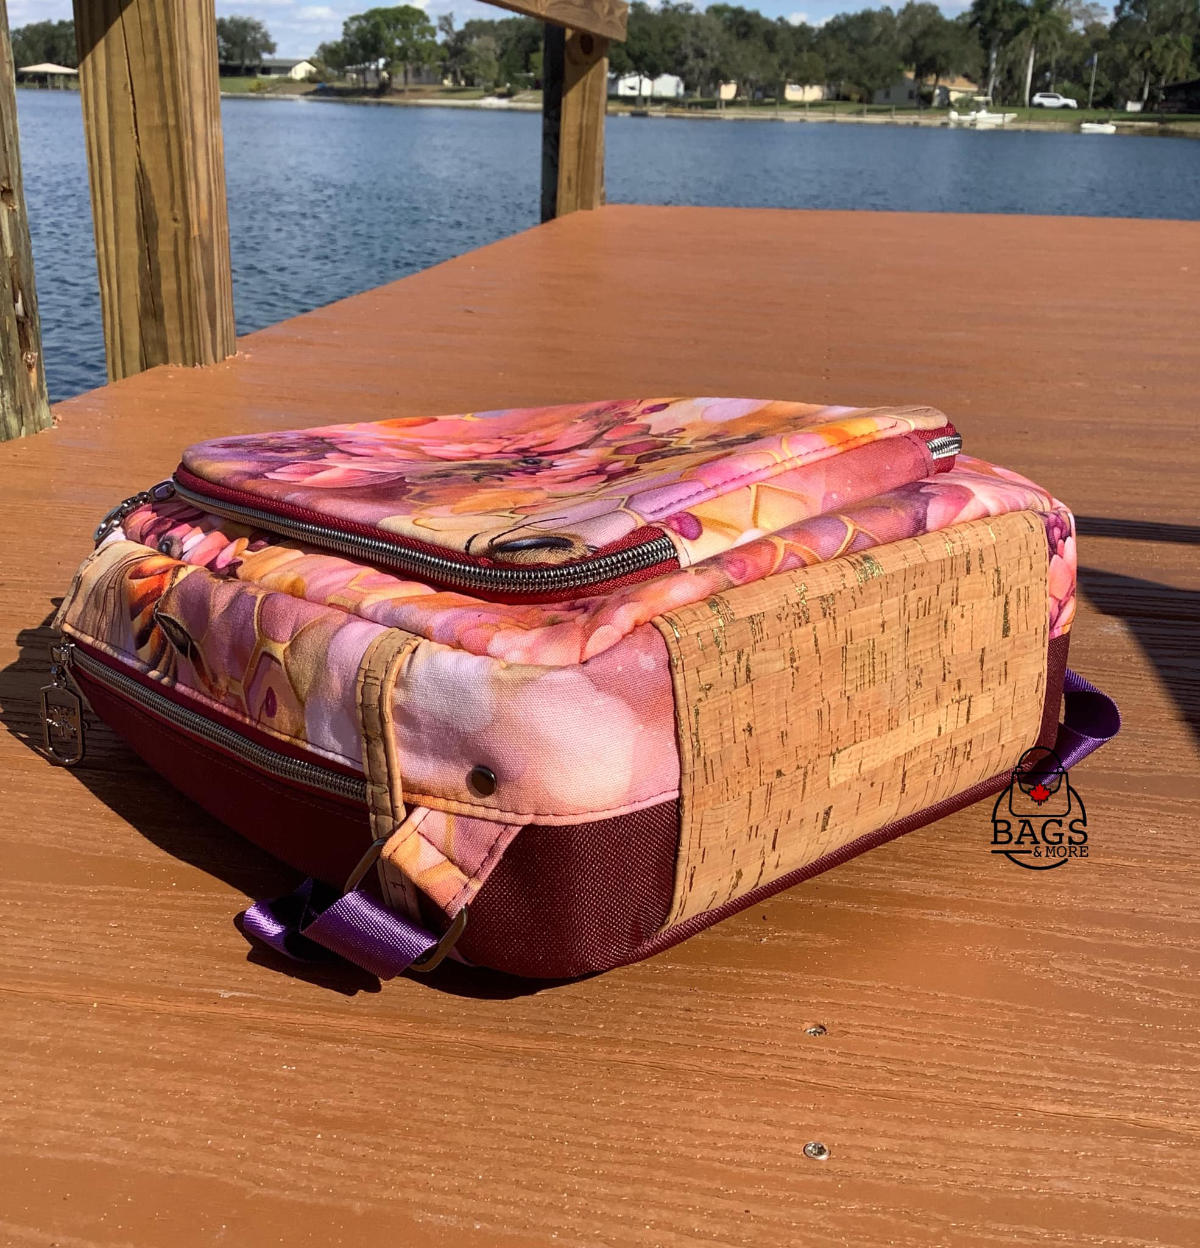
Made by Sabrina, Bags & More


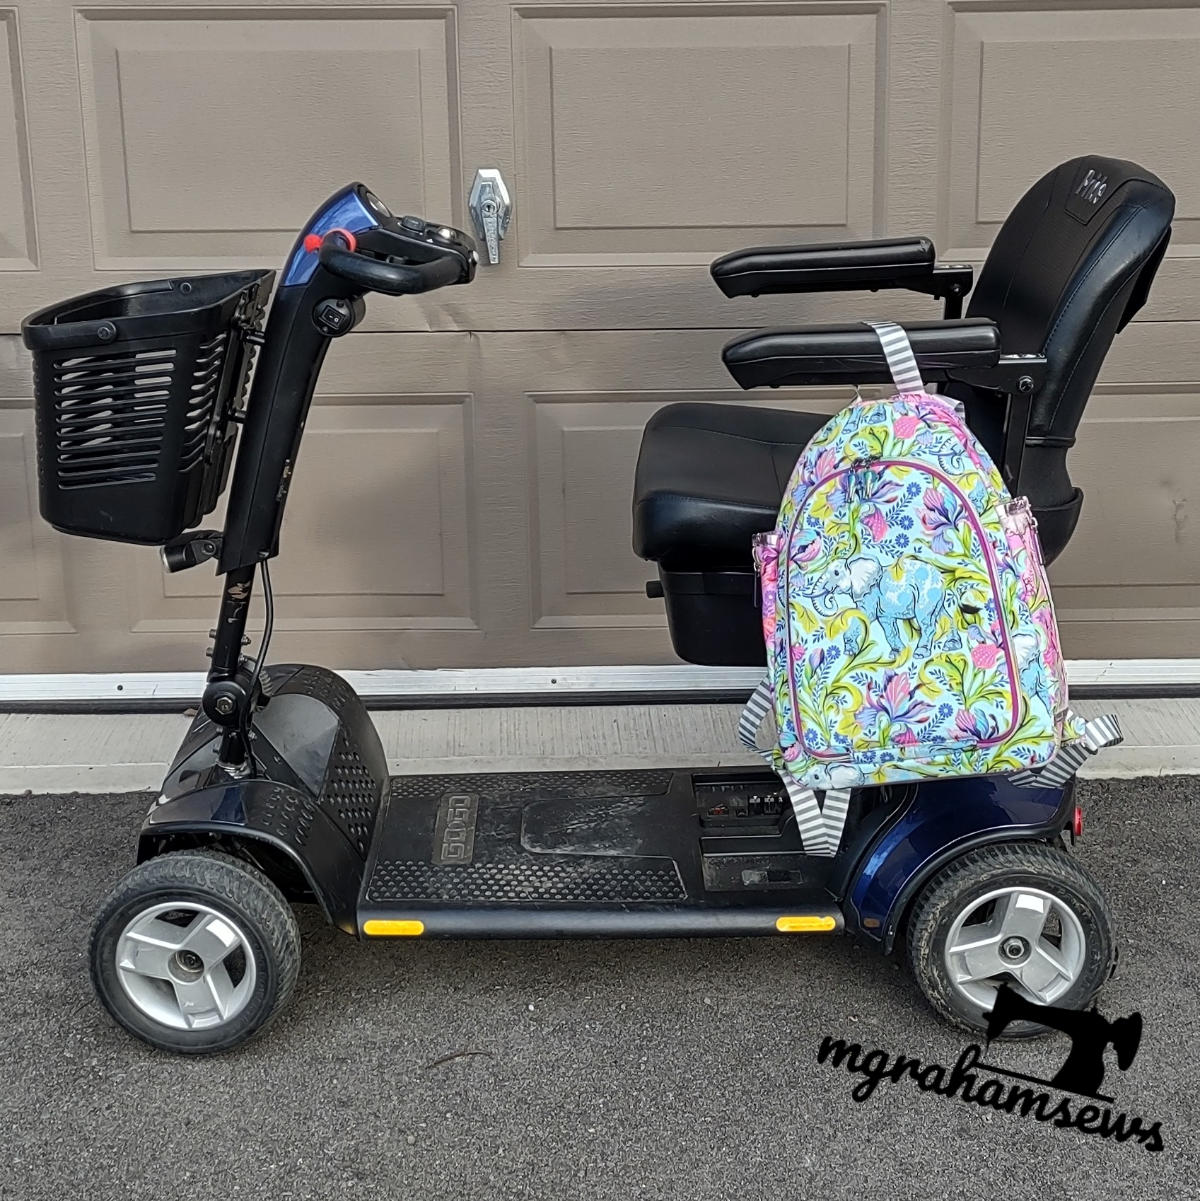
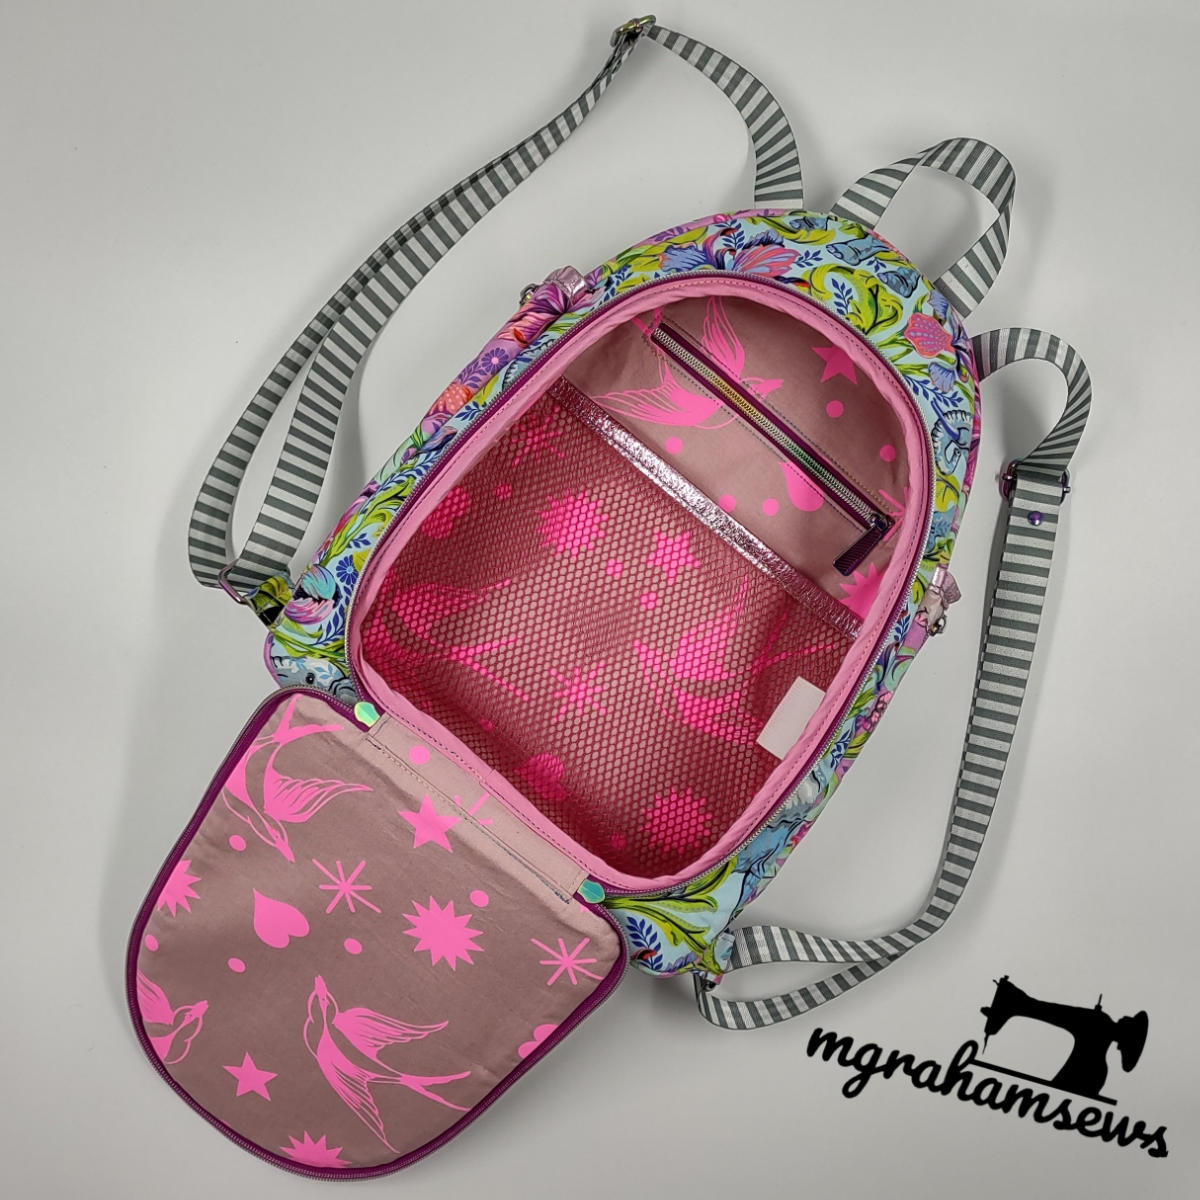
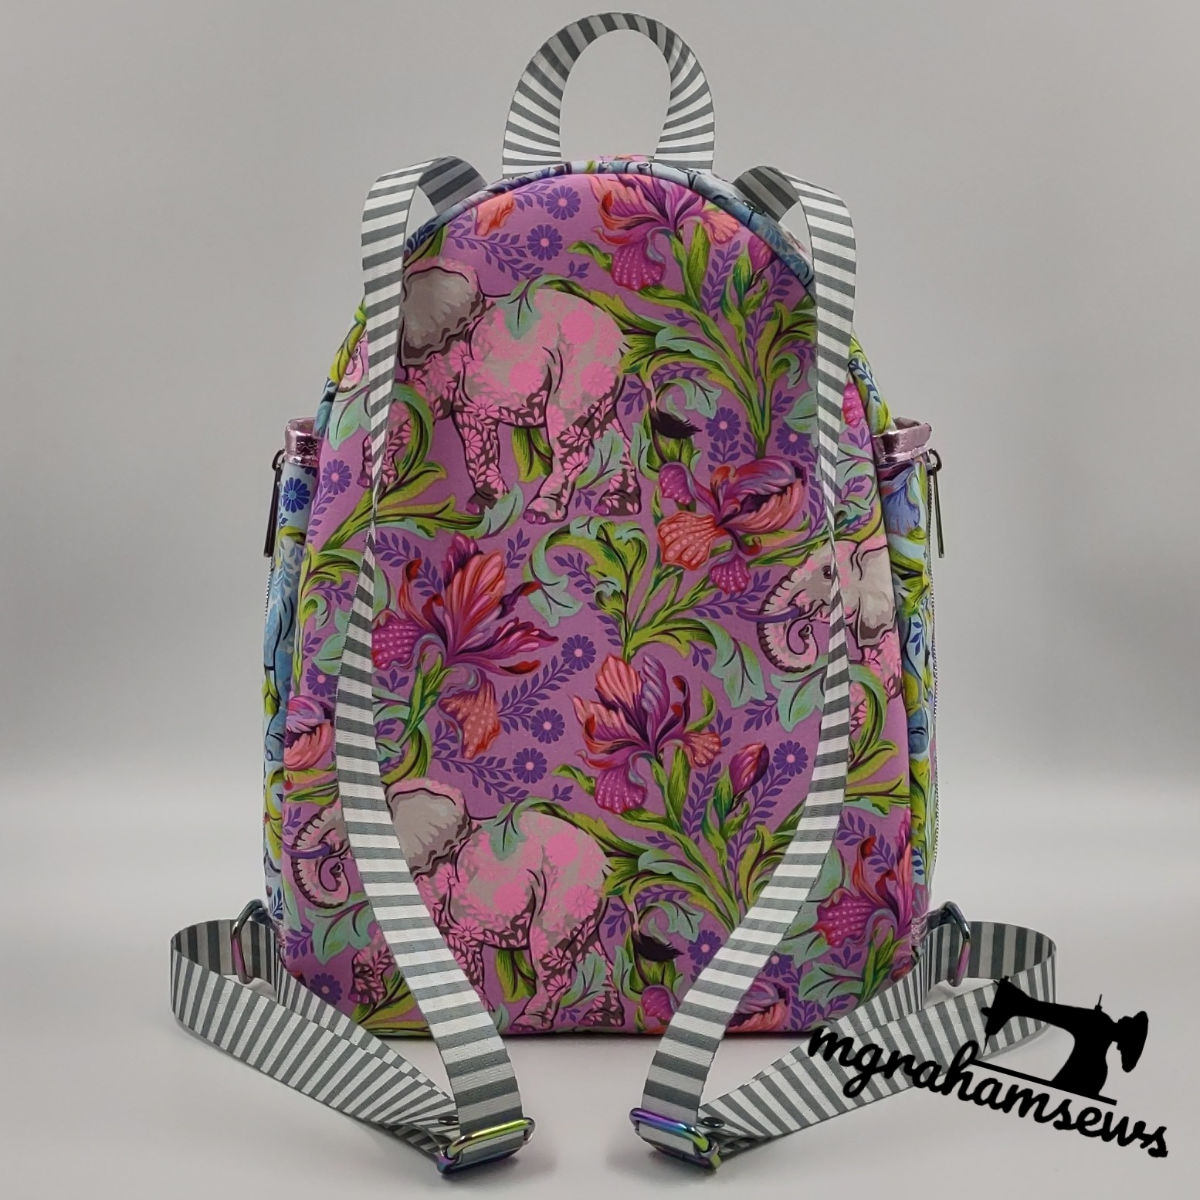
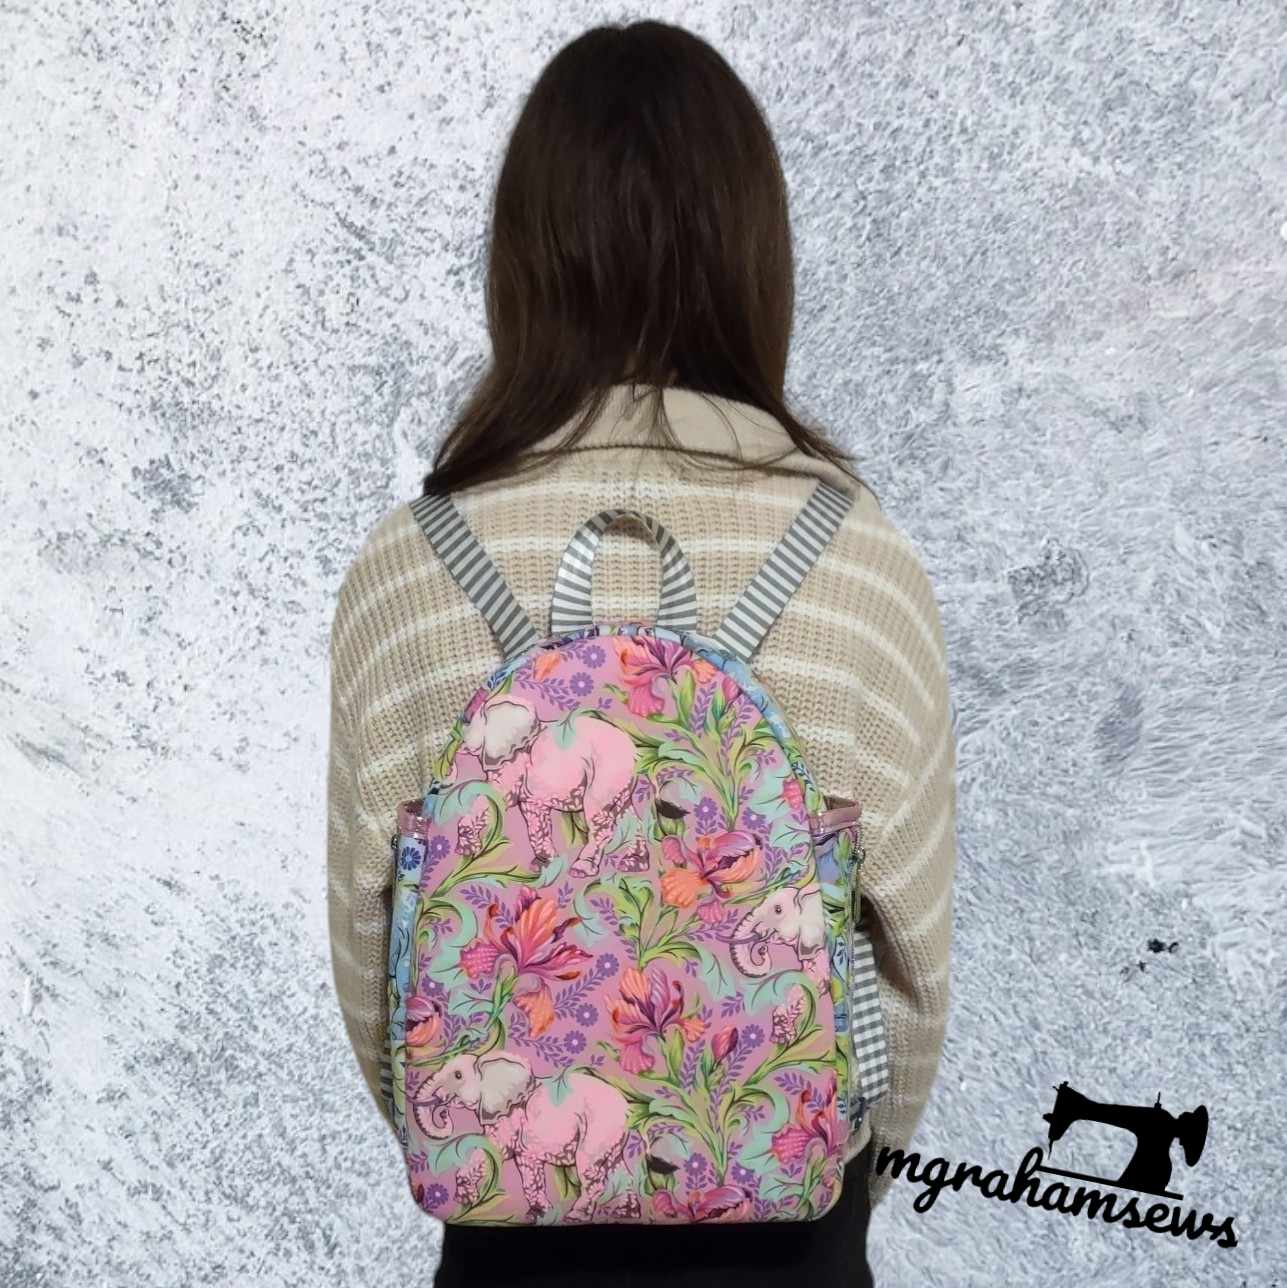
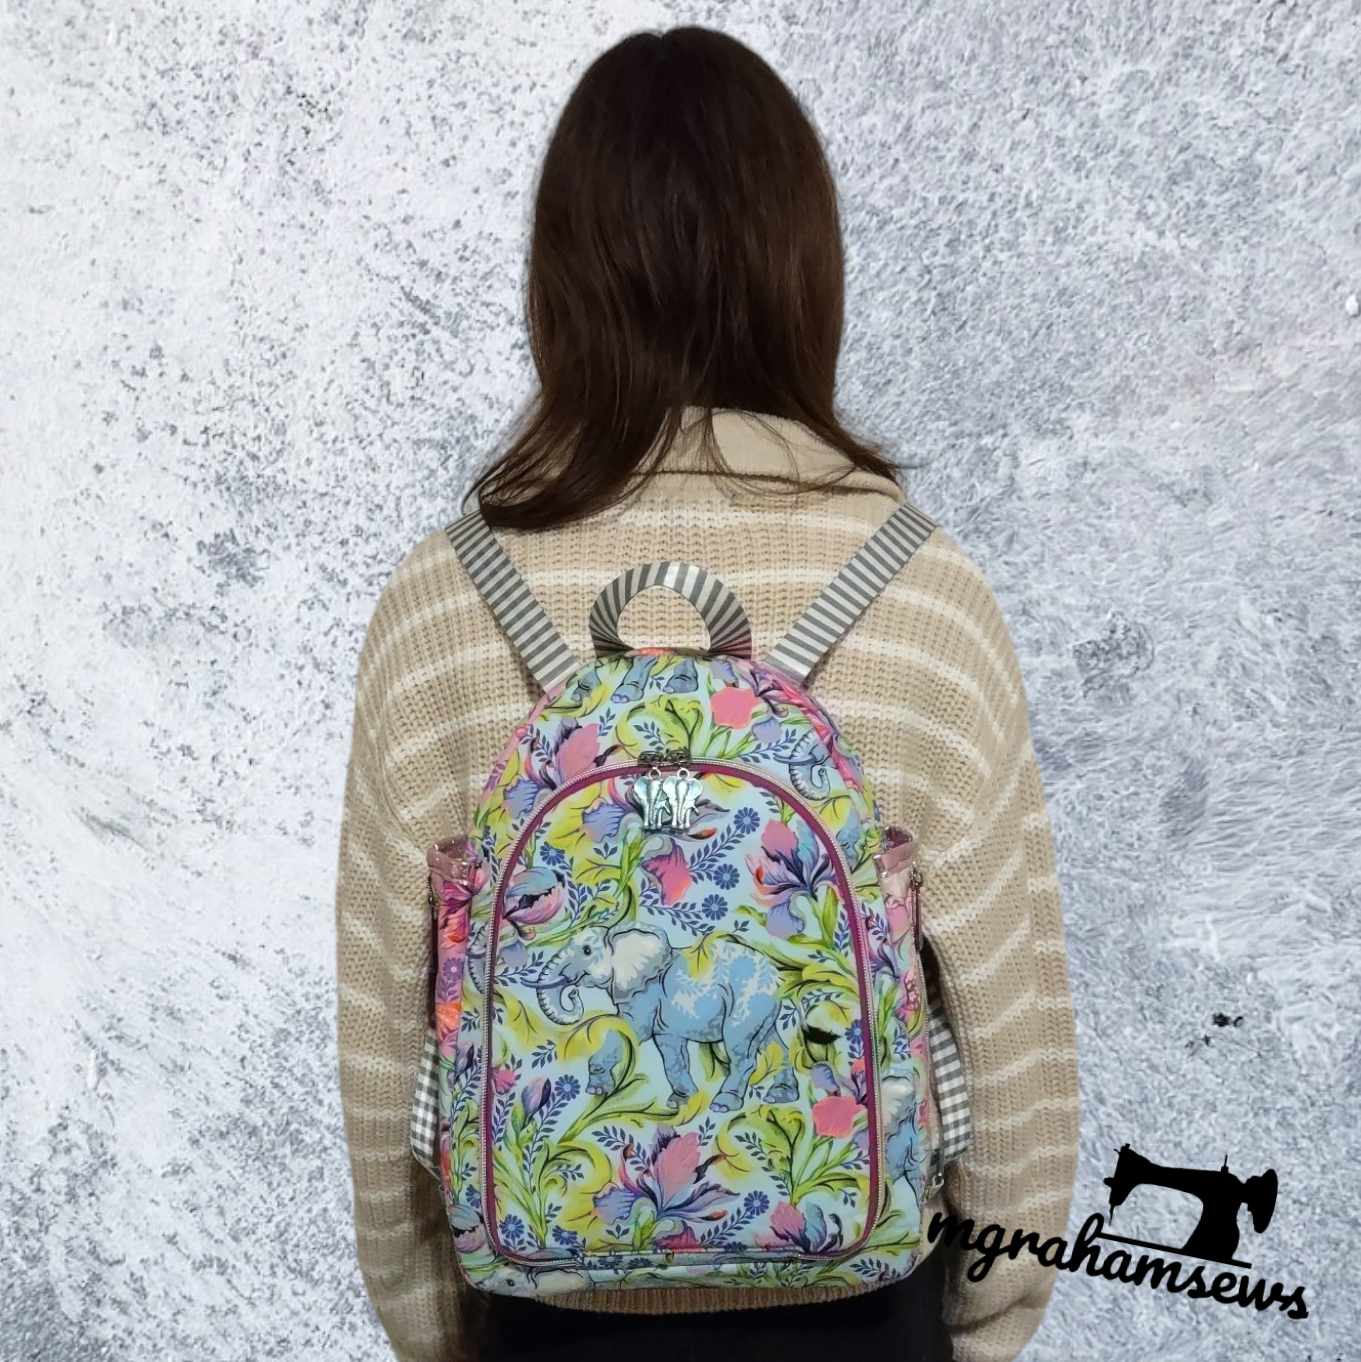
Made by Michelle, M Graham Sews
“I loved making this bag. The design is genius!”


Made by Jo, Country Cow Designs
This bag was an earlier prototype so there are some differences compared to the final pattern.

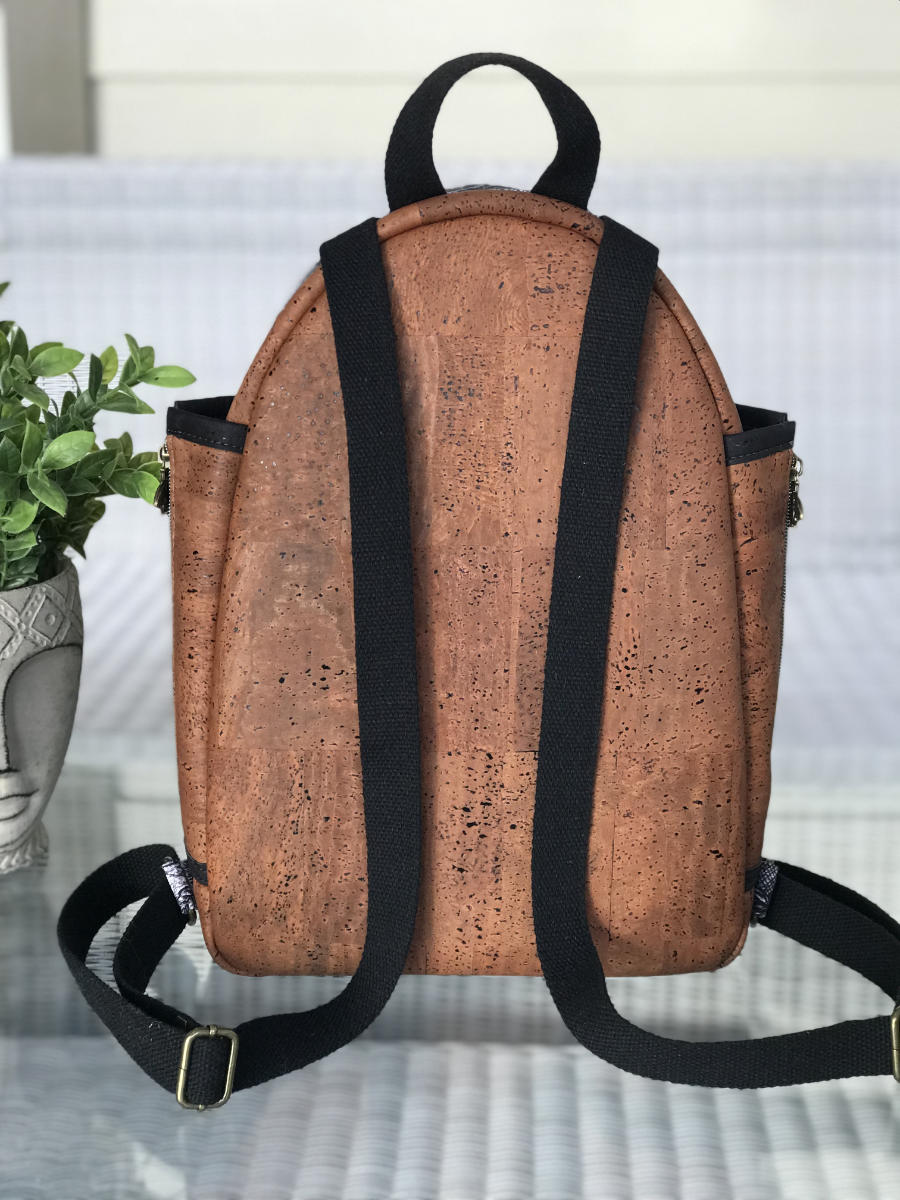
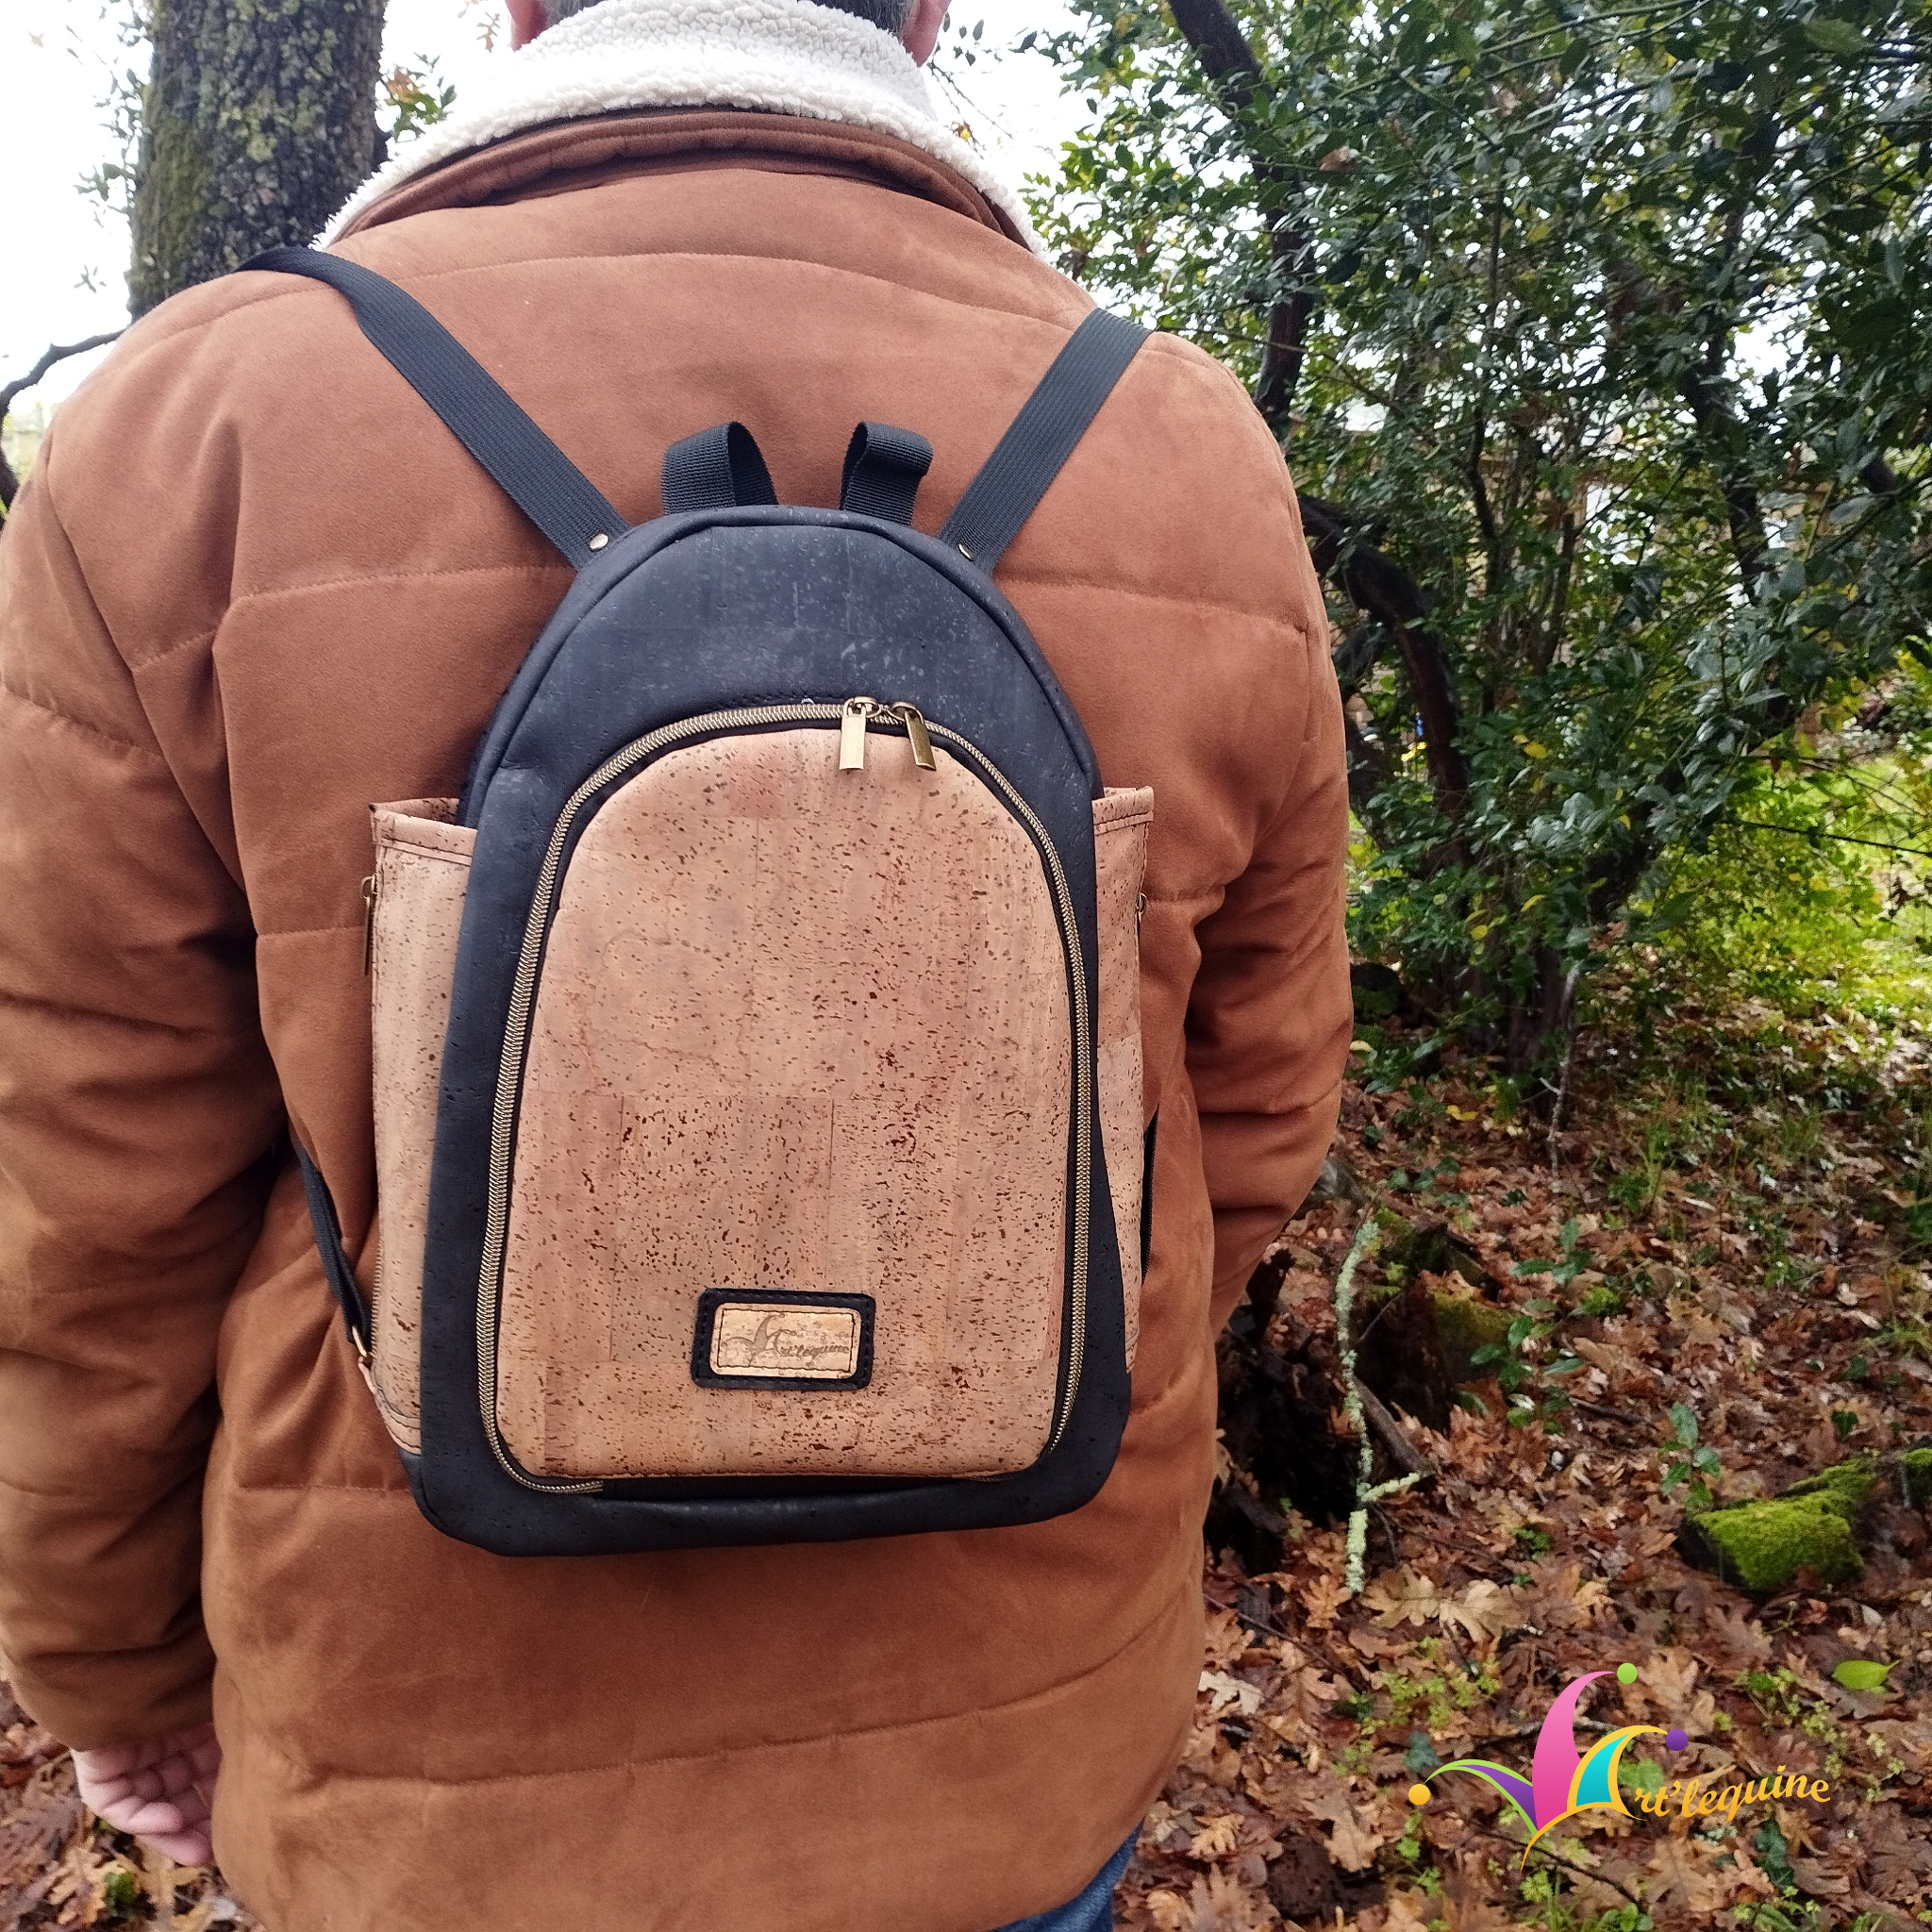
Sandrine Art’Lequine
A beautiful bag from two colours of cork fabric.


Nous sommes ravis de vous présenter notre dernier patron de couture de sacs, le sac à dos Double Face. Comme son nom l’indique, ce sac est réversible et peut donc être porté dans les deux sens. Cela le rend idéal comme sac à dos antivol.
Plutôt que d’avoir un avant et un arrière, il a deux faces, d’où son nom. Nous avons travaillé sur ce patron pendant de nombreux mois, en essayant différents prototypes et méthodes de couture, et nous sommes finalement satisfaits de tous les changements que nous avons apportés en cours de route. Nous espérons que vous l’aimerez autant que nous ! Faites défiler vers le bas pour voir les photos des testeuses et trouvez de l’inspiration avant de coudre votre version.
Achetez le patron ici
Quelle est la particularité de ce patron ?
Il peut être porté dans les deux sens, et nous voulions qu’il ait fière allure quelle que soit la façon dont vous le portez. Nous l’avons donc conçu pour qu’il soit entièrement réversible, sans avoir besoin de changer ou de décrocher vos bretelles ! C’est aussi simple que de le mettre sur votre dos, quelle que soit la façon dont vous préférez. Vous remarquerez sur les photos qu’il y a une couture centrale autour du gousset. Cela signifiait que nous devions faire preuve de créativité avec les poches latérales. Adam a eu l’idée de les rendre extensibles avec un zip central. Cela créé un look unique et a aidé à garder l’illusion qu’il s’agit de deux sacs complètement différents des deux côtés. L’ouverture principale du sac est également tout à fait unique. Il s’ouvre très largement avec un excellent accès aux poches intérieures.
DE QUEL NIVEAU DE COUTURE AVEZ-VOUS BESOIN POUR FABRIQUER CE SAC ?
Ce modèle de sac est destiné aux couturières avancées. La partie la plus difficile du sac est l’ouverture principale de zip, car vous cousez un cercle complet, avec quelques courbes serrées sur le bord inférieur. Pour vous faciliter la tâche, nous avons conçu l’ouverture zippée à l’aide de biais. Bien que nous ayons inclus des instructions pour coudre le zip en utilisant la méthode standard, nous vous recommandons fortement de suivre la méthode de biais dans le patron car cela donnera à votre sac son meilleur aspect et le rendra plus simple à coudre. Pour le reste du sac, vous devrez être prêt à coudre des courbes. Nous avons publié un tutoriel vidéo complet (en anglais uniquement) pour montrer étape par étape comment fabriquer le sac. Vous pouvez regarder le tutoriel vidéo avant d’acheter le patron, afin de voir exactement ce que cela implique. Nous espérons que vous l’essayerez et que vous apprendrez peut-être de nouvelles techniques de couture en cours de route.
Tissus et entoilages
Nous avons une courte vidéo de préparation sur notre chaîne YouTube. La vidéo est spécifique au patron du sac à dos Double Face et vous aidera à choisir les matériaux et à vous préparer à coudre votre sac. Regardez la vidéo ici (en anglais uniquement).
Le coton est le matériau le plus facile à travailler lors de la fabrication de ce sac car il facilite les courbes. Nous ne vous recommandons d’utiliser du simili, du liège, du cuir ou du tissu enduit que si vous êtes un fabricant de sacs très expérimenté et à l’aise pour coudre ces matériaux. Quels que soient les matériaux que vous choisissez, assurez-vous de tenir compte des limites de votre machine à coudre. Il y a quelques endroits où les épaisseurs s’accumuleront.
Pour un beau sac robuste, nous recommandons de la mousse thermocollante pour l’entoilage, mais vous pouvez utiliser quelque chose comme un molleton si vous voulez une finition plus ample. Les instructions du patron incluent plus de détails sur les entoilages dans la section « informations supplémentaires ».
QUELLES SONT LES CARACTÉRISTIQUES DE CE SAC ?
Toutes les poches de ce sac sont en option. Vous pouvez choisir d’ignorer l’une d’entre elles sans aucun problème.
- Deux poches extérieures extensibles
- Poche intérieure en filet
- Poche intérieure zippée
- Porte-boisson intérieur
- Fentes pour cartes de crédit intérieures et poche plaquée
- Réversible
- Poignée
Autres caractéristiques
- Mesures impériales et métriques
- Fourni en format A4 et lettre pour garantir une expérience d’impression fluide où que vous viviez dans le monde
- Pièces de patron A0 si vous préférez utiliser un projecteur ou faire imprimer vos pièces de patron par une imprimerie
- SVG pour ceux qui utilisent des machines de découpe telles que Cricut ou Cameo
- Disponible en français ou en anglais
Nous sommes convaincus que vous allez adorer ce modèle et que vous allez apprendre de nouvelles techniques à utiliser dans vos futures créations.
Procurez-vous une copie du patron pour commencer. Laissez un commentaire ci-dessous pour nous faire savoir ce que vous aimez dans ce modèle, ou tout ce que vous aimeriez que nous envisagions de modifier/ajouter pour de futurs patrons. Nous espérons que vous prendrez autant de plaisir que nous !
Jo et Adam