Is this your first time quilting? Welcome to my sewing blog! Thanks for joining me. I’m Jo, a sewing enthusiast living in Cornwall, UK. My husband Adam and I set up Country Cow Designs in 2019 and together we create sewing patterns, video tutorials and sell hardware for bag makers across the globe. Every Friday we write a new blog post for bag making tips (although this week’s blog post is actually about quilting, but from a bag maker’s viewpoint). Join our mailing list to receive sewing tips directly to your inbox every Friday along with other exclusive perks. This post may contain affiliate links.
Part 1
Have you tried Quilting?
I’ve wanted to try quilting for years. My grandmother, who gifted me her Bernina 930 and encouraged me to get into sewing, was a keen quilter. Her quilts are really impressive. However, my health held me back. I didn’t think I had the ability to heave an almost finished quilt through the sewing machine. Now my health is improving, I’ve decided to finally take the leap!
I’ve just finished my first every quilting project and am in the process of cutting out my first full size quilt. This blog post discusses the tips I was given by others and things I wish I’d known before I’d started. We all learn differently, but I personally learn best from jumping into a project and giving it a go. Hopefully if you’re on a similar journey to me and want to make your first quilt, you’ll find this post useful. If you’re a seasoned quilter, maybe you’ll find it amusing to hear the viewpoint of a complete beginner, and hopefully find some of the resources I’ve linked in the post helpful.
We’ll discuss the following points in this blog post:
- Find a pattern you love
- Consider starting small
- Don’t let mistakes stop you
- Where to start
- Quilts are expensive
- It’s different to bag making
Tip #1 – Find a pattern you LOVE
This is something I believe to be true when you start bag making too.
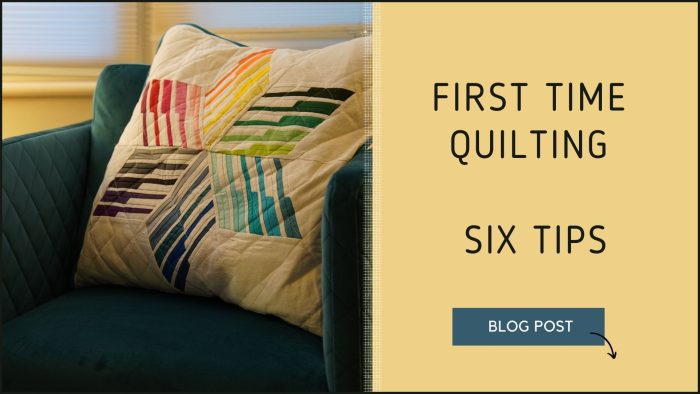
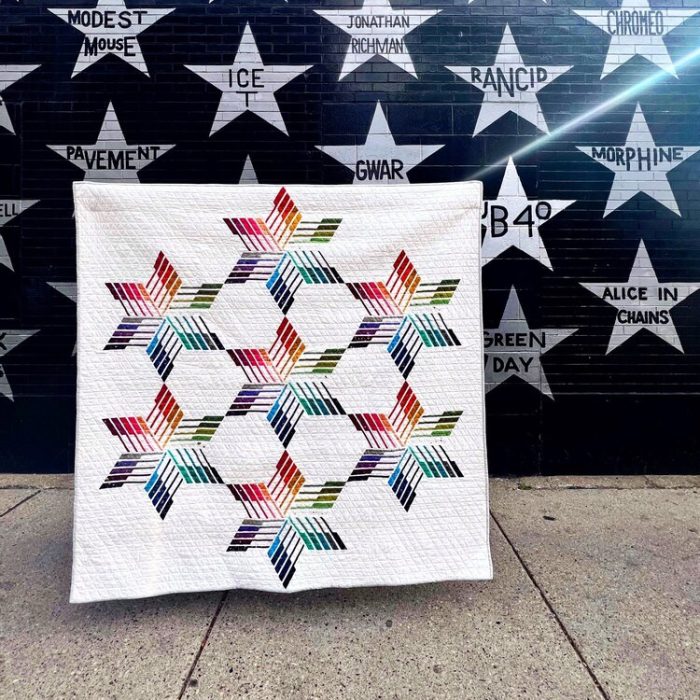
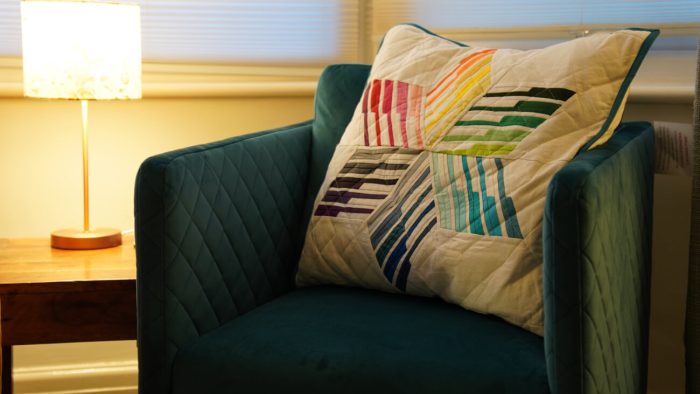
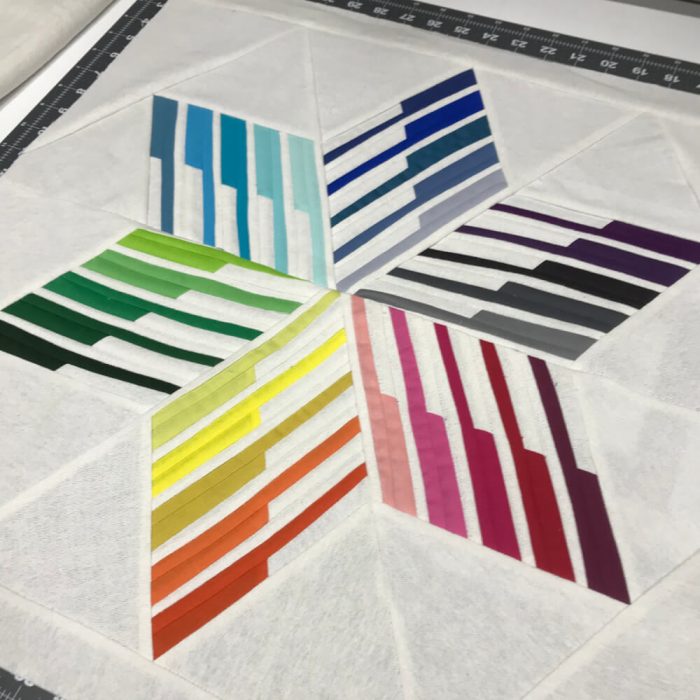
I follow a few quilt pattern designers on Instagram but one pattern stood out to me the most – the Zetus Lapetus quilt by Matt, The Quilty Architect. As soon as I saw it, I knew I wanted to give it a go. An advanced pattern for my first ever attempt at quilting? Bearing in mind I knew absolutely nothing about the subject….was that a good idea? Probably not, but my biggest tip for you, is to find a pattern you love and just get started! Contrary to popular belief, the finished article doesn’t have to be perfect. My first attempt certainly wasn’t perfect, but I love it nonetheless. If you choose a mediocre pattern that doesn’t make your heart flutter, you probably won’t enjoy making it and you may not even make it to the finish line. Instead, choose a design you’re crazy for, and give it your all. Embrace the mistakes and learn from each one.
Tip #2 – Consider starting small if its your first time quilting
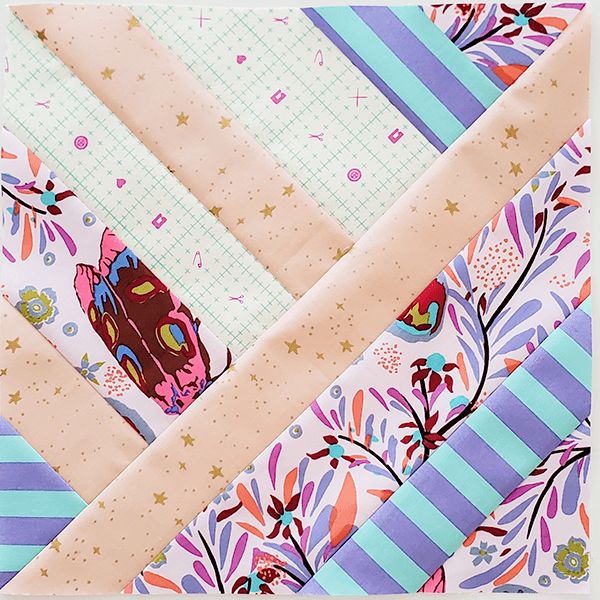
If it’s your first time quilting and you feel overwhelmed by the concept of making an entire quilt, you could do what I did and start with a “pillow” version. Or just start with one block. You can then turn that block into almost anything – a bag panel, a cushion, a wall hanging, the list goes on…
There’s lots of free block patterns available online. Here’s a link to my favourites, the Block Party patterns by Jess Oklaroots. Thirteen free block patterns that are a fantastic place to start if you’re not quite ready to dive in the deep end. Plus, she has accompanying videos for each of her blocks. You can watch them on her YouTube channel. Also, her block designs are great for using up scrap fabrics so you don’t need to purchase fabrics specially for your first project.
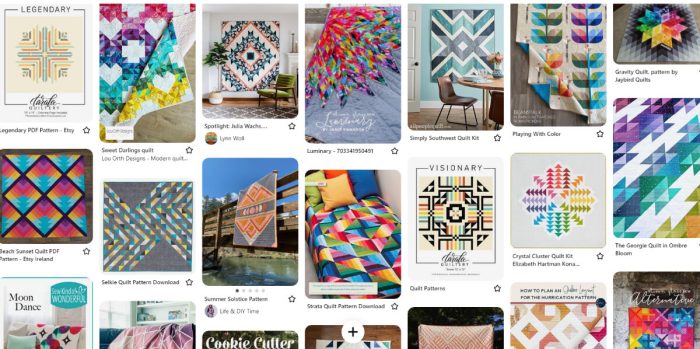
Alternatively, you could start with a simple quilt pattern, but make sure it’s still one that sings to your heart. Here are some of the quilt patterns that I hope to make in the future. Some of them state intermediate but none of them look quite as challenging as the Zetus Lapetus. We all have different tastes though so keep searching until you find the one for you.
For a more comprehensive list, check out my Pinterest board for quilt patterns I want to try.
Tip #3 – Don’t let mistakes stop you
Mistakes? Yes! We all make them. Carefully positioned photos can hide a multitude of mistakes, but they’re still there. When you make a mistake or your block doesn’t match up as it should, don’t panic, just take a break and grab a cup of tea. Then decide what you’re going to do next. You have a few choices on how to proceed if it’s your first time quilting, depending how far it’s gone astray.
- Option 1, exercise Mr.Seam Ripper. Tear out those stitches and start again. This is usually my preferred option as a small mistake at the beginning can turn into a much larger one later on. Seam ripping when you first see the problem usually saves you time and stress later on. But before you do, try to figure out where you went wrong so you can avoid making the same mistake again
- Option 2, restart that section. The great thing about quilts is that you’re piecing together lots of small pieces of fabric so generally if you have to re-start a section that failed, it’s not going to ruin your entire quilt, and you usually have enough leftover bits of fabric to replace it. If it’s just one block or one part of a block that’s gone terribly wrong, it’s ok to set it aside and start afresh. But before you do, evaluate whether there’s any way to save the piece. If not, take some time to figure out what led to the error. Then view it as a learning experience so it’s not a waste. Making mistakes is part of the process so don’t beat yourself up about it
- Option 3, fudge it. Unless you’re making a quilt to sell, which you’re probably not for your first one, then fudging is usually an option. Not necessarily the best option, but an option nonetheless. Ask yourself ‘can I live with it as it is, or is it going to forever bother me?’ Also ‘is it going to throw off the entire quilt because the block isn’t the correct finished size?’ If so, options 1 or 2 are probably better since you could make a lot more work for yourself by fudging it. Take a close look at my Zetus Lapetus pillow and you’ll see where I fudged the green section. Does it ruin the look of the finished pillow? Everyone will answer that question differently, but I’m happy to live with it. It fit together ok for the final panel and I wasn’t willing to re-do the section just for looks since it didn’t bother me and I still love it
Tip #4 – Where to start
For starters, quilt patterns tend to be more expensive than bag patterns. Are they worth it? Should you use a pattern? Bear in mind that a quilt is probably going to take a lot longer to make and cost a lot more in materials, so you’re investing a lot more into it. Having someone do the hard work for you and work out the kinks is worth the cost in my opinion. Having said that, Art Gallery Fabrics (AGF) have a huge resource of free quilt patterns on their website. They also tell you exactly which fabrics to purchase to achieve the finish they’ve shown. This saves you worrying about co-ordinating fabrics and can reduce the time you spend preparing to make your quilt.
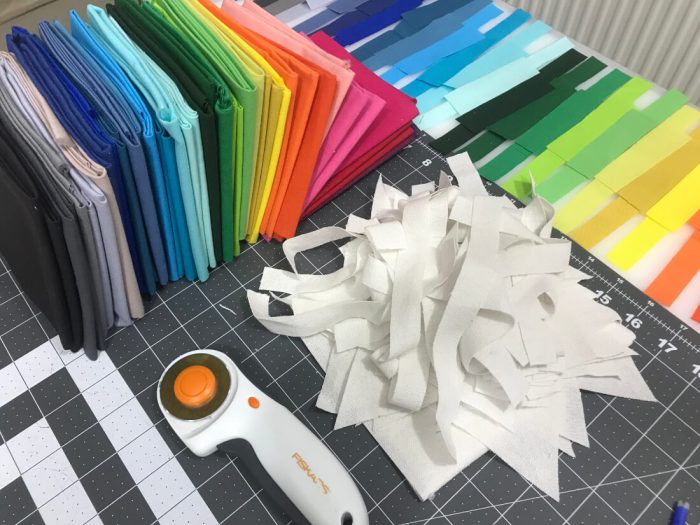
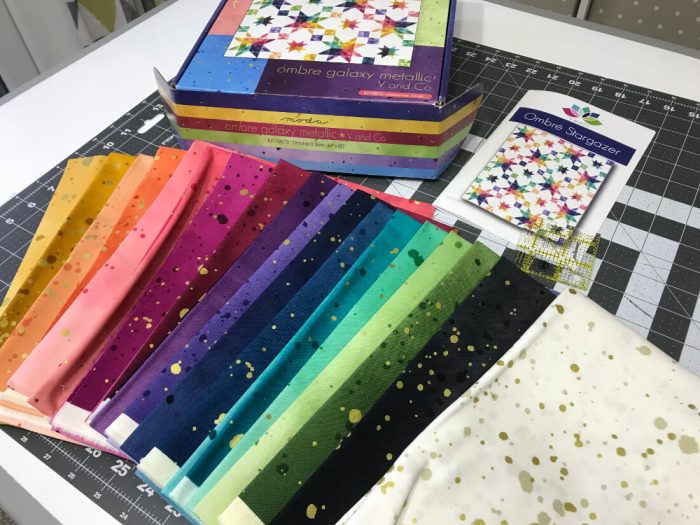
For me, the most overwhelming part of starting my first quilt was sourcing the fabrics. You expect this to be easier than bag making because there’s no hardware or stabilisers to worry about (except for the wadding). However, a lot of fabric goes into a quilt and a lot of colours/fabric patterns to co-ordinate. For my first full size quilt, Adam treated me to a quilt kit. This is fantastic because it includes the pattern and all the fabrics I need for the main quilt. I just need to add backing fabric and wadding. However, kits are expensive, so consider shopping around, try to get them when they’re on sale or check for a special subscriber discount before purchasing online.
For my first quilt kit I got the Ombre Stargazer quilt by Vanessa Christenson. It’s no longer available at the shop I purchased from so I can’t include a link but you could search Google or Etsy for “Stargazer Ombre Galaxy Quilt Kit” if you’re interested in making the same one, or check with your local quilt shop to find out what kits they have in store.
Tip#5 – Quilts are expensive
The most cost effective way to make a quilt is to find a “scrappy” pattern that requires very small pieces. This way you can use the offcuts in your scrap drawer and possibly make an entire quilt without buying anything except the binding, wadding and backing fabric. However, this is going to limit your colour combinations and may not result in the finished look that you’re going for. Remember you’re investing a lot of time into a quilt so you want it to look incredible when you’re done.
Then you’ve got the actual quilting part. This is where you sandwich together the top layer (the part you worked so hard to piece), the wadding and the backing. You then need to quilt the whole thing. You can do this yourself but it’s definitely an acquired skill. Let’s be honest, I struggled just doing the pillow. It’s hard to know which quilting pattern will look best on the quilt you’ve worked so hard on. If you struggle to manoeuvre a finished quilt through your machine, you can Quilt As You Go (QAYG). I have no experience with that but here’s a blog post discussing one method. Or….you can take it to a professional long-arm quilter. They have special machines that sew the most beautiful quilting designs on your quilt. It really is amazing what they can do. This is definitely the most expensive option though. I’ve enquired with a couple of long-arm quilters local to me and they charge approximately £130 ($160 USD) for a queen size quilt.
A quilt can take a long time to make, possibly weeks, months, or for some people, years. It’s something you and your family can keep and use for many years. So maybe it’s worth the extra splurge?
Tip #6 – It’s different to bag making
Quilt patterns are different to bag patterns. I haven’t found many that include video tutorials and most of the patterns assume you have some knowledge of quilting. I needed to search for YouTube videos to check I was doing things correctly. I also had to run a few searches on Google. Terms such as HRT (not the menopause treatment) are used a lot with an assumption that you know what Half Rectangle Triangles are and how to make them. There’s a tonne of videos on YouTube showing different techniques so don’t be afraid to search for the information you need. There’s also a lot of amazing quilting blogs to follow if you want regular advice to improve your quilting skills. Here are some of my favourites:
So that’s part 1 of my quilting journey. I hope you’ve found something useful in this article and haven’t laughed too hard at my wayward learn as I go approach. There’s so much more to discuss though. We haven’t even discussed co-ordinating fabrics, cutting, sewing, binding, using quilting in a bag or my favourite quilting tools. Keep an eye out for part 2 of my “First Time Quilting” blog in the coming months. If you’re not a subscriber, join our mailing list to receive bag making (or very occasionally quilting) tips direct to your inbox every Friday.
Hello Jo. I am the direct opposite to you, I am a quilter who is struggling to make bags. I have made simple bags for grocery shopping and other easy carrier type bags but now i am about to jump into the “real Mc Coy”.
I find your blogs and tutorials very helpful, and love the style and pattern of your bags.
Oh and by the way, there is a very popular “mantra” to work by… Finished is better than perfect !!!
That’s the perfect mantra for me 😁 thank you! Keep going with bags. It’s so much fun. The “real Mc Coy” bags take longer but they’re so worth it! And not as long as a quilt ☺️
Hi Jo! I sew bags, bears, clothing etc.! These are are mostly for myself and family! I really enjoy your patterns and tutorials! I love your pillow! I’m interested to trying it out!
Hi Jo. Love the pillow and I didn’t even notice your mistake until you mentioned it. My moms a quilter and has made some beautiful quilts. I have made a couple quilted pillows and Im working on a quilted tree skirt with my mom. All my projects are small in scale and they are a LOT of work. I bought fabric at a quilt festival a few years ago to make a lap quilt for my living room and I still haven’t done it yet. I subscribe to the “me time” boxes and doing squares in the hoop makes it super easy. Im think about using these squares to piece together the lap quilt. My problem is that I have so many things I want to make and so little time to do it in. Hopefully one day I’ll be able to retire & spend my days sewing and knitting. Thank you for sharing your quilted journey. I cant wait to see your finished stargazer quilt. 🙂
When you are finished with your quilt…and wash it…most of the “mistakes” disappear!! I find when I am making a quilt…I am thinking about my next bag…and when making a bag I envision my next quilt. You might enjoy Rebecca Bryan’s quilts…check out Bryan House quilts and her freezer paper piecing process…so much easier than regular paper piecing. Happy quilting….and bag making!
I’ve made quilts before. I’m selftaught, but there’s always an online group to get tips from, which is great. I think you’ve done a sterling job! I love that cushion.