Do you use a hump jumper? Welcome to my sewing blog! Thanks for joining me. I’m Jo, a sewing enthusiast living in Cornwall, UK. My husband Adam and I set up Country Cow Designs in 2019 and together we create sewing patterns, video tutorials and sell hardware for bag makers across the globe. Every Friday we write a new blog post for bag making tips. Join our mailing list to receive it directly to your inbox along with other exclusive perks. The tips included in this post may be helpful in other sewing situations, but this post is specifically written in the context of bag making. The post may contain affiliate links.
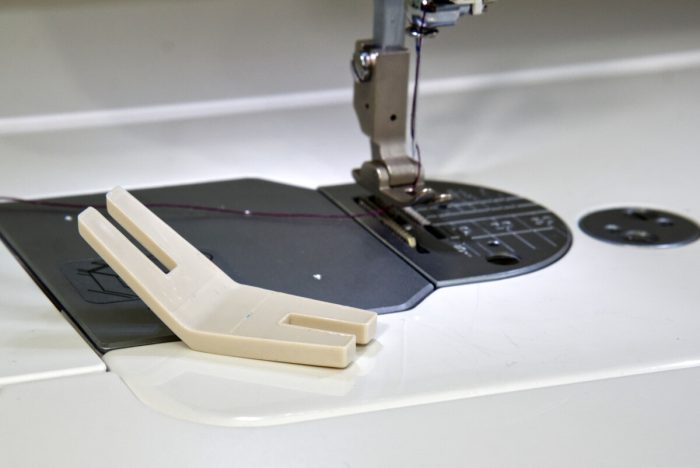
Hump Jumper (Bulky Seam Aid / Jean-a-ma-jig)
A hump jumper goes by many other names and comes in a variety of sizes, shapes and colours. But it’s a pretty simple, cheap and straightforward tool. What does it do? It props up the presser foot on your sewing machine to make it level with your sewing project. They’re usually available from your local sewing shop and cost less than £4. If you don’t have a sewing shop local to you, you can grab one from our shop.
Why should I use a hump jumper?
Using a hump jumper in your bag making project will result in a more professional looking bag and a less stressful sewing experience. It helps:
- Prevent skipped stitches
- Ensure a neat, equal stitch length
- Allow you to manoeuvre around hardware with ease
Prevent skipped stitches
Skipped stitches are where the needle and thread haven’t made a complete stitch pattern, one or more of the stitches hasn’t caught correctly. You’ll know you have skipped stitches if, for example, your machine is set to a 3mm stitch length and you have some stitches that are 6 or 9mm long. This can make your finished stitching look quite messy. There’s a large variety of reasons why your machine might be skipping stitches, but one reason can be because your machine is struggling to sew over a bulky seam. How does the hump jumper fix this? It brings your presser foot level with the seam.
Ensure a neat, equal stitch length when using a hump jumper
If your presser foot is struggling to climb over a seam or bulk in your project, it will struggle to feed the fabric through the machine at a consistent rate. Conversely, if your presser foot slips off a large bulky seam, it can feed the fabric through too quickly. Both of these scenarios result in uneven stitch lengths which can result in a messy finish, particularly when you’re topstitching. How does a hump jumper help? Place it behind the presser foot as you approach a bulky seam and it will raise your presser foot up to an equal height. This will allow your presser foot to glide onto the seam rather than climb up it. Place the hump jumper in front of the bulky seam as you’re coming down from it and it will keep the presser foot level so it doesn’t slip off the seam.

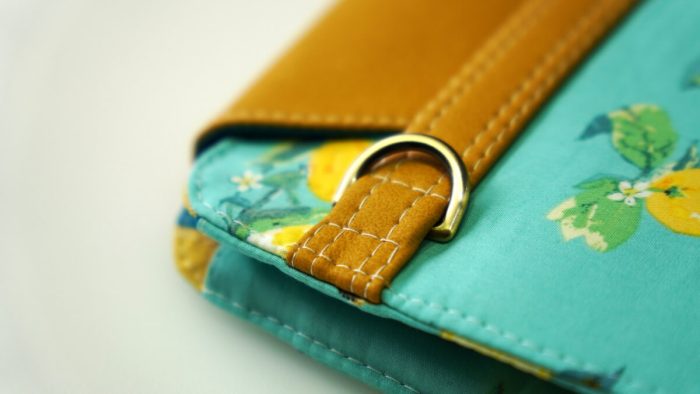
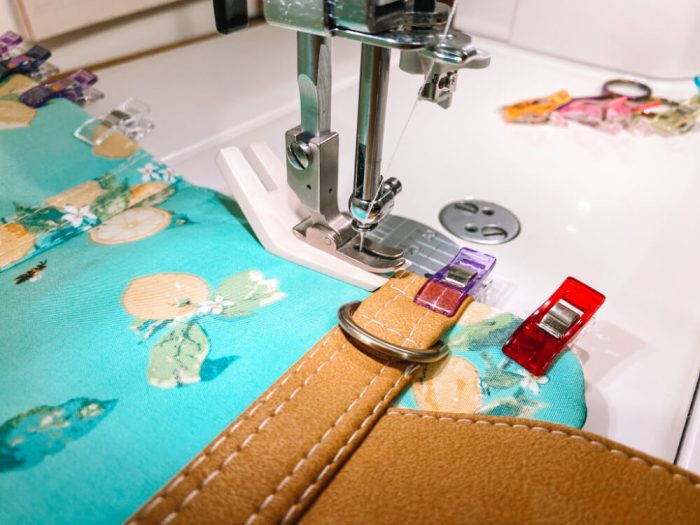
Manoeuvre around hardware with ease
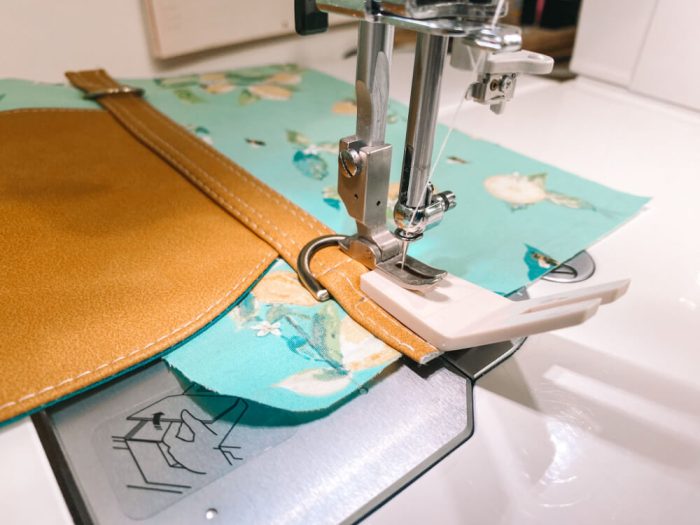
If you’ve sewn a few bags, you’ll know how tough it can be to stitch a seam close to hardware. For example, when making a strap you want to sew as close as you can to the strap slider or swivel hook to ensure it stays put and doesn’t move around too much. When sewing D-ring connectors, you often need to get very close to the D-ring to keep it fixed in place. This can be tough going and often requires stopping your stitching, changing to a zipper foot and then sewing that one line separately. How can a hump jumper help?
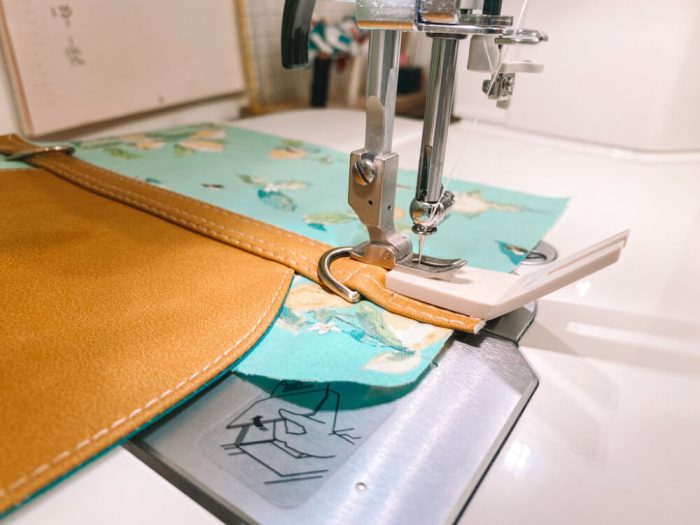
Provided your hardware isn’t exceptionally thick (and your presser foot height is sufficient), the hump jumper can lift your presser foot up so it’s clear of the hardware. This means you can sew right up to and alongside the hardware using your standard presser foot and without stopping. This is a good time saver and gives a neater finish because you don’t have backstitching where you’ve stopped and started stitching multiple times.
Just use a folded piece of cardboard instead?
I’ve heard a lot of recommendations from people to just use a folded piece of cardboard instead of buying a hump jumper. Personally I’m not a fan of this method. Why?
Firstly, the centre cut out on the hump jumper allows it to fit completely under the sides of your presser foot. This prevents it from slipping while your project is moving through the machine. I’ve used cardboard on a couple of occasions after misplacing my hump jumper. It’s far more likely to slip out from the back of your presser foot as your project is moving. This can be frustrating as it results in messy stitching.

Secondly, the cut out in the hump jumper allows the needle to come toward it without hitting it. When using cardboard, you can place it behind the presser foot easily enough, but when your foot is coming off the front of the bulky seam, it’s going to be a lot harder to use the cardboard without sewing straight through it.
As you can probably tell, I love my hump jumper! It’s a simple, cheap tool that won’t wear out, makes your stitching look great and takes the stress out of sewing bulky seams, all for a tiny price. What’s not to love?
A massive thank you to everyone who has supported my new blog in 2022. Your support for our small business means a lot. Please leave a comment to let us know if you enjoyed this post, and suggest other subjects you’d like us to cover in the future.
Thank you so much for this information. It’s definitely something that I will buy.
Okay! I’m sold. Now I just need lots of practice!
I absolutely love this tool. It has helped me a lot over those bulky seams but I still need more practice with it to be proficient 🙄
Thank you so much for explaining all the different ways you can use the hump jumper. can I ask you to please do a blog on ways to avoid or indeed improve an already baggy bag lining😉
Thank you for this post, I have one and never knew how to use it properly. Can’t wait to give it a go.
I must be consistent when using my hump jumper. Sometimes I think it will fine without it and then of course I’m not. I will remind myself of this post wen I’m sewing over bulky seams next time. Thanks Jo
I’ve owned hump jumpers for years but never really appreciated them until I watched your videos and saw you using them. Game changer while sewing around hardware.