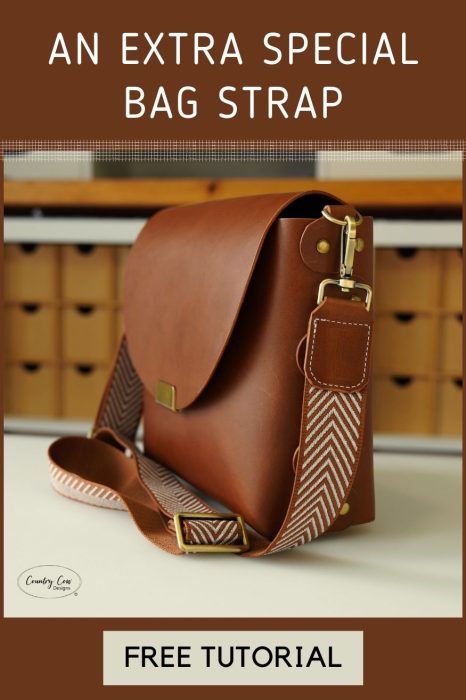
Scroll down for the French translation – Faites défiler l’écran vers le bas pour voir la traduction française de l’article.
We’ve become very used to making a webbing bag strap. It’s so quick and easy but they can be a bit plain. I recently made a “fancy” webbing strap combining it with leather offcuts. To our surprise it turned out better than we thought and wasn’t that hard so Jo asked me to make another for this blog post. Scroll to the bottom of the page to download the pattern templates.
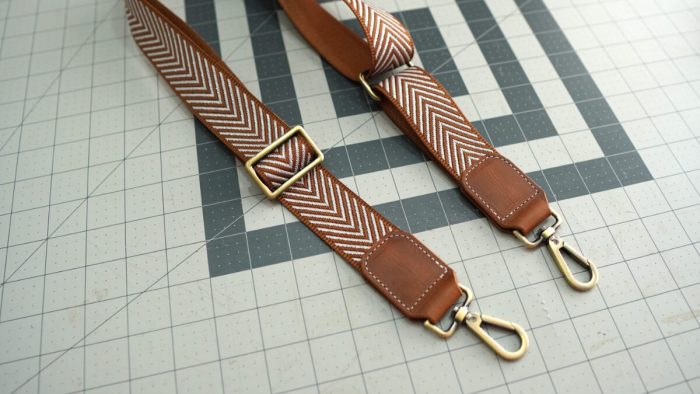
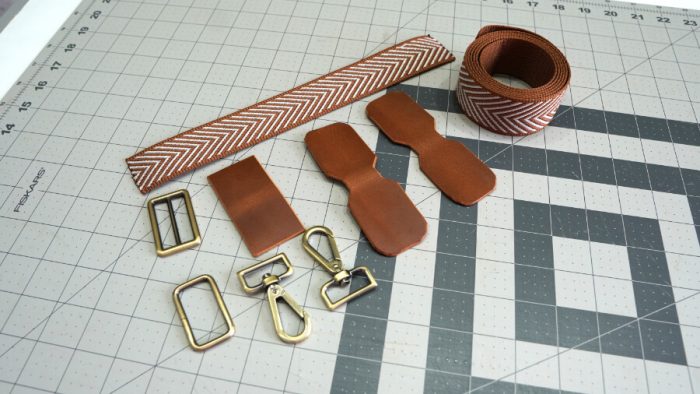
To make this bag strap you’ll need the following:
- 2 x 1″ [25mm] Swivel hooks
- 1 x 1 ½” [38mm] Rectangle ring
- 1 x 1 ½” [38mm] Strap slider
- 1 ½” [38mm] Webbing cut 60″ [150cm] long
- 1 ½” [38mm] Webbing cut 10″ [25.5cm] long
- 1 x Leather strap end cut 1 ½” x 3″ [38mm x 76mm]
- 2 x Leather Swivel hook connectors (pattern file linked at the very bottom of this page)
- A sewing machine that can make it through two layers of your chosen leather plus two layers of webbing
1. Before we start, this would be a good time to burnish, or edge paint the leather pieces. It’s worth the effort. In this example I’m using 2.2mm veg tan. I bevelled and burnished the edges. Here’s a short video showing how I do this.
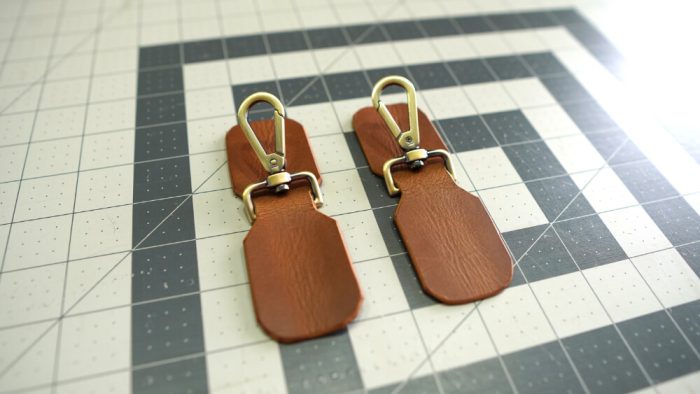
2. Combine the leather connector to the swivel hooks. You’ll need to fold the leather to fit through.
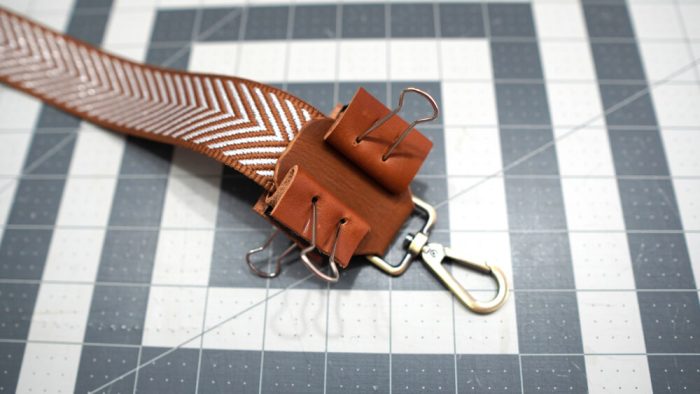
3. Take the smaller webbing piece and pass it through the rectangle ring. Bring the webbing back so the two raw edges are matching. Sandwich the two edges together in between the leather connector. I recommend using fabric glue to keep this together which will make sewing it easier. While the glue dries, I like to use bulldog clips with a bit of scrap leather. Normal wonder clips can leave marks on leather.
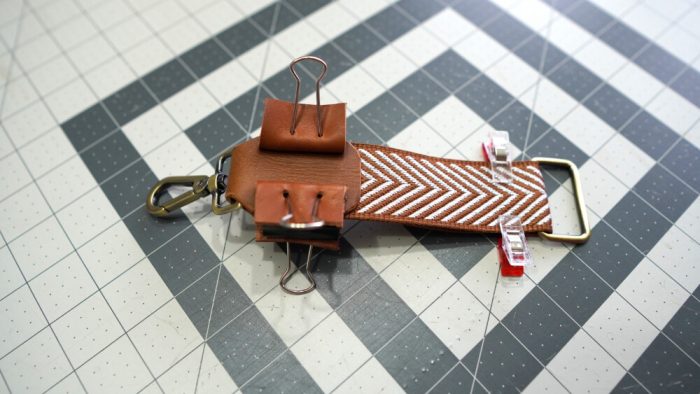
4. Once the glue has dried, sew it together using 1/8″ seam allowance. Make sure you’re using a leather needle that will cut through rather than punch through like a standard needle.
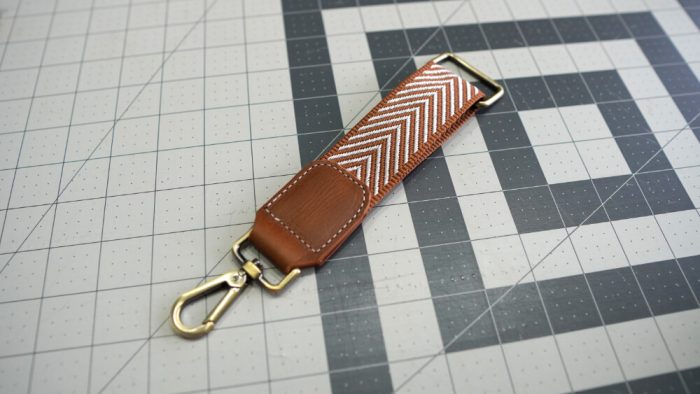
5. Next, sew the leather strap end to one raw end of the longer piece of webbing. Wrap this around the centre bar of the slider and rivet together.
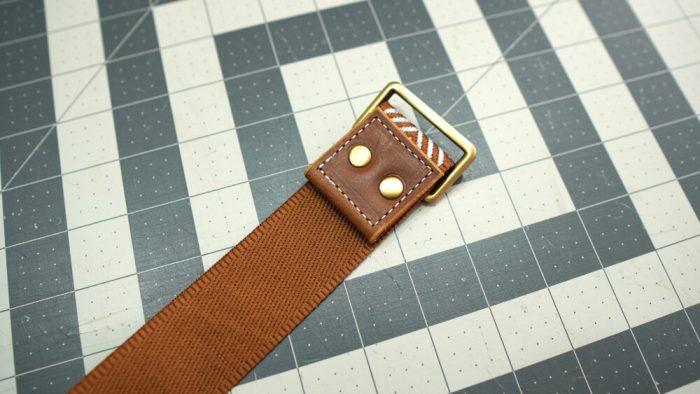
6. Now pass the other end of the webbing through the rectangle ring and back through the slider.
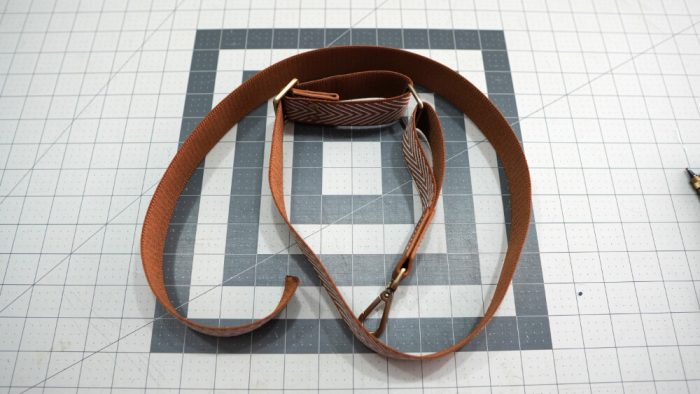
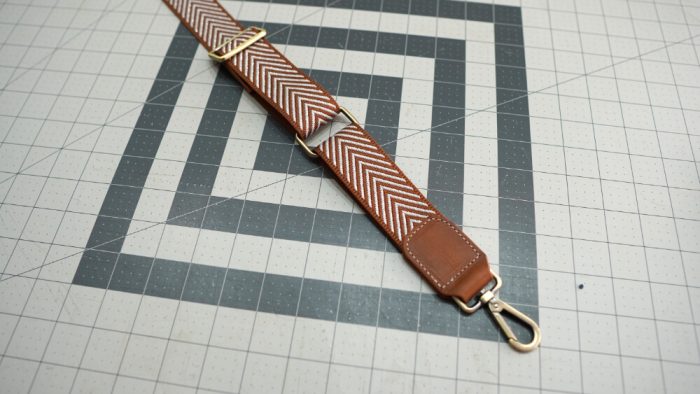
7. Sandwich the raw end of the webbing with the other leather connector and glue together. Once the glue is dry, sew together.
Hey presto you’re done! A fancy webbing bag strap and a great way to use offcuts of leather. Now you can attach it to your bag knowing your strap adds to it’s beauty!
For bag making tips straight to your inbox every Friday – join our mailing list!
Pattern download links:
An Extra Special Bag Strap – Letter Paper for the USA & Canada
An Extra Special Bag Strap – A4 Paper for use outside the USA & Canada
UNE SANGLE DE SAC EXTRA SPÉCIALE
Écrit par Adam Kay (Country Cow Designs Ltd) le 8 décembre 2022. Publié dans Blog.
Nous sommes devenus très habitués à fabriquer une bandoulière de sac avec une sangle. C’est si rapide et facile, mais elles peuvent être un peu trop simples. J’ai récemment fabriqué une bandoulière « fantaisie » en combinant avec des chutes de cuir. À notre grande surprise, cela s’est avéré mieux que nous le pensions et n’a pas été si difficile, alors Jo m’a demandé d’en faire une autre pour cet article de blog. Faites défiler jusqu’au bas de la page pour télécharger les gabarits.

POUR FABRIQUER CETTE SANGLE DE SAC, VOUS AUREZ BESOIN DES ÉLÉMENTS SUIVANTS :
- 2 mousquetons de 1ʺ [25mm]
- 1 x 1 1/2ʺ [38mm] anneau rectangulaire
- 1 x 1 1/2ʺ [38mm] boucle de réglage
- 1 1/2ʺ [38mm] sangle coupée 60ʺ [150cm] de long
- 1 1/2ʺ [38mm] coupe de sangle 10ʺ [25.5cm] de long
- 1 x embout de sangle en cuir coupé 1 1/2ʺ x 3ʺ [38mm x 76mm]
- 2 x connecteurs de mousqueton en cuir (gabarit lié tout en bas de cette page)
- Une machine à coudre qui peut passer à travers deux couches de cuir de votre choix plus deux couches de sangle

- Avant de commencer, ce serait un bon moment pour polir ou peindre les tranches des pièces en cuir. Le jeu en vaut la chandelle. Dans cet exemple, j’utilise du veg tan de 2.2 mm. J’ai biseauté et poli les bords. Voici une courte vidéo montrant comment je fais cela.
- Combinez les connecteurs de mousqueton en cuir et les mousquetons. Vous devrez plier le cuir pour l’insérer à travers les mousquetons.

3. Prenez la plus petite sangle et passez-la à travers l’anneau rectangulaire. Ramenez la sangle pour que les deux bords bruts correspondent. Sandwich les deux bords ensemble entre le connecteur en cuir. Je recommande d’utiliser de la colle à tissu pour garder cela ensemble, ce qui facilitera la couture. Pendant que la colle sèche, j’aime utiliser des grandes pinces avec des chutes de cuir. Les clips de couture standards peuvent laisser des marques sur le cuir.

4. Une fois la colle sèche, cousez autour du connecteur avec une marge de couture de 1/8ʺ (3mm). Assurez-vous d’utiliser une aiguille en cuir qui coupera plutôt que de percer comme une aiguille standard.

5. Ensuite, cousez l’embout de sangle en cuir à une extrémité brute du morceau de sangle le plus long. Enroulez-le autour de la barre centrale de la boucle de réglage et installez des rivets.

6. Maintenant, passez l’autre extrémité de la longue sangle à travers l’anneau rectangulaire et de retour à travers la barre centrale de la boucle de réglage.


7. Insérez l’extrémité brute de la sangle dans le second connecteur de mousqueton et collez l’ensemble. Une fois la colle sèche, cousez de la même façon que pour le premier connecteur.

Vous avez terminé ! Une bandoulière de sac fantaisie et un excellent moyen d’utiliser des chutes de cuir. Maintenant, vous pouvez l’attacher à votre sac en sachant que votre sangle ajoute à sa beauté !
POUR DES CONSEILS SUR LA FABRICATION DE SACS DIRECTEMENT DANS VOTRE BOÎTE DE RÉCEPTION TOUS LES VENDREDIS – REJOIGNEZ NOTRE LISTE DE DIFFUSION !
LIENS DE TÉLÉCHARGEMENT DES GABARITS :
Une bandoulière de sac extra spéciale – Format Lettre pour les États-Unis et le Canada
what a gorgeous strap! I love this tutorial and plan on trying it – thankyou Jo and Adam <3
Wow looks incredible I must try this sometime, thank you for the tutorial very clear and Precise as always, thank you jo and Adam.Merry Christmas and Happy New year to you both .xx
Thank you for the instructions. Please explain the purpose for the short piece and the square ring. Would it be necessary if you used 1-1/2″ swivel hooks?
As long as you’re using leather accents on both hooks, the strap can’t be adjustable so the rectangle ring makes it possible to have an adjustable strap. If you want a non adjustable strap then you won’t need the ring 😁
I really love this because sometimes the big swivel hooks can overwhelm a smaller bag. It’s great to be able to use a smaller hook without sacrificing all the pretty wide webbings that are available. Thanks for sharing it.
Thank you for the tutorial. I would like to know how to make the part that has the d-ring and attaches to the bag.
For this one, it’s actually a bag that’s cut entirely from one piece of leather and the bit that wraps around the D-ring is part of that one large piece. But we’ll do a future post on how to do the lovely D-ring tabs on other bags, the ones that you can rivet over the top 😁
Hello from Ohio!
Love Country Cow designs! Your patterns always produce high-end results and are easy to follow. Thank you for this strap, it brings a bag up to a boutique level.
Kim V
Thank you for this tutorial! I’ve been wanting to try out a new way to create a bag strap! It looks great and will definitely make the bag look even better!